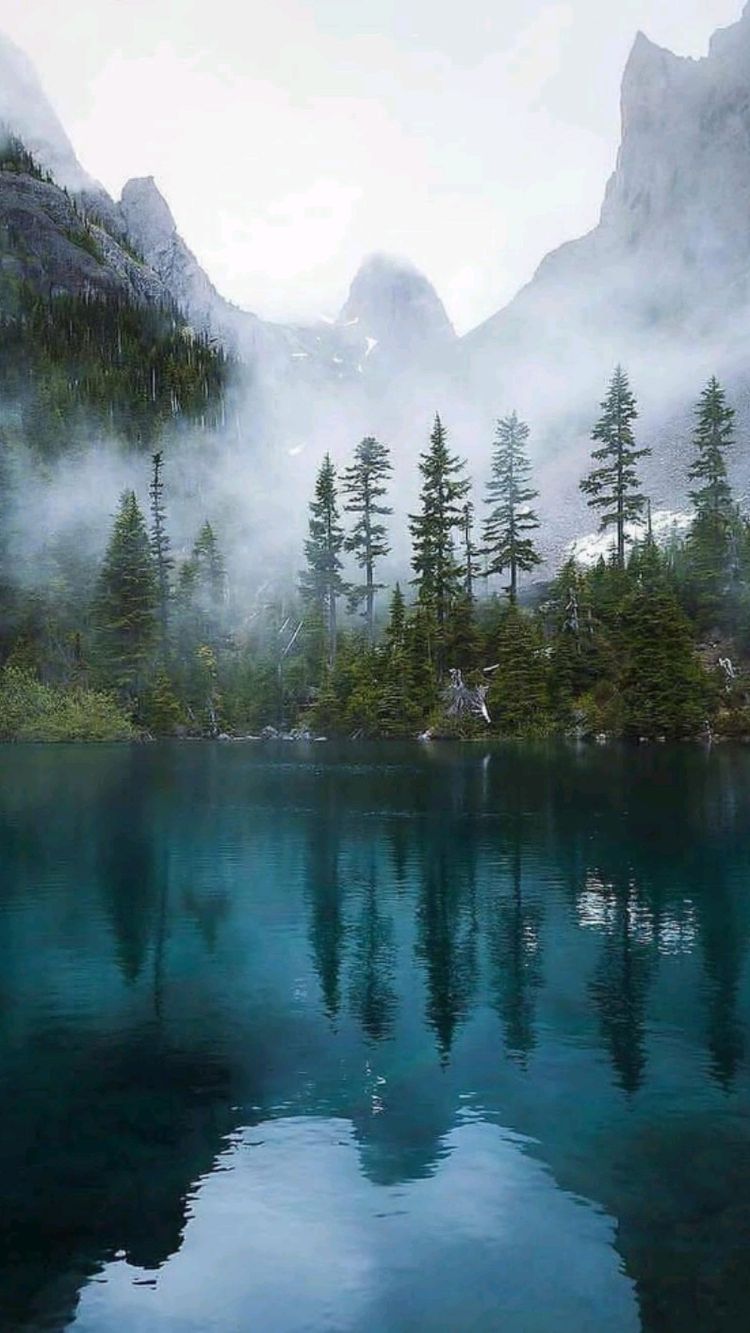
Hike to Sky Pond in Rocky Mountain National Park

If you plan to hike to Sky Pond in Rocky Mountain National Park, you are in the right place! This local guide will give you all the information necessary to hike the gorgeous Sky Pond trail in Colorado.

For a good reason, the climb to Sky Pond in Rocky Mountain National Park is one of the best. There are cascades, mountain lakes, high mountain views, and exciting river and stream crossings you can witness on the way up.

You’ll have to rock scramble up a waterfall to reach Sky Pond, so it’s not for novice hikers. It’s a bit on the long side; however, the view of Sky Pond at the conclusion is well worth the effort. When it comes to high-altitude challenges, this one should be on your bucket list!

This guide will answer your questions about the hike to Sky Pond in Rocky Mountain National Park. We’ll ensure you have a good time on one of the most fascinating hikes in Colorado!

About Rocky Mountain National Park

Hike the sky pond trail in Colorado at Rocky Mountain National Park
rockymtnresorts.com

In northeastern Colorado, Rocky Mountain National Park is by Estes Park to the east and Grand Lake to the west. It’s also near Lyons, Winter Park, Granby, and Boulder.

There are three entrances on the park’s east side, while the western entrance is on the other.

Rocky Mountain National Park offers various activities and sights to explore. From 7,800 feet to 14,200 feet, it is one of the nation’s tallest national parks. Sixty mountain summits more than 12,000 feet above sea level produce breathtaking views.

The Colorado Continental Divide marks the north-south divide of the park. Ancient glaciers have sculpted the topography into an astounding array of ecological zones.

There are numerous other things to do in the national park. Tour guides, waterfalls, lakes, skiing, and many more options are available. It’s also possible to see a variety of landscapes depending on your location. Plus, there are tons of incredible hikes in Rocky Mountain National Park!

You can view Montane landscapes, where enormous meadow valleys and slopes support the broadest range of life. Evergreen trees and mountain lakes are in the subalpine zone. The alpine tundra’s combination of high winds and subzero temperatures will have you huddling close to the earth.

And on the way to Sky Pond, we’ll be able to see and experience most of these!

About Sky Pond Trail

Rocky Mountain National Park’s Sky Pond trail is in the Bear Lake Road Corridor at an altitude of 10,900 feet, and the rocky cliffs of the Rocky Mountains border it. There are many jagged peaks in this area.

You’ll be rewarded with a spectacular view at the end of the hike when these jagged mountains meet the crystal-clear waters of Sky Pond. The most excellent part of this walk, though, is that Sky Pond isn’t the only thing to see along the way.

Along the trip, you’ll come across two other magnificent lakes and several waterfalls and rivers. What a fantastic hike this is!

You’ll have to travel 9.4 miles out and back with a total elevation gain of 1,758 feet to experience the trail fully. Dogs are not allowed on the moderate to challenging path, which takes anywhere from four to six hours to complete.

Because it’s a well-known hiking destination, other hikers will likely be along for the trek. Be ready for rough, wet, and snowy terrain when hiking, as well as some serious crowds!

Sky Pond Trailhead and Parking

Hikers must first enter Rocky Mountain National Park to get to Sky Pond. You’ll either pay the $25 daily admission cost or show your annual pass.

It costs $70 to get a year-long Rocky Mountain National Park access. All parks and monuments can be accessed using the America the Beautiful Pass, which costs $80 (as of this writing; we’ll update if there are changes).

If you desire to get an early start, you may be able to skip paying the admission fee to Rocky Mountain National Park because the gates are often only staffed beginning at 6 am.

Once you have entered the park, the trek to Sky Pond can begin from either the Bear Lake parking lot or the Glacier Gorge trailhead.

The extra distance from starting at Bear Lake is around a quarter mile. But if the Glacier Gorge parking space is full, you’ll want to head over to Bear Lake, where there are more spaces.

When to Hike Sky Pond Trail

Hike the sky pond trail in Colorado at Rocky Mountain National Park

Rocky Mountain National Park in offers ventures for amusement throughout the year, and Colorado’s famous Sky Pond Trail is no exception.

The months of June to September are perfect for visiting Rocky Mountain National Park and hiking the Sky Pond since they offer the most incredible variety of treks and scenic drives.

It is the busiest time of year, but if you can wake up early enough to avoid the masses, you will have accessibility to mostly snow-free trails and be able to take the Trail Ridge Road, the most popular route in the park. We also recommend going on a weekday.

You won’t have to deal with abundant snow in late June and early July. You’ll also have plenty of time to see and do everything you desire throughout this period.

To avoid crowds and enjoy the best weather, consider visiting in May and October when the weather is more likely pleasant, but keep in mind that conditions might change at any time.

Snowshoeing to Sky Pond would be a spectacular experience in the winter if you’re up for the challenge. Consider avalanche safety before venturing into the mountains in the winter months; avalanches are dangerous when trekking in snowy conditions.

What To Bring to the Sky Pond Trail

There are several essentials you must bring to have an easier time taking Sky Pond Trail. And these are things we don’t miss whenever we hike.

Hiking footwear: Use hiking shoes or boots for this trek. Although it’s summer, you should expect to hike through the snow at some point. Also, the waterfall ascent can be treacherous; therefore, hiking shoes with extra traction are a need.

Hiking Poles: Using hiking poles isn’t required, but it’s always a good idea. The final part of the hike takes place primarily in rocky terrain. Poles will come in handy when you encounter more strenuous climbs. It will ease the tension on your joints and assist you in maintaining your balance as you travel up or down the mountain.

Layers: If you’re planning a hike in the mountains, especially at higher elevations, be prepared for sudden temperature changes. At Sky Pond, the weather suddenly changed, so having a wide range of clothing is a godsend!

Headlamps: You’ll need headlamps to light your path if you plan to get an early start. These headlamps will serve you admirably during your time with them.

Sunglasses, Hut, Sunscreen: The trail is a shade for most of the path. However, the last mile to Sky Pond is open, so you’ll be in the sunlight for at least an hour of the trek. Be sure to bring sun protection with you.

Camera: Even a mobile phone will suffice. An excursion to Sky Pond offers breathtaking views at every turn. Make sure you bring a high-quality camera with you to capture these instances.

Food and Water: You must not miss these. Since the trip is nearly nine miles long, it only makes sense to pack enough food and drink. Particularly during the warmer months, bring additional water.

Hiking the Sky Pond

Now that we learn about the essentials, it is time for the exciting part. Here are the things you will tackle when you finally take the trail!

Alberta Falls

Hike the sky pond trail in Colorado at Rocky Mountain National Park

To get to Alberta Falls and Sky Pond, follow the path signage.

It isn’t long before you witness the first of many breathtaking views. You can reach this point after a steep incline of about .6 miles from the junction of the Glacier Gorge and Bear Lake trails.

A forest and mountains backdrop enhance the natural splendor of this waterfall. It is still a sight even when the water isn’t rushing at full speed.  It is the park’s most famous waterfall and one of its most beautiful.

However, beginning your journey before the sun rises may be too dark for you to see. Fortunately, you’ll still be able to witness it on your return journey, but it’ll be considerably more crowded.

You can look at the waterfall from the vantage point or atop the massive boulders along the riverbank.

Loch Vale

Hike the sky pond trail in Colorado at Rocky Mountain National Park
peakpx.com

Loch Vale is approximately two miles from Alberta Falls. The abundance of breathtaking vistas along the way makes getting here feel like a breeze.

You’ll apply most of your time in the shadows of the woods, but there should be few spots where you’ll be able to see the sky. As a result, you’ll sense the park’s enormity as you look out over the mountains in this section.

The hike takes place nearly two miles along a steep, canyon-fringed cliffside. You’ll eventually emerge into a little meadow where the river flows free. The peaks on the horizon will loom over you as you descend back into the forest on a clear day.

Once you’ve crossed the third-mile mark, you’ll come across Loch Vale, better known as The Loch. Take your time because the vistas from this vantage point are some of the best on the trek. Photographers love the Loch because of the stunning views of the surrounding mountains and snow-capped summits.

While walking down the Loch, you’ll notice an increase in difficulty. The trail gets complicated at this point, so take advantage of the numerous views.

Timberline Falls

Hike the sky pond trail in Colorado at Rocky Mountain National Park

The ascent has been steady to this point, but it now takes a big turn for the worst. It is a relatively modest distance, at least in terms of length.

Nearly half a mile brings you up 400 feet of slope. You’ll need to do some bouldering to go up some steeper sections. It becomes considerably more difficult if it’s already melted and the water is running.

Since there’s only one route up and one way down from here, there’s generally a bit of a jam. But Timberline Falls, a short side trip away, is well worth it. Look back and see how distant you’ve come on the trail before you continue.

Please pay close attention to your footing when it’s your turn to ascend. You’ll be at least 4 miles from the start if you’re seriously injured in an accident here.

The scramble is simple, but the steepness and wetness of the terrain may make you anxious. There is some movement, but it’s not as fast as in the other streams.

Despite this, the hike is all the better for it. If no one else is coming down, you can take your time ascending the waterfalls.

Lake of Glass

Hike the sky pond trail in Colorado at Rocky Mountain National Park

You’ll arrive at Lake of Glass after ascending to Timberline Falls.

Some visitors mistakenly believe that it is the Sky Pond and proceed to depart. Keep going to the Sky Pond, which is just as beautiful as the rest.

Gorgeous vistas of The Sharkstooth, Taylor Peak and Powell Peak are all visible from this alpine lake. Glass Lake is another name for this body of water.

There is a lot of rough rocky terrain along the west portion of the lake from here on out. A closer look is required to keep on the right track.

Take it slow, and you shouldn’t have any issues staying on track. The moraine-formed Sky Pond is visible straight ahead if you keep your eyes peeled in that direction.

Sky Pond

Hike the sky pond trail in Colorado at Rocky Mountain National Park

You’ll ultimately reach the penultimate destination after a couple of extra walks!

You won’t find a better vista on a beautiful day in Colorado. Sky Pond’s blue waters are closed by rugged mountains that resemble sharks’ teeth.

Although Sky Pond is a popular destination, the climb’s difficulty generally means there won’t be many visitors. If there are many people, you can still locate a quiet location to eat lunch and take some shots around Sky Pond.

Located at an altitude of roughly 10,900 feet, Sky Pond features a circular basin encircled by cliffs on three sides.

The hike is just very rewarding, thanks to the 360-degree beautiful vistas! Be sure to spend more time there before heading back.

Heading Back From Sky Pond

The Sky Pond trail is an out-and-back, so you must return the way you came. You can add different hikes if you’re feeling adventurous.

Detours like Lake Haiyaha, which gradually links to the Emerald Lake Trail, are an excellent example. Also, a glacier diversion is available.

But if your legs certainly feel fatigued and you desire to chase the thrill of the breathtaking views will likely lead you back to civilization.

Fortunately, the return trip is entirely downhill from here on out. After hiking several hours to get to Sky Pond, your return will last only a few hours. The entire Sky Pond hike time definitely takes a day, though!

Pro Tips in Hiking Sky Pond

Consider following these tips for you to have the best time hiking Sky Pond.

Start Early: As always, start early. It is excellent not just to avoid the crowd, but thunderstorms are frequent in the afternoon during hotter months. You want to be back before these occur for your safety.

Prepare To Turn Around: On your way up the Sky Pond, sudden condition weather changes are typical. If you feel like a downpour will occur, end our hike immediately.

Be Wary of the Altitude: The length and altitude of this hike make it a tough one. Generally, if you’ve never been to Colorado before, you should spend a few days getting used to the higher altitude. You can try some warm-up hikes around, such as Emerald Lake, Deer Mountain, and Gem Lake.

Wildlife Awareness: Bears and mountain lions are among the many species that call Rocky Mountain National Park home. Read up on what to do if you run into one. Optionally, you can bring bear spray for protection.

Where To Stay When You Hike Sky Pond

Unfortunately, there are no lodging options inside the park where the Sky Pond resides. Our best bet is to stay in the nearby accommodations to access the Sky Pond easily and have the best time. Here are the best places to stay when you hike the Sky Pond!

Estes Park Resort

The Estes Park Resort is the solitary hotel on picture-perfect Lake Estes, set on 5 acres of land in Estes Park. You’ll be able to visit all of Estes Park’s restaurants, wineries, and cultural sites within a short distance of this resort.

You can also take a kayak, a paddle, or a floating boat to explore Lake Estes during the summer. A 3.75-mile loop trail is available around the lake, which provides stunning views and the opportunity to see local wildlife, including elk and bighorn sheep.

The indoor pool, arcade, and outdoor fire pits are all available for guests when they’re not exploring Ester Park.

A 49-inch HDTV, pillow-top mattresses, and large workstations are standard in the hotel’s 54 modern guest rooms.

Kitchenettes with sinks, tiny refrigerators, microwave ovens, and coffeemakers are convenient extras. Private balconies or terraces are available in every accommodation, and many offer breathtaking views of Lake Estes.

It is also the site of one of Estes Park’s most renowned restaurants. The Dunraven is known for its excellent Italian cuisine. Take advantage of the lake and stunning views from the deck when the weather permits.

All of this is within a distance of the Sky Pond trailhead. It’s an excellent place to rest before embarking on your trek!

Click here to book.

The Landing at Estes Park

If you’re eyeing one of the most incredible boutique hotels around Rocky Mountain National Park, then The Landing is the place to stay. The primary lodge is an excellent alternative for couples or lone visitors who want to relax, enjoy a spa, and immerse themselves in the beauty of nature.

It’s well worth the extra money if you’re traveling with children or need extra room. On the riverside patio, you can have a cup of coffee in the morning, relax in front of the stone-clad fire, and cook a family dinner in the kitchenette.

Landing’s usage of environmentally and socially responsible goods and products is only one of the many reasons why they stand out.

Furnishings crafted from recycled plastics, milk, and water bottles are visible around the house, as well as braided Capel carpets and American-style woven Capel rugs in the bedrooms.

If you feel like you’re in the middle of nothing, you’re only a mile from Rocky Mountain National Park’s entrance and three miles from Estes Park’s restaurants and shops.

It is a beautiful choice for those looking for the best lodging, activities, and proximity to Rocky Mountain National Park.

Click here to book.

Woodlands On Fall River

Beautifully landscaped grounds with 300-year-old trees surround The Woodlands on Fall River, which sits right on the river’s edge.

The Fall River entry to RMNP is only two miles from this quiet motel, so you can spend your days relaxing. Plus, you’ll see Fall River or Castle Mountain in all their glory every morning!

Luxurious Woodlands on Fall River is a boutique hotel near Rocky Mountain National Park if you consider a home away from home.

One- and two-bedroom condominiums have comfortable sleeping quarters, living spaces with fireplaces, and fully equipped kitchens with stoves, dishwashers, and microwaves.

You can enjoy the water views while lounging on your private deck. Gas grills are available on each deck so that you can cook up a big feast for the whole crew. You can go fishing outside your front door and cook a fresh fish meal with 350 feet of riverfront access!

The property’s amenities include a hot tub overlooking the mountains, access to numerous hiking routes, and riverside picnic places.

The mountains you’ll take later on are visible from this motel!

Click here to book.

Maxwell Inn

The Maxwell Inn will treat you like a member of the family the instant you walk through the door. This family-run inn is in a 1930s single-family residence that later became a dental office in the 1960s. Dana and Peter, the kind innkeepers, will go out of their way to make your stay as pleasant as possible.

The guest rooms include a mix of rustic and modern design elements. The Serta mattresses, handcrafted wood trim, and furnishings, as well as the convenient microwaves, mini-fridges, and coffeemakers, will make your stay a pleasant one.

Finished in 2020, the “On the River” rooms feature gas furnaces, kitchenettes, and riverside sitting areas that are all private.

The hotel staff provides a complimentary continental breakfast in the mornings, which is a great way to start the day. The hot tub, fire pit, barbeque, and picnic area are all great places to unwind in the evenings after a long day.

A weekly outdoor night with other visitors and the Maxwell family is available in the warmer months.

The paved riverbank path into town takes less than 15 minutes, and the entrance to Rocky Mountain National Park is just a few notes away by car.

It’s a good starting point for a vacation that’s either just beginning or has just ended.

Click here to book.

StoneBrook

StoneBrook is one of the top hotels surrounding Rocky Mountain National Park if you want to rest and unwind.

This charming inn is tucked away in the woods on Fall Riverbank. Also, this resort is strictly for adults over 21, so you can relax in peace.

There are stone fireplaces, fully equipped kitchens, and private balconies in every unit.

To enjoy the flowing river, guests can relax in a hot tub on their private patios in the Riverside Cottages and the Riversuites’ living rooms, which also feature gas grills and spa tubs.

Two miles away, a Safeway store has everything you need to make meals at home or pack a lunch for a hike.

Fishing, hiking, or simply relaxing on the river’s side are all feasible activities, thanks to its unique location. You might even see elk and bears in their natural habitat if you’re lucky!

Estes Park and the Fall River entry to Rocky Mountain National Park are just a short drive from StoneBrook.

Click here to book.

Camping Options When You Hike Sky Pond

Hike the sky pond trail in Colorado at Rocky Mountain National Park
campgroundreviews.com

If hotels are not on your mind when you hike the Sky Pond trail, you can go camping. There are several options you can do this activity, and the great thing is that the campsites are nearby your destination. Here are the camping options to consider when you hike Sky Pond!

Timber Creek Campground

The Timber Creek Campground, just 10 miles from the Grand Lake entry, contains 98 sites. In operation from late May to early November, it’s the only camping on the park’s west side that is open.

Located at 8,900 feet along the Colorado River, this picturesque campground is dubbed the “Rocky Mountain high” because of its stunning scenery.

It features flush toilets and ranger-led activities and can accommodate RVs over 30 feet in length. Due to the pine beetle infestation in the area, the park service had to remove several trees from this campground.

Secure your reservation early since it is the only campsite on the park’s west side. Summer reservations begin in late March.

This campground is a minute’s walk to the Sky Pond trailhead!

Click here to book.

Moraine Park Campground

Longs Peak, the park’s highest peak, can be seen from Moraine Park Campground, where you can spend the night.

Reservations are compulsory throughout the warmer months. Up to six months in advance, you can book online or by calling the hotline. There are no reservations allowed in the winter, so walk-ins are welcome.

Located two-and-a-half miles south of the Beaver Meadows Entrance Station, this gorgeous campground has 244 summer and 77 winter sites, but you never feel like a sardine in a can.

Depending on water availability, you’ll see both flush and vault toilets. Generators are allowable from 7:30 am until 10 am and from 4 pm until 8:30 pm, except in Loop D, where they are prohibited.

A free shuttle service connects the park to Bear Lake and Estes Park, which is ideal for RVers who like to leave their cars at home while enjoying the nearby attractions.

The Moraine Park Discovery Center and trail links in the surrounding area are also within easy walking distance. Using the shower bag stall on the campsite or your solar showering bag, you can rinse off after a long day of adventuring.

Click here to book.

Longs Peak Campground

Are you looking for a basecamp that allows only tents?

The only first-come, first-served campground in the park, Longs Peak Campground has 26 sites hidden in a forested area at 9,500 feet and costs $26 per night. Pack extra garments for the nights and early mornings due to the high altitude of the campground.

You can access the park’s tallest mountain from here and the Sky Pond trailhead.

It is on the park’s eastern perimeter, just south of the main entrance. From Estes Park, travel south on Highway 7 for nine miles.

Aspenglen Campground

Aspenglen Campground is open from late May to late September in a pine forest west of Fall River Entrance Station. At the height of 8,200 feet, you’ll see the canopy stars above you more clearly at night.

Aside from the 53 campsites, this campsite allows generators on the C Loop. These are allowable from 7:30 to 10:00 in the morning or 4 pm to 8:30 pm.

Take advantage of the point that cell phones don’t work on the Sky Pond trail to unplug from your surroundings and engage yourself in the natural environment.

During the summer, evening activities led by rangers are frequently accessible at the nearby Fall River Visitor Center.

The Glacier Gorge Trailhead is also nearby, setting it distinct from the other destinations it connects.

Click here to book.

Fern Lake

Fern Lake offers an excellent opportunity for a short-distance backpacking trip for families with fit kids. From the Fern Lake trailhead, it’s 3.8 miles to this point. You’ll see The Pool, Fern Falls, and Marguerite Falls on your journey.

A pit toilet at each campsite at Fern Lake is a welcome convenience for families traveling with young children. To avoid the dangers of standing dead trees, park officials have requested that you set up camp in the designated area.

Visit neighboring Spruce or Odessa lakes, or go fishing in Fern Lake the following day before resting at your campground and resting for night number two under the stars.

Camping overnight in the wilderness requires a permit. You can’t request a license at Rocky Mountain National Park by phone, fax, or walk-in.

The Fern Lake trailhead is close to the Beaver Meadows Visitor Center on the east side, where the backcountry office is next door. The backcountry station is available seven days per week, but the hours vary based on the season and the type of activity.

You can also drive 4 minutes to the Sky Pond trailhead, which is an excellent choice if you want to go on an extra adventure before or after your trip.

Click here to book.

Final Thoughts

As you can see, hiking Sky Pond in Rocky Mountain National Park is very rewarding. Yet, it takes excellent planning to have an experience that will last for a long time.

With the length, the steep sections, and the altitude, a journey to Sky Pond will take a toll on you. Save this post about the hike to Sky Pond in Rocky Mountain National Park to have a guide when you arrive in the area. Have a fantastic hike!

Hiking Mount Lafayette, Franconia Ridge Trail Loop In New Hampshire: The Ultimate Guide

Are you planning to hike Mount Lafayette in New Hampshire? This complete guide to Franconia Ridge Loop Trail will tell you everything you need to know!

The hiking trails in New England don’t get as much attention as those on the West Coast, but they can be really incredible. The Franconia Ridge Loop is one of the most popular. It is a challenging hike that takes you up three of the state’s famous 4,000-foot peaks, Mount Lafayette included!

This is a must-take path for a variety of reasons. The first is how easy it is to get to the trail, making it one of the most popular NH hikes. Plus, the hike includes a loop (thus why it’s called Franconia Ridge Loop). No need to plan for a pick-up, leave a vehicle at the end of the route, or hike back because the trail begins and ends in the same parking lot.

And of course, the views are incredible! When you take the Franconia Ridge Loop, you get to hike up three mountains in one day and see a lot of New Hampshire’s beauty.

Of course, the trail’s countless waterfalls are a big draw. The scenery is a photographer’s dream, and anyone who sees it will want to capture it forever.

In this post, you’ll learn everything you need to know about hiking Mount Lafayette, including the Franconia Ridge Trailhead. Let’s jump in!

Overview of Mount Lafayette Hike

Hiking Mount Lafeyette: the Franconia Ridge Loop in Franconia New Hampshire

The Franconia Ridge Loop trek takes hikers over White Mountain National Forest to the summits of three 4,000+ footers: Mount Lafayette, Little Haystack, and Mount Lincoln. It is not for someone with a faint heart.

You’ll cross a few beautiful waterfalls, several rocky, steep slopes, and the Greenleaf Hut, a simple shelter for overnight hikers.

Check out any changes in the weather before you go out because you are vulnerable on the alpine ridgeline for about a mile and a half. As a result, the weather can be severe and change quickly, which is very risky.

On the other hand, the White Mountains offer some of the loveliest views in the region of New Hampshire on days with little to no fog and clear skies.

This is one of the most popular day hike loops in New Hampshire for a reason. Peakbaggers can climb two 4,000-foot peaks in a matter of short distances, and it offers gorgeous vistas along the ridge.

For those who want to see a sunset or sunrise on the ridge summit, the loop offers camping possibilities close to both ends, making it a perfect overnight alternative.

This 8.5-mile circle trail offers breathtaking views. You must overcome approximately 3,700 feet of significant elevation to reach the summit. The Mount Lafayette hike will last anywhere from 6 to 8 hours depending on your pace.

You can also perform the loop in an extended version. With this route, you will traverse all of the significant peaks in the Franconia Range. But you need to be seriously in shape for this option! You’ll be in for a long day if you want to complete this “loop” with the Flume and Liberty out and back part, but it also makes for a fantastic overnight walk. The journey will cover 15.3 miles in total.

Mount Lafayette Trailhead and Parking

Route 93 North and South, which travels between Kinsman and Franconia Range mountain passes, provides easy access to the entire Franconia Notch State Park, including the Franconia Ridge Loop Trail.

It’s a beautiful drive to the trailhead no matter where you’re coming from, with mountain ranges bordering you on each side.

Pull into the Lafayette Place parking lot and walk east down the road to find a posted trailhead to begin your hike. Many vehicles and hikers are likely to be on this busy trail, so you won’t be able to overlook it. Don’t worry about getting lost!

The Old Bridle Path has a designated parking lot in case the area is already jam-packed. It’s also trendy on the weekends. Highway 93 has an extra two-mile stretch each way for additional overflow parking.

Best Time To Hike Mount Lafayette

The most significant time to trek the Franconia Ridge Loop is from late May to September, although you can do it anytime.

During these months, you can anticipate higher temperatures and more clear skies. To avoid the crowds, plan to visit during the weekdays.

And make sure to start early in the day! Since the trek would take at least six hours, you don’t want to run the danger of running out of light.

Conditions can shift rapidly and dramatically due to the region’s reliance on the weather. Before leaving the house, ensure you are ready for any weather. We suggest bringing a backpack with water, a raincoat, and a sweatshirt since the White Mountains have a unique weather pattern.

Things To Consider Before Hiking Mount Lafayette

Hiking Mount Lafeyette: the Franconia Ridge Loop in Franconia New Hampshire

Even though the Franconia Ridge Loop trail is well-marked and straightforward to follow, there are some things to consider before going to Mount Lafayette. Here are some of them:

First-timers and inexperienced hikers should not attempt this hike. It’s not a good idea for families with young children or novice hikers to embark on this trek. This trail is challenging because of many stream crossings, steep hills, and icy sections. Artist Bluff & Bald Mountain is an excellent option for those searching for an easy White Mountains trek with stunning views.

The Franconia Ridge Loop is best to hike counter-clockwise. While you can walk the loop in any direction of your choice, going up the Falling Waters and back to the Old Bridle Path is the path of least resistance. The Falling Waters trail is strenuous in descent due to its muddy and slippery sections, so to avoid accidents, better hike it on the way up. We recommend it to anyone planning this hike.

When the skies are clear, you’ll have an easier and more pleasant hike. On rainy or overcast days, the peaks you’ll be traversing will likely come with fog. As a result, you will have oversight of the breathtaking scenery on the Franconia Ridge Loop. Keep an eye on the weather and schedule your hike for a day that appears to be sunny and clear if you have the opportunity. These precautions will help ensure a safe and enjoyable White Mountains hike.

Hiking Mount Lafayette Via Franconia Ridge Trail

Are you ready to finally hit the trail? Here is what it will look like when you hike Mount Lafayette through Franconia Ridge Trail!

The trailhead is marked as the “Old Bridle Path” parking lot and can be found on the right side of Interstate 93, heading north. This is where you’ll start.

There is a bifurcation in the route immediately after starting the hike, which leads either the Old Bridle Path to the left or the Falling Waters Trail to the right. We’ll take the Falling Waters Trail on the right in this journey.

Falling Waters Trail

Hiking Mount Lafeyette: the Franconia Ridge Loop in Franconia New Hampshire

As you ascend the Falling Waters route, you’ll come upon several waterfalls running practically alongside the path for several miles. You’d better get your cameras set because there are a lot of waterfalls here that are photogenic.

You’ll have to cross at least five streams during the first ascent to keep on track. A sturdy pair of waterproof boots and some creative footwork over the rocks are all you need to avoid having your feet wet on these hikes!

The Falling Waters trek begins gently, but as the mountainside steepens, it swiftly gains momentum. When climbing, you’ll be following blue blazes, so keep your eyes peeled for them to find the quickest routes up.

Little Haystack

Hiking Mount Lafeyette: the Franconia Ridge Loop in Franconia New Hampshire
pinterest.com

Once you’ve hiked the waterfalls for about 1.5 miles, you’ll enter the forest and follow a dirt and rock trail to the summit. After eight switchbacks, the ascent is steep until you reach the first summit.

A 0.1-mile detour to Shining Rock is also an option, although it’s unnecessary. With a little extra effort, you can mark your way uphill until you reach a rocky section that indicates you’re getting close to the summit.

The first peak, Little Haystack, will reach approximately 3 miles up! The views from the top of the mountain are breathtaking. Have a snack and some downtime as you take in the stunning views of Mount Lincoln and the Franconia Ridge as you gaze up at the White Mountains.

Mount Lincoln

Hiking Mount Lafeyette: the Franconia Ridge Loop in Franconia New Hampshire
peakery.com

Continue up to Mount Lincoln, the second highest point on your journey. Mount Lincoln, which you can observe from Little Haystack, is the one that obscured your view of Mount Lafayette, the final and third summit.

As you approach the peak on your left, the blazes will turn white instead of blue, so keep an eye out for them.

Protect yourself from the sun here since you won’t have a lot of cover.

Although the terrain is rough and steep, there isn’t a lot of scrambling required in this location. Throughout your journey, you’ll see breathtaking views of the surrounding mountains. There’s a lot of wind around here! There’s no denying that a nice raincoat or windbreaker would be helpful.

Mount Lafayette

You’ll see Mount Lafayette’s summit as you reach Mount Lincoln’s top. Before completing the final push through the meadow and up Mount Lafayette, take a quick pit stop and refuel.

Mount Lafayette’s vistas are the most impressive among the three peaks, so spend the most time on it if you can.

The entire ridge stretch of the route is less than 2 miles long, and it’s breathtaking from start to finish. It will take 1.5 hours to climb the ridge, including 20-30 minutes of rest.

Take in all the scenery and take a break because afterward, you’ll need to be ready for the steep ascent.

Greenleaf Hut

Hiking Mount Lafeyette: the Franconia Ridge Loop in Franconia New Hampshire
tripadvisor.com

The last section of the Franconia Ridge Loop path returns to the parking lot via Old Bridle Path. Greenleaf Hut, a backpacker’s lodge located a little over a mile from the summit, is the first stop on the itinerary. From the ridge, you can see it, so it’s not that far away.

To descend Mount Lafayette, do not follow the ridge trail in the same way as the descending path. If you want to get back into the parking lot, don’t do it that way. Go to the rock piles and turn left to get to Greenleaf Hut instead.

If it’s been raining recently, expect a muddy hike. There’s a risk of tripping! You can also stop by Greenleaf Hut for a short break if you’d like. For the final three miles to the parking lot, stop at this point for some free drinking water and then continue on your way.

Old Bridle Path

Hiking Mount Lafeyette: the Franconia Ridge Loop in Franconia New Hampshire
naturetravelers.com

There are a few steep, rocky sections of the Old Bridle Path, but most of the trail is moderate. These are the portions of the path that will require the most handwork.

If you pack trekking poles, you’ll be glad you did. Because of the hike’s length, your legs will likely be tired, so go slowly and carefully.

Shrubs, wild sedges, and alpine cranberries are just some of the plants you’ll find in this portion of Northern New England.

A rock staircase will lead you to a junction with the Falling Waters Trail, from which you can return to the trailhead.

What To Bring to the Mount Lafayette Hike

These are the things you should carry with you to have good times when you embark on this challenging Mount Lafayette hike:

Hiking Clothes: Reliant on the time of year you’re trekking, you’ll need appropriate clothing. Wear a sweat-wicking shirt and breathable slacks in the summer to keep cool. Wear layers, a jacket, and trekking socks in the winter.

Hiking Poles: You won’t use these on every hike, but keeping some in your car for emergencies is a good idea. If you’re planning on trekking up Mount Lafayette, consider bringing a lightweight, robust hiking pole to make the ascent go more smoothly. This hike is on the difficult side!

Water and Food: A constant clean drinking water is vital. We encourage carrying your reusable water bottle to reduce the amount of disposable plastic used. Don’t forget to pack some food if you get hungry while hiking.

Bug Sprays, Brimmed Hat, and Sunscreen: Hiking is notorious for causing sunburns and bug bites, two of the most aggravating side effects. To avoid these, you should use sweatproof sunblock and bug spray. Also, if you’re planning a day hike in the sun, carry a brimmed hat or cap.

First Aid: Since it is a long hike to the summit, everything is possible, and it’s better to be cautious than sorry. Bring a first aid kit with you or an emergency blanket.

Durable Backpack: Everything you’ll need for a day on the trail will fit perfectly in a tough day pack. For extended day hikes, we recommend a backpack that is both comfortable and breathable.

Where To Stay When You Hike Mount Lafayette

Hiking Mount Lafeyette: the Franconia Ridge Loop in Franconia New Hampshire
booking.com

Hiking Mount Lafayette through Franconia Ridge Trail Loop only lasts 6 to 8 hours, which is suitable for a day hike. But, if you want to include it in your adventure in the White Mountains and other surrounding areas, it is great to have a shelter to prepare for coming activities.

Here are the closest yet incredible lodging options for you when you hike Franconia Ridge Trail Loop!

Parker’s Motel

See why Parkers Motel is the guest house of choice for so many visitors to the area.

With a family-friendly atmosphere and a wide range of services for visitors like you, this motel is an excellent value.

Parkers Motel’s rooms come equipped with a flat-screen TV, conditioning systems, and a refrigerator, all of which are complimentary to visitors.

Take advantage of the outdoor furniture and picnic area while you’re here. Visitors to Parkers Hotel can also reap the hotel’s on-site pool and grilling area benefits. Parking is free for those arriving by vehicle.

Some of the area’s most prominent attractions, including the Pemigewasset River and Loon Mountain Ministries, are nearby. The Parkers Motel is an excellent site for travelers.

Also, Parkers Motel is just a short distance from Aloto Gelato and Fresolone’s Pizza, Pasta & Sub. Guests of Parkers Hotel can quickly achieve the nearby tourist attraction of Georgiana Falls, which is an excellent place to kill some time while in the area.

The trailhead at the Lafayette Place Campground is just a short drive away. It is excellent as a stop before doing your long hike in the mountain!

We’re confident that your stay at Parkers Motel will be memorable, as you take advantage of all the area offers.

StonyBrook Motel & Lodge

With its proximity to Franconia Notch State Park and the picturesque village of Franconia, Stonybrook is ideal for exploring the area’s many sights and activities.

New Hampshire’s White Mountains and Lake Region are never more than 45 minutes away from Stonybrook.

It has eight acres of beautiful grounds available to its visitors, all of which are yours to enjoy.

If you choose to relax by the bubbling Gale River, take a dip in The Pond, or enjoy a Personal Barbeque, you’ll have a wonderful time at the site!

Enjoy the lodge’s interior Open Hearth Fireplace, lawn sports activities, and more; you have complete freedom to design your time here precisely how you want it for as long as your vacation permits!

Extensive vacation stays for individuals, couples, and families are welcomed and accommodated through Custom Packages, which you can request in advance.

StonyBrook is an excellent stop for meals to fuel up before or after the long loop towards Mount Lafayette’s peak. It serves breakfast and is close to several other restaurants.

StonyBrook is a terrific place to stay when hiking trails and engaging in other recreational pursuits!

Best Western White Mountain Inn

Keep this Franconia motel in mind when planning a walk up Mt. Lafayette or any other outdoor activity.

The White Mountain Inn, a Best Western property, is a haven for outdoor enthusiasts. Located in Franconia, New Hampshire, this hotel prides itself on providing the most exemplary customer support and amenities at a reasonable cost.

You’ll be just minutes away from three popular ski resorts at this Franconia hotel: Cannon Mountain, Loon, and Wildcat Mountain. Several other neighboring recreational activities include hiking and biking.

Franconia’s most popular attractions are the Mount Washington Auto Road, the Mt. Washington Cog Railway, and Santa’s Village.

High-speed Internet connection and cable television are available in each hotel’s Franconia, New Hampshire hotel rooms.

A complimentary breakfast is available each morning in the hotel’s non-smoking lobby. Plus, this New Hampshire inn offers additional amenities besides an indoor swimming area and a fitness facility. The hotel’s business center will be a big help to business travelers.

Reserve a room at the Best Western White Mountain Inn in Franconia, New Hampshire, for exemplary service and a convenient location!

For reservations, either uses a credit card by the confirmed guest staying in the accommodation or fill out an authorization form before the person arrives. Get in touch with the property and arrange for them to obtain the authorization paperwork.

Also, pets are only allowed in specific rooms labeled as such. Pets are welcome here, so don’t hesitate if you’re planning a trip to the top of Mount Lafayette.

Hillwinds Lodge

This quaint New Hampshire motel is in Franconia, New Hampshire, on the banks of the serene Gale River. Nearby, you’ll find all the natural and man-built wonders that have established this part of the world as a popular vacation destination for over a century.

Two minutes from town and only two miles from Franconia Notch State Park, Hillwinds Lodge is well situated to provide guests with quick and straightforward access to a wide range of recreational opportunities.

Everything from hiking and bicycling to swimming and fishing is just a short walk away. Mount Lafayette’s trailhead is only a short drive away, as well.

Each of the guest rooms in this hotel is large and brightly lit. You can choose between a view of the river or the pool and gardens from the hotel’s 30 rooms spread across two floors.

Double occupancy rates can range from $79 to $149 + tax, depending on the season and hotel type. As a first responder or a senior citizen, you could be eligible for exceptional savings. Stays of four or more nights are eligible for reduced rates.

Appliances such as refrigerators, ovens, and coffee makers are all available to you. Also, you can set each room to a different temperature depending on the season. High-speed internet and cable TV come standard.

It’s a pet-friendly motel! Taking your puppy on a hike can be even more fun when you have this option. Breakfast is complimentary as well. Request gluten-free choices if you wish!

Hillwinds Lodge is the perfect spot to relax before or after a strenuous climb. Set it up as a resting place after your hike, or use it as a preparation ground to ensure everything is in order.

Gale River Motel and Cottages

You can enjoy stunning views of the Franconia Notch and Mount Lafayette from the picture window in your big room.

New Hampshire’s Gale River Motel provides travelers with cheap, pleasant lodging just a short drive away from the state’s most beautiful sights and attractions.

Weary travelers and families visiting the area are always welcome at the Gale River Motel, which offers various services to suit everyone’s needs. Its playground is a draw for children.

The older kids will have fun playing horseshoes, shuffleboard, and other lawn activities, while the whole family will enjoy the outdoor pool.

Also, it’s a pet-friendly accommodation place for pre-approved pets.

Are you up for a hike? Check out the hiker’s section for ideas or request a custom itinerary. At the Gale River Motel, backpacks, water bottles, and maps are free.

The Gale River provides mountain vistas from every motel room and easy access to the hotel’s facilities. Plus, two fully-equipped cottages have everything you need for a comfortable stay.

Outdoor hot tub, shuffleboard, horseshoe pit, picnic area, and bonfire pit are just some of the facilities available at this resort.

Are you not convinced yet to choose this as your place to stay when you hike Mount Lafayette? There are also special discounts! Not to mention that the trailhead to Mount Lafayette is just a few minutes away from this location.

Camping At Mount Lafayette

Hiking Mount Lafeyette: the Franconia Ridge Loop in Franconia New Hampshire
flickr.com

If you are down to see sunrise and sunset when you hike Mount Lafayette through the Franconia Ridge Trail, then your best option is to set up a camp. Fortunately, there are several camping choices in the area. Here are some of them!

Lafayette Campground

The location near the trailhead is the ideal location for camping.

Franconia Notch State Park’s attractions, including the Mount Lafayette trailhead, can be reached from Lafayette Place Campground.

Out-of-towners use it as a gathering place in the Whites. Franconia Notch Recreation Path, Pemi Trail, and Lonesome Lake Trail run through the campground.

Those looking to camp should bring their tents or modest pop-up awnings. Only seven locations are open to the public on a first-come, first-served basis, while the remaining 88 can only be reserved. For organized groups, there is one designated camping area.

Reservations are advisable for three ADA-accessible locations. However, bookings and full amenities are only offered from the end of May to the beginning of October at Lafayette Place, even though camping is permitted year-round.

A gravel surface refuges the majority of the locations, making them level. There is a picnic table and an open fireplace at each location. Except in the group camping area, no more than two tents are allowable per site.

Two adults and four youngsters under 18 are acceptable on each site. Additional adults that share a campsite will be charged $10 per night (as of writing this post) for each extra adult.

Also, the locations are isolated but not overly wooded. The upper Pemigewassett River’s banks are home to a few of them.

You’ll find a running water faucet and a flushing toilet in the restrooms. A dishwashing station allows you to wash your hands and dishes. Registration and a small camping equipment store are in the Lafayette Place Lodge.

Outside the campground is a tiny picnic spot on the east bank of the Pemigewassett River. These facilities offer free parking and day use.

Liberty Springs Tent Sites

You can tent at Liberty Springs Tent Sites before or after your trek up Mount Lafayette if you wish to stay in the mountains.

For overnight hikers, these campsites are ideal. It’s a terrific site to camp for sunrise or sunset, and it’s only a half-mile from Liberty Spring Trail’s summit.

When the campgrounds are full, alternate campsites closer to the top are less expensive and less crowded.

Tent pads come in seven- and three-person configurations. There is a composting toilet and a bowl for washing dishes. The spring has a seasonal caretaker, and the water is terrific.

First-come, first-served is the sole option for small parties of 5 or less. All amenities except Hermit Lake require using AMC’s Group Notification System for groups of six or more. You can make submissions via the internet.

During the caretaker season, which includes Memorial Day and Columbus Day, there is a cost of $15 per guest per night. There is no charge for residing at the property outside the caretaker season.

Because there isn’t anywhere to take refuge on site, you’ll want to be well-prepared. Throughout the day of your trip, take a look at forecasts for camping. Also, these locations are well-known, so arrive early to avoid the crowds!

Spend time here to replenish your energy and prepare for your next hike to Mount Lafayette or the nearby trailside spring.

Greenleaf Hut

As you look out over Eagle Lake from Greenleaf Hut, you can see Mount Lafayette, a nearby peak, which motivates you to hike the Franconia Ridge’s entire length.

It’s about 2.7 miles to the Greenleaf Hut, and the crew is ready to serve you delicious meals and share their knowledge of the area’s trails and wildlife. Take in stunning views of the Pemigewasset Wilderness, Kinsman Range, and the Franconia Notch from the top of Lafayette, New Hampshire.

Co-ed bunkrooms and private washrooms with compost toilets and water sinks are available at Greenleaf Hut. The AMC Huts are located in remote wilderness areas and are only accessible via trekking.

Heating, lights, and electrical outlets are not available in bunkrooms. Bring a warm sleeping bag, headlight, or lantern if you plan to stay the night.

The huts no longer include blankets and pillows, but Effortless Adventures can rent sleeping bags, pillows, and other items.

Also, breakfast and dinner are complimentary to your room rate. Eggs, pancakes, baked dishes, hot cereal, fruit, and morning meat, such as bacon or sausage, are provided at 7 am sharp. Fresh bread, soup, salad, and an entree are all included in the family-style dinner that begins at 6 pm.

If you don’t want to bring your lunch, you can buy soup and baked products daily from 10 am to 5 pm. You must bring your trash or recyclables in and out of the area in compliance with Leave No Trace guidelines.

This site sits roughly at 4,000 feet in elevation, and the summit of Mount Lafayette is about a mile away. It is an excellent place to halt if you’ve already begun your trek!

Final Thoughts

Congratulations! You just conquered the summit of Mount Lafayette through the Franconia Ridge Loop!

Not one, not two, but three peaks with stunning sceneries reward you in this challenging hike. Not to mention the beautiful waterfalls and plants visible, this trail lives up to its popularity!

Go up there now and enjoy everything that awaits you. Enjoy!

P.S. Don’t forget to stop at some of the top restaurants in Lincoln on the way home. We especially love the brewery!

Watkins Glen State Park: Hiking the Gorge Trail + Activities & Camping

Are you planning on hiking the Watkins Glen State Park Gorge Trail but don’t know where to start? We’ve got you covered! 

A visit to the Finger Lakes is incomplete without a stop at Watkins Glen State Park. This state park is like stepping into an ethereal dream with magnificent waterfalls, flowing glen, and high cliffs.

One remarkable experience in the area is hiking the Watkins Glen Gorge Trail. The most famous location in the park, Rainbow Falls, is reached via this trail. The Glen Creek-following Gorge Trail ascends stone stairways and crosses picturesque bridges. You will be able to see some of the most stunning waterfalls in the Finger Lakes throughout the climb. In all honesty, Watkins Glen is among New York State’s most picturesque locations.

Watkins Glen, one of the top State Parks in New York, welcomes almost 1 million visitors yearly. It includes citizens of New York, Americans from every state, and even tourists from other countries. Apart from hiking, camping and other activities make the state park a tourist hotspot.

If you’re planning to hike the Gorge Trail, see the views, or check out some of the best Watkins Glen State Park waterfalls, keep reading!

About Watkins Glen State Park

Hiking the Gorge Trail Watkins Glen State Park + waterfalls and activities

Watkins Glen is the most well-known Finger Lakes State Park, renowned for its natural beauty.

It has many gorges and waterfalls that are likely to astound everyone. You can pass 19 waterfalls on a nearly two-mile journey and ascend more than 800 stone steps.

The Gorge Trail has several side trails that lead to various enjoyable outdoor pursuits adjacent to the main course. Contest and trailer camping areas, swimming areas, picnic areas, and guided topographic tours are available.

Dogs on leashes are allowable on the rim paths but not on the Gorge Trail.

The main entrance, south, and north entrance are three park entrances. While you can escape to the grandeur of Watkins Glen State Park’s gorges and waterfalls, you are not far from the comforts of a town.

Location of Watkins Glen State Park

Hiking the Gorge Trail Watkins Glen State Park + waterfalls and activities

The town of Watkins Glen, within the Finger Lakes area of New York, is home to Watkins Glen State Park. And it’s super small!

In fact, from practically any are in town, you can walk to Watkins Glen State Park’s main entrance. The main entrance to the park is close to many dining options and is on the town’s major thoroughfare.

Watkins Glen is situated on Seneca Lake’s southernmost point.

Best Time to Visit the Watkins Glen State Park

Hiking the Gorge Trail Watkins Glen State Park + waterfalls and activities

You will have a different experience when you visit the state park each season of the year. Hiking Watkins Glen State Park can be accomplished in three out of the four seasons, but you’ll need to plan carefully for the weather. Here’s what to expect with varying seasons:

Spring

One of the best times to visit since Glen Creek’s best water flow occurs during the snowmelt season.

Summer

Despite the longer daylight hours and intense heat, the gorge trail will be really crowded. It’s a lot hotter but is still a great time, plus the greenery is beautiful!

Fall

The best time to hike in New York is the gorgeous Autumn foliage. Seriously: it’s insanely beautiful!

Winter

During winter, the Gorge Trail closes. You’ll have to wait until spring to be able to hike.

Getting to Watkins Glen State Park

Thanks to its strategic position, Watkins Glen State Park can be reached by car anywhere in New York State and many neighboring states.

To travel to and within the area, you will need a vehicle. Make sure you reserve a rental car if you don’t already have one. Watkins Glen isn’t really accessible any other way and there’s no local public transportation.

Entrance Fee and Parking at Watkins Glen State Park

Hiking the Gorge Trail Watkins Glen State Park + waterfalls and activities

It costs nothing to visit Watkins Glen State Park or hike the Watkins Glen Gorge Trail. However, parking at the approved lots will cost you $8. Your parking permit is valid for the entire day at any New York State Park if you intend to visit several state parks in one day.

Finding a parking space when hiking Watkins Glen State Park can be challenging on weekends and big holidays because it’s one of the most visited state parks in the country. If you are visiting on a popular day, try to get there early to avoid the mob and to get a parking spot.

Alternately, you have two choices if you wish to avoid spending the parking fee: park on a side road or leave your car at your hotel.

There are no metered spaces in the town, so you can park anywhere on a side street close to the park. Afterward, proceed to the Gorge Trail’s entrance to begin hiking Watkins Glen State Park. On a busy day, it will be challenging to get street parking.

You can park your car at the hotel garage lot and stroll to the park if you’re staying there in Watkins Glen. The majority of hotels are a little stroll from the park’s entrance.

Try to arrive early if you do want to get a parking spot. During the middle time of the day, the area becomes crowded before becoming quieter late in the afternoon.

It is best to avoid visiting the area during the busy weekends between April and October, especially during holidays. Visit during the weekdays if possible or come early; the parking lot fills up quickly.

Overview of Gorge Trail Hike in Watkins Glen State Park

Hiking the Gorge Trail Watkins Glen State Park + waterfalls and activities

Now that we’ve covered details about Watkins Glen State Park let us dive into the activities in the park. Hiking Gorge Trail is one of the most popular, and here is what to expect when you hike this renowned attraction:

Highlights: A breathtaking waterfall cascading down a beautiful gorge you can access via 800 steps. The trail has scenic views and is family-friendly.

Distance: 1.5 mile

Difficulty: Moderate

Elevation Gain: 394 feet

Trail: Rock, water, stairs

Trailhead Location: Though there are several ways to hike the Watkins Glen Gorge Trail, we nearly always advise starting at the Main Entrance.

Hiking Time: 49 minutes on average

Permit Info: There is no permit required when hiking the Gorge Trail

Restrictions:

  • Watkins Glen Gorge Trail only permits hiking in one direction because of the pandemic. You must complete the Gorge Trail and Indian Trail Loop because it is impossible to trek the Gorge Trail in reverse. After hiking Gorge Trail, you must take the Indian Trail to return. The making of a one-way trail is to promote social distancing.
  • Although the state park generally allows dogs, they are not allowed on the Gorge Trail.

Hiking Gorge Trail in Watkins Glen State Park

The breathtakingly beautiful Watkins Glen Gorge Trail is family-friendly, thanks to a stone wall that surrounds the walkway’s edge and keeps young children from tumbling. However, it is not the most convenient for people with mobility problems.

Although you certainly don’t need to be an Olympian to hike the trail, you shouldn’t overlook the required 800 steps. Step carefully as wet leaves on the paths and waterfall spray can make the stone surfaces slick.

The Watkins Glen State Park Gorge Trail has a few different sections, each of which is equally amazing. We’ll go over the sections in order here so you know what to expect!

Entrance Tunnel and Sentry Bridge

Hiking the Gorge Trail Watkins Glen State Park + waterfalls and activities
pixels.com

The breathtaking canyon route at Watkins Glen begins before you even start your journey or ascend the first step. Hiking Watkins Glen State Park is definitely part of the experience, but we recommend checking out this Watkins Glen State Park waterfall before you even begin!

A tall, narrow fissure in the ground, a little, silky waterfall gushing from the bottom, and an exposed, elegant stone bridge linking the two sides form the first scene.

There used to be a flour mill with a waterwheel at the entrance. Dams, troughs, and tunnels regulate the water flow to turn the wheel.

Sentinel Bridge allows you to pass through the tiny creek, but you must first ascend an artificial spiraling staircase carved out of a turret to get to the arched overpass.

You won’t have to hike for more than a minute before you can see directly down this stunningly beautiful and incredibly tiny portion of Glen Creek.

Low running water makes it possible to see considerably more detail in the worn shale rock. But this is merely a preview of the main delight that will follow.

Cavern Cascade and Spiral Tunnel

You undoubtedly know everything about Rainbow Falls, the most famous of the Watkins Glen State Park waterfalls, from magazine covers or Google photographs. But there are tons of other gorgeous views and surprises you’ll find when trekking the Watkins Glen canyon route, which is what makes the hike so exciting. One of those big surprises is Cavern Cascade.

As you continue along the artificial stone route following the edge of the gorge, you’ll see a stairway connecting the way to your left. Avoid making the turn; Couch’s Staircase, which leads to the South Entrance, lies there.

There has to be a dead end up ahead, it appears at first. All that is visible is a petite 30- to 40-foot-high waterfall that emerges from a valley three meters wide and is formed by eroding beneath layers of harder sandstone. When you continue along the path, you’ll see that it arcs around and beneath Cavern Cascade before going further inside the granite to a further spiral staircase.

But don’t plan to remain dry when encountering the might of Cascade Falls! You’ll definitely want to bring a towel and a waterproof bag if you intend to head into this area. Keep in mind that you don’t have to go around/beneath Cavern Cascade when hiking Watkins Glen State Park – the choice is yours.

The Narrows, Glen Cathedral, and Central Cascade

Hiking the Gorge Trail Watkins Glen State Park + waterfalls and activities
foursquare.com

You will rise a few flights of stairs, hug one side of the canyon, then cross to the other as the Watkins Glen gorge hike passes across Glen Creek.

The Narrows is a stretch of the route shielded from sunlight and light. Thus it is constantly damp and cold—the ideal setting for moss to flourish. Paper-thin gullies are visible as water progressively erodes the fragile sedimentary rock, resulting in a sequence of wispy waterfalls. As you pass an excellent stone bridge that spans the peak of Central Cascade, you will be astounded by more impressive stonework.

The most miniature waterfall inside the gorge is “only “60 feet tall. And while the views get even more impressive up ahead, we recommend snapping a few pictures here!

Rainbow Falls

Hiking the Gorge Trail Watkins Glen State Park + waterfalls and activities
reddit.com

There is much to love about Rainbow Falls, from the waterfalls to the pothole pools, the silvery water dropping from above, the stunning stone bridge and staircase in the background, and the contrast of the bright colors and deep shadows.

Out from this world, metaphors take on new meaning in Rainbow Falls. The view will blow you away!

The reason for the name “Rainbow Falls” is because rainbows are visible when visiting in the late afternoon on a sunny day when the sun’s rays are just right to enter the canyon and reflect and refract in the water droplets. If you’re lucky, you might catch a glimpse of these rainbows!

The emotional punch of Rainbow Falls combines drama, beauty, piercing beauty, striking beauty, and delicacy. The brain needs seconds to fully process what it sees because there is too much information. It’s seriously that beautiful.

You can’t help but admire how well-designed and constructed artificial walkways, staircases, and bridges are. They appear to have been formed by erosion alone, not by man, as they blend in with the gorge.

When your mind is already blown by the rainbow falls, continue beneath the incredibly thin but wide waterfall on your journey.

Spiral Gorge and Mile Point Bridge

Hiking the Gorge Trail Watkins Glen State Park + waterfalls and activities
pinterest.com

The Watkins Glen gorge trail trip still has a couple more jaw-dropping sights up its sleeve, even though Rainbow Falls has served as the hike’s pinnacle.

You will continue down the trail in the confined spiral gorge as you pass other pothole pools, steps, and more Watkins Glen State Park waterfalls.

The smooth portion of the Watkins Glen gorge route is one of the hike’s last sights. Take note of the colorful and curved shale rocks where water flows can rise fully after winter.

We couldn’t get enough of the rock staircases located adjacent to different gorge parts since they all seem like they could be scenes from a fantasy book.

Return to Main Entrance Via Indian Trail

The smallest and least stunning bridge you’ve seen so far is Mile Point Bridge. Indian Trail is by a small cut-through and follows North Rim on the way back to the entrance of Watkins Glen State Park.

There are a few vantage points along the way, including one cemetery, but none offer views that match those inside the gorge itself. So make sure to take your time inside the gorge and get your fill since you can’t go backward.

Returning to your car after leaving the Watkins Glen canyon trail requires hiking twice as far. The only noteworthy pit stop is a picturesque suspension bridge that spans the gorge and connects to South Entrance.

Tips When Hiking Watkins Glen Gorge Trail

Hiking Gorge Trail is a unique experience, but to make the most of your time there, consider following some tips!

Ready Your Hiking Gear

Watkins Glen State Park’s Gorge Trail is often chilly and rainy all year. The area could be rather muddy, and you might get splashed by the waterfalls’ mist. Take a rain jacket if the weather is chilly to stay dry. You won’t get wet, so don’t worry! The Cave of the Winds is not here! Also, ensure your footwear is something you don’t mind getting dirty in.

Beat The Crowd

As indicated earlier, Watkins Glen State Park can become highly congested. Show up early or during shoulder seasons to avoid congestion. Most tour groups prefer to go in the late afternoon, on weekends, or on holidays in the summer.

Make Use of Shuttle

Consider using the shuttle if you don’t have the time or stamina for hiking the Watkins Glen Gorge Trail or even the Gorge Trail and Indian Trail Loop roundtrip. A seasonal shuttle that travels from and to the Upper Entrance is available.

Spend More Time

The Gorge Trail is 1.5 miles long and takes about an hour to accomplish if you hike it. However, allow yourself two hours to unwind and take in the sights of this trek. Take your time; you’ll enjoy Watkins Glen State Park’s splendor more and be a bit exhausted after the hike if you do.

Other Activities in Watkins Glen State Park

Hiking the Gorge Trail Watkins Glen State Park + waterfalls and activities

Do you still have plenty left in the tank after hiking Watkins Glen State Park Gorge Trail? Try these other activities in and near Watkins Glen State Park.

Corning Museum of Glass: You can find stunning glass art at Corning, New York, which is nearby. They were established in 1951 and currently house a collection of over 50,000 glass items, some of which date back over 3,500 years.

Horseback Riding: What more impressive way to see the Finger Lakes than atop a magnificent stallion? You can find a variety of horses to assist you in exploring the area at Painted Bar Stables. You must not miss this Finger Lakes experience!

Seneca Wine Route: Given how close the Finger Lakes is to Niagara’s wine region, it makes sense that they would be a popular stop on wine tours. Drink a glass or two as you tour more than 100 wineries in the area.

New York Waterfalls: You’re in luck if Rainbow Falls isn’t enough! Other stunning waterfalls, including Hector Falls, Ithica Falls, Taughannock Falls, and others, are simply waiting for you to visit in the area of Watkins Glen.

Watkins Glen: There are lots of charming restaurants, delicious ice cream, and even a small brewery in the adorable town of Watkins Glen. Take some time to explore, and while you’re doing so, indulge a little.

Where To Stay Near Watkins Glen State Park

The best way to experience Watkins Glen State Park is to book a hotel room the night before and get up early to hike the gorge route first. Here are the best lodging options in the area:

Watkins Motel

Choosing the best modest hotel in Watkins Glen should not be challenging. Travelers on a strict budget might consider the Watkins Motel, which is a conveniently 3-minute walk from the state park.

The Watkins Motel rooms come with free wifi, an air-con, a fridge, and a desk. There is free parking for guests arriving by vehicle.

Reisinger’s Apple Country is just 2.9 miles from the Watkins Motel, so visitors can easily visit one of Watkins Glen’s most well-known attractions.

You might want to try some filet mignon while you’re in Watkins Glen at one of the eateries in the area, including Seneca Lodge Restaurant or BluePointe Grille.

Don’t forget to visit an art gallery while you’re there, like Quintus Gallery.

The finest of Watkins Glen is at your fingertips, thanks to the Watkins Motel, making your stay pleasurable and restful. It’s one of the best budget places to stay when visiting or hiking Watkins Glen State Park.

Watkins Glen Harbor Hotel

Another excellent lodging option near Watkins Glen State Park is the Watkins Glen Harbor Hotel.

The Watkins Glen Harbor Hotel offers lodging with dining, a free private park, a fitness center, and a bar. It is in Watkins Glen, 5 miles from Watkins Glen International.

A 24-hour front desk, room amenities, and free wifi are just a few amenities offered at this establishment. There are patios with lake views in several of the property’s units.

Every room in the guesthouse has a desk. Apart from a flat-screen TV, air conditioning, and a private bathroom with a shower and bathrobes, some Watkins Glen Harbor Hotel rooms offer a seating area. Towels and couch linens are also available in each room at the hotel.

A spa, wellness center, and hot tub are available to guests at the Watkins Glen Harbor Hotel. Visitors to the hotel will access activities like hiking and fishing in and around Watkins Glen.

Visitors can use the business center, which provides printing, copying, and fax facilities, or dip in the indoor pool.

If you are with your partner when you travel to the state park, you will particularly love this area!

Glen Motor Inn

The Glen Motor Inn is convenient for all of your Finger Lakes activities. Every apartment has an unrivaled breathtaking view of Seneca Lake that is magnificent!

This inn is the ideal place to unwind after a long day exploring wineries, competing in races at Watkins Glen International, or sailing on the lake.

After a day of exploring the neighborhood, you’ll discover that the rooms are cozy, and the swimming patio is a beautiful retreat.

Watkins Glen State Park and Watkins Glen International are within a 15-minute drive of Glen Motor Inn.

Visitors can drop at Montage Italian Grill, which serves dinner, for a bite to eat. Also, Seneca Harbor is 1.5 miles from this motel.

Enjoy the one-of-a-kind amenities that the Glen Motor Inn can give you when you are a guest. Your stay will be enjoyable, from the welcome at the door to the farewell.

The Falls Motel

The Falls Motel is an excellent option for visitors to Montour Falls, and Watkins Glen State Park is only a 5-minute drive away. The setting is affordable, and many valuable amenities are available to make your stay more enjoyable.

The Falls Hotel’s rooms come with air conditioning, a refrigerator, and complimentary wifi, all of which offer outstanding comfort and convenience.

One of the amenities of this motel is a front desk that is open around the clock. Making your stay much more memorable is the on-site restaurant. There is free parking close to The Falls Motel for anyone arriving by car.

The Falls Motel is ideally situated close to Sal’s Bar & Grill and Heavily Brewing Company if you enjoy bars.

There are adequate activities available in the area, including exploring well-known waterfalls like She-Qua-Ga Falls, Havana Glen Park, and Eagle’s Cliff Falls.

Consider staying at The Falls Motel if you want to visit Watkins Glen State Park and other attractions.

Lakeside Resort & 3812 Bistro

The Lakeside Resort in Watkins Glen offers lodging with grilling facilities, a garden with 30 acres of walking pathways, and miniature waterfalls, all within 8 minutes drive of Watkins Glen State Park.

This hotel offers visitors a terrace apart from a standard room. Wifi is available for free.

A coffee maker, microwave, and mini-fridge are in every room, with a hair dryer and shower in the private bathroom’s amenities. Each accommodation at Lakeside Resort has a flat-screen TV with cable networks.

Visitors at Lakeside Resort can take part in attractions in and around Watkins Glen, such as hiking, enjoy stunning views of Seneca Lake from their clean, cozy lodgings, and find peace.

The 3812 Bistro is a perfect place to stop before participating in any activity in the area because it also serves hand-crafted farm-to-table meals for breakfast, lunch, and supper daily, along with local beer, wine, and cider.

Watkins Glen State Park Camping

flickr.com

There are numerous campgrounds and rustic cabins in Watkins Glen State Park for you to explore if motels are out of your price range or you prefer to stay outdoors and surrounded by nature.

The State Park’s South Entrance is where you’ll find the campgrounds and the cabins. Here are several camping options in the state park:

Tuscarora Village Campground

A series of hiking paths within the park are easily accessible from Tuscarora Village, an excellent place to camp.

Most of the campground’s 53 campsites are only appropriate for tent camping, although 12 allow RVs up to 40 feet in length and range from pull-through to back-in sites.

Although there are no amenities at this campground, you can take advantage of the playground, on-site facilities, and showers. You can also use a private picnic blanket and fire ring at this pet-friendly campground. The camp office is close to a water filling and trash station.

Reservations for this campground can be ready up to nine months before, and it is available from late May through mid-October.

Seneca Village Campground

24 of the 47 campsites at Seneca Village are appropriate for RVs from 25 to 35 feet long.

You must log in to each of the sites. The playground, bathrooms, and toilets are available at this animal campground, but there are no hookups.

The camp office is close to a water filling and trash station. You can enjoy a picnic or relax by the fire at the picnic benches or one of the fire rings.

Seneca Village Reservations can also be ready up to nine months in advance, and it is open between mid-June to early September.

Onondaga Village Campground

Onondaga Village has 49 campsites, 26 of which allow RVs up to 25 or 30 feet long.

No connections are available, so you must back your RV into each spot. The Indian or Gorge Hiking trails are easily accessible from this pet-friendly campground.

Picnic tables, fire pits, restrooms, and showers are all available for your use. Near the camp office, visitors can find a water filling station and a disposal station.

Reservations for this campground can be up to nine months in advance, and it is open from June to the beginning of September.

Mohawk Village Campground

Fifty-four campsites at Mohawk Village are accessible to RVs 25 to 40 feet long.

The only campsite in the park with electric hookups, Mohawk Village, welcomes pets. One pull-through site is available, but most areas need you to back in.

Facilities, bathrooms, picnic areas, and a playground are available. The camp office is close to a trash and water filling station.

You can set a booking at Mohawk Village Campground nine months in advance, and it is open between late May to mid-October.

Cayuga Village Campground

Cayuga Village is a campground that welcomes pets and has 49 spaces for tents and RVs.

A total of 33 of the sites can house RVs that are 25 to 40 feet long. There are no utilities at these campsites, so campers must have backups.

The South Pavilion, camp office, and trailer dump station are all located closest to this campground. It has water filling stations, showers, and bathrooms.

Reservations for Cayuga Village can be requested approximately nine months ahead of time, and it is accessible from June through September.

Rustic Cabins

Watkins Glen State Park has several cabins to select from if you want a more rural experience. There are bathrooms and showers in these cottages. The place is pet-friendly, so you’re welcome to bring your furry pals along to stay with you there.

Final Thoughts

Watkins Glen State Park is, without a doubt, among if not the best state park in Finger Lakes. With its bountiful natural beauty, it’s certainly worth the visit. Check out all the incredible Watkins Glen State Park waterfalls, rock formations, plus plenty of other activities.

We hope you find this hiking Watkins Glen State Park guide helpful. Enjoy the incredible views!

Next: 15 Best Hikes In Vermont 

Navajo Loop Trail In Bryce Canyon: The Complete Guide

Heading to the Navajo Loop Trail in Bryce Canyon? You’ve come to the right place! The Navajo Loop Trail is one of our favorite Bryce Canyon hikes and we’re here to guide you every step of the way.

In Bryce Canyon, there are lots of hiking paths. Some only last an hour or less and are less than a mile long, while others last all day. Despite being small, Bryce Canyon National Park offers a lot to wow visitors, and one of the best is the experience on Navajo Loop Trail. The Navajo Loop Trail ranks among the busiest trails for a reason!

What makes Navajo Loop Trail different? The hike is magnificent because of the steep fall into the canyon, the trees at the base, and the vistas on the way up.

The famous Navajo Loop Trail starts and ends at Sunset Point. It goes down switchbacks between narrow walls of colorful limestone, giving you views of tall Douglas-fir trees and Thor’s hammer, the park’s most famous hoodoo.

We definitely recommend that you hike the Navajo Loop Trail if you’re heading to Bryce Canyon. The views are insane and the hike itself isn’t too difficult, making it perfect for all types of hikers.

About Bryce Canyon National Park

Hiking The Navajo Loop Trail In Bryce Canyon Utah: The Complete Guide

Bryce Canyon is one of the most distinctive national parks in the country with its sandstone rock formations and orange and pink hoodoos. With such wide-open views, there is no better spot to let yourself get carried away by nature!

Just behind Zion National Park in southern Utah is where you’ll find Bryce Canyon. Driving time from Salt Lake City is four hours. If you want to take a flight, Las Vegas is the closest airport and is about 4 hours away. McCarran Airport in Las Vegas is an excellent international airport for travelers from a distance.

The park separates into three climate regions: spruce or fir woodland, ponderosa woods, and pinyon pine or desert forest due to the area’s elevation of over 2,000 feet. Despite being bright for most of the year, Bryce Canyon National Park’s weather can be somewhat erratic. Be ready for anything during Bryce Canyon hikes, from virtually daily summertime thunderstorms to significant winter snowstorms.

About Navajo Loop Trail

Hiking The Navajo Loop Trail In Bryce Canyon Utah: The Complete Guide

Among the most popular paths in Bryce Canyon National Park is the Navajo Loop Trail. The trailhead begins just across the street from Sunset Campground and starts by descending into the amphitheater and passing through “Wall Street,” a tiny switchbacked slot canyon between cliffs lined with tall Douglas fir trees.

The trail offers spectacular views of Thor’s Hammer, a well-photographed tall, slender pinnacle with a narrower neck that supports a massive, hammerhead-shaped rock. From the path are also magnificent views of the “Silent City,” where rock formations imitate towers, buildings, and temples. The “Temple of Osiris” is located to the east.

The Navajo Loop Trail is 1.5 miles in length and ascends/descends 550 feet, beginning and terminating at Sunset Point. Most people traverse the loop in 1-2 hours. For a lengthier trek, continue onto the roughly 3-mile Queen’s Garden Loop or Peakaboo Loop. Both of these routes can be connected to form a 6.35-mile figure-eight loop.

There are sections of the trail that give no shade and are quite hot during the summer, and areas shaded by rock formations and extremely chilly. So we recommend bringing enough water and wearing proper clothing with lots of layers.

Hiking The Navajo Loop Trail

The Sunset Point parking lot is the best place to start your journey on the Navajo Loop. Guests can drive or take the Park Shuttle to the parking lot.

From the Bryce Canyon Visitor Center, travel 1.2 miles south on UT-63 to get to the Sunset Point Parking area at the entry to Bryce Canyon National Park. Cross over Sunset Point Road on the left.

Get there early or ride the Park Shuttle because parking can become limited during the busy summer months. A little distance from the Bryce Canyon parking lot is where you’ll find the Navajo Loop Trailhead.

You must make a short hike along the canyon wall to get to Sunset Point from the parking area. This viewpoint is among the most frequented in the park; therefore, there will probably be a crowd there.

Hiking The Navajo Loop Trail In Bryce Canyon Utah: The Complete Guide

You can go a little down into the canyon from Sunset Point by following the Navajo Loop route, marked by a sign.

Sunset Point is the trail’s beginning and end. Choose which way of the loop you would like to hike when the trail forks at the start of the hike.

When To Hike Navajo Loop Trail

Hiking The Navajo Loop Trail In Bryce Canyon Utah: The Complete Guide

Hiking Navajo Loop Trail in Bryce Canyon National Park offers chances for enjoyment throughout the year, but keep in mind that lower temperatures prevail for a large portion of the year due to its high elevation. Daily high temperatures rarely exceed 80 degrees, not even in the summer.

Spring

In the park’s alpine meadows, wildflowers start to bloom, and meandering streams get a fresh start thanks to the recent snowmelt. Expect daytime highs in the 50s and 60s and a nighttime low of about 30 degrees in temperature.

Summer

Summer is the most popular season when daytime temperatures reach the upper 70s and low 80s. Contrary to typical seasonal fluctuations, Bryce Canyon receives the most rainfall throughout the summer. Expect numerous, brief thunderstorms and equally intense downpours.

Fall

As October arrives, lower elevations burst with fall foliage, and people start to diminish. Planning for milder weather is advisable because snowfall as early as October is not unusual.

Winter

Cross-country skis and snowshoes should be substituted for hiking boots once snowfall starts in early December. Winter is also the most incredible season for winter astronomy programs and organized full moon snowshoe hikes.

Where To Stay If You Hike Navajo Loop Trail in Bryce Canyon

Hiking The Navajo Loop Trail In Bryce Canyon Utah: The Complete Guide

There aren’t many campsites and accommodation types in or close to Bryce Canyon because it’s a small (approximately 55 square miles) and inaccessible park.

However, finding a location to put your hiking sticks at the end of each day shouldn’t be too difficult if you do some before planning or having a sense of adventure.

Here are the best options for you to stay near Bryce Canyon if you hike Navajo Loop Trail!

Sunset Campground

Located 1.5 miles south of Bryce Canyon Visitor Center, west of Sunset Point is a choice for car camping. It has 99 sites divided into three loops; Loop A is mainly for RVs, while Loops B and C are tent-only.

There are no available power, water, or sewer hookups. In the summer, a dump station is close to North Campground; the included cost of a campsite. There is potable water close to the dump station. A shuttle stop is available at the entrance of Sunset Campground, which is near Sunset Point.

North Campground

Another option for car camping is North Campground. It lies across the street from the visitor center and has 100 sites divided into four loops: A, B, C, and D.

Campers in RVs use Loops A and B. Tent campers should use loops C and D.

There are no available power, water, or sewer hookups. In the summer, a dump station is close to North Campground; use includes the cost of a campsite. There is potable water close to the dump station.

The Fairyland Loop/Rim Trail, General Store, and North Campground are all nearby.

Backcountry Camping

Get away from the tourists and explore Bryce Canyon’s backcountry to learn more about its distinctive geology and ecology. Up to 48 hours in advance, backcountry licenses are available at the visitor center for $5.

Two paths, the Under-the-Rim Trail (22.7 miles, eight sites) and the Riggs Spring Loop, provide access to backcountry camping (8.9 miles, four campsites). Only specific grounds are available for camping.

The Lodge at Bryce Canyon

At this historical lodge, established in 1924, rooms fill up quickly. The place, which has 70 modest accommodations, 40 cabins, three suites, and a studio, is close to the Bryce Amphitheater. Also, it has a restaurant open for breakfast, lunch, and dinner.

Towns

Hiking The Navajo Loop Trail In Bryce Canyon Utah: The Complete Guide

Throughout Bryce Canyon National Park, little villages are dispersed and provide various lodging options and dining establishments.

The Bryce Canyon Shuttle serves Bryce, which is the nearest and is located one mile from the park. Hatch, 24 miles from the national park, is conveniently on Highway 89, allowing faster access to Zion and the Grand Canyon.

Tropic, 10 miles from the park, or Cannonville, 15 miles from the national park, are excellent bases for people who want to explore Grand Staircase-Escalante National Monument.

What To Bring When Hiking the Navajo Loop Trail

Hiking The Navajo Loop Trail In Bryce Canyon Utah: The Complete Guide

To have an easy time hiking the Navajo Loop Trail and have a satisfying experience, here are the things you should not forget!

Food and Water: You will be hiking in a high-altitude environment, which can lead to dehydration, so it is best to bring ample water. Apart from water, do not forget packed lunch or snacks to eat while tackling the trail.

Hiking Gear: You can’t put just anything on the Navajo Trail because it’s a strenuous journey. While trekking some of the more challenging sections of the trail, it’s crucial to wear the appropriate footwear. Hiking poles can even be advantageous for some hikers.

Light Jacket: While hiking throughout the day, you’ll want to wear hiking gear because you’ll be hot. Eventually, as the sun sets, it will be freezing! You’ll want to be ready because the weather in Bryce Canyon changes dramatically from day to night.

Blanket: Red soil on the Navajo Loop Trail can ruin your clothes beyond belief. We advise carrying a small blanket with you on your trip if you want to pause, take a breather, and relish a picnic lunch.

Hats and Sunscreens: Even though you’ll be moving through a canyon, once the sun is right overhead, you won’t be able to hide from it. So it’s essential to pack a sturdy hat and sunscreen.

Camera: Not essential, but it is great to have a camera around. You’ll start looking back years later and regret taking all of your photos of Bryce Canyon with a blurry camera! Your photos will last a lifetime, so do not forget to bring a decent camera, preferably a small and lightweight one.

Hiking the Navajo Loop Trail

Are you ready to finally take the route? Here is what you would expect when you embark on your journey at Navajo Loop Trail.

Sunset Point

Hiking The Navajo Loop Trail In Bryce Canyon Utah: The Complete Guide
tripadvisor.com

Your experience begins at Sunset Point. From this vantage point, you can appreciate the Silent City and the numerous hoodoos that comprise Bryce Canyon National Park. Hike along the Rim Trail from Sunset Point until Sunrise Point if you want to discover more.

After admiring the scenery from Sunset Point, proceed to the rim and follow the signs to the beginning of the Navajo Loop Trail. Be sure to get some hydration and use the parking area toilet before leaving.

The Fork and Thor’s Hammer

Hiking The Navajo Loop Trail In Bryce Canyon Utah: The Complete Guide
flickr.com

You’ll have the option to turn left toward the Twin Bridges or right into Wall Street soon after beginning the Navajo Loop trail.

If you are beginning your morning hike, it is advisable to proceed toward Twin Bridges. You’ll have better lighting within the slot canyon region if you save Wall Street for later in the day.

You’ll begin a sharp drop into the canyon shortly after passing the fork. The trail will be straightforward before giving way to a lengthy string of tightly spaced switchbacks.

As you begin the switchbacks, keep an eye out for one of Bryce Canyon’s most famous hoodoos. It would be best if you didn’t miss seeing Thor’s Hammer, which towers proudly above the barren terrain. As you make your way downhill into the canyon, it will be to the left.

Canyon Floor

Hiking The Navajo Loop Trail In Bryce Canyon Utah: The Complete Guide
tripadvisor.com

You will eventually descend past Thor’s Hammer and reach the canyon floor. A fantastic trail that crosses high walls and grows irregular trees can be spotted here. Although this section of the path has no official name, it was an exciting part of the trip.

You’ll find some tree cover here, which is nice if you’re trekking in the summer when the sun is already blazing at eight in the morning.

Twin Bridges

Hiking The Navajo Loop Trail In Bryce Canyon Utah: The Complete Guide
flickr.com

The Twin Bridges is the next significant landmark you’ll encounter along this trail. These arches were slit open into sandstone bridges that hung overhead like a city sidewalk, which is how they received their name.

Due to their fragility, the Twin Bridges come with several signs warning against approaching or attempting to cross them. Please obey the park rules while there since it is for your safety.

From a distance, they are equally spectacular, so feel free to gawk, take some pictures, and keep walking. There is yet more beauty to behold!

Trail Split Junction

Hiking The Navajo Loop Trail In Bryce Canyon Utah: The Complete Guide
intermountainhealthcare.org

You will leave the high canyon walls and enter the more exposed part of the canyon floor if you continue on the route from the Twin Bridges. From this point on, follow the path until you come to a trail divide.

Here, you get to decide how the remainder of your trekking day will pan out. You should keep to the right and follow the arrow that leads to Wall Street if you only have a short period and want to trek the Navajo Loop Trail. You’ll return to Sunset Point by doing this.

If you want to extend your journey, turn left to connect the Peek-A-Boo Loop or keep on to reach Sunrise Point on the Queen’s Garden Trail. Carry on reading to absorb more about these choices!

Wall Street

Hiking The Navajo Loop Trail In Bryce Canyon Utah: The Complete Guide
tripadvisor.com

If you want to finish the Navajo Trail, turn right and follow the canyon floor route until you reach the stunning Wall Street entrance. It is simple to understand why Bryce Canyon National Park attracts so many visitors from throughout the nation when you step foot inside the canyon.

You’ll think you’ve entered a different world with its tall stone cliffs and Mars-like scenery.

You begin your journey within Wall Street at the canyon’s floor and travel through several high-walled slot canyons. Before you get to the top of the wall, the trail winds around like this.

From this point, you can anticipate taking a well-traveled and challenging route towards the canyon wall and Sunset Point. You won’t have to hike straight up because there are switchbacks in the path.

Drink plenty of water and take frequent pauses, if necessary. Most critical, halt and turn around! Thanks to this, you’ll also get some breathtaking aerial panoramas of Wall Street.

Best Add-On Hikes When Hiking the Navajo Loop Trail

What if you’ve completed the Navajo Loop Trail but still want more? Consider these other options for adding onto your hike!
Navajo Loop (Counter Clockwise)

1.4 miles | 459 feet elevation gain | Moderate 

You can also hike Navajo Loop counterclockwise, even if neither side is straightforward. Most other hikers complete the loop clockwise, which places Wall Street as the hike’s ascent.

Since your legs and lungs are on fire, it is difficult to appreciate its vastness. It becomes more apparent how enormous these walls are as one descends into the emptiness of this seemingly unfathomable hole.

Second, if you climb the Navajo Loop’s north portion uphill, there are a couple of fantastic rest stops. Thor’s Hammer, Two Bridges, and the expansive views of Bryce Valley and elsewhere are all excellent reasons to pause and breathe in some much-needed oxygen.

To hike this loop, turn right at the junction underneath the rim, go over Wall Street, then keep to the left at the split just below the canyon’s bottom.

Navajo Loop to Queen’s Garden

2.5 miles | 600 feet elevation gain | Moderate 

This well-liked loop connection is ideal for hikes of moderate length. Hikers can experience the true essence of Bryce Canyon National Park by linking the Navajo and Queen’s Garden paths.

Stop underneath the rim to get a bird’s-eye view of Thor’s Hammer, Bryce Canyon’s largest hoodoo at 150 feet. Next, take the right branch on the route to descend through Wall Street’s terrifying switchbacks.

The key to this loop is to turn left at the main intersection at the bottom of the canyon. The track is well-marked, so if you catch yourself climbing steadily immediately, do a U-turn at Two Bridges and pretend you knew where you were going.

You can access the Queen’s Garden connector to get right there. To return to the top at Sunrise Point, you must make a strenuous ascent.

Navajo and Peek-A-Boo Loop

4.5 miles | 1,400 feet elevation gain | Difficult 

The Navajo/Peekaboo Trail’s figure 8 loop is the best option for lengthy hikes. Turn right on the first split below the rim to start this loop, then enjoy the breathtaking descent via Wall Street.

At the crucial intersection at the bottom of the canyon, turn right into the connection route. You will reach the Peekaboo Loop using this Connector. From here, it’s on you whether to go left or right.

Be aware that while horseback rides follow the loop clockwise, going counterclockwise is the less-dusty choice. As an alternative to making the entire Peekaboo Loop, you could take the challenging one-mile uphill offshoot to Bryce Point and catch the Park Shuttle back.

Take the connecting trail back towards the Navajo Trail to complete the loop if you decide.

Other Trails to Hike in Bryce Canyon National Park

Hiking The Navajo Loop Trail In Bryce Canyon Utah: The Complete Guide

If you stay longer in Bryce Canyon National Park and are curious about what other trails you can hike, these are some that you can try!

Queen’s Garden Trail

The Queen’s Garden Loop Trail is the best short hike to see the spectacular hoodoos of Bryce Canyon.

As hikers descend from Sunrise Point, they face hoodoos of all different sizes. On a clear day, the 80-mile-distance top of Navajo Mountain is visible on the horizon.

A closer look at the hoodoo structures reveals a color scheme of white, vermillion, yellow, pink, and purple. Pose for pictures within the custom tunnels that pass directly through the rock fins of Bryce Canyon.

Her Majesty is waiting at the trail’s finish. Have fun identifying her among the weirdly formed white rock pillars and try to figure out where she is lying. Searching for people, animals, and patterns in the Queens Garden Loop Trail hoodoos can let your imagination go wild.

Rim Trail

The Rim Trail offers the best access to Bryce Canyon National Park without descending into the canyon. Visitors can begin their breathtaking 5.5-mile journey along the rim of Bryce Canyon’s amphitheaters, either Fairyland Point or Bryce Point.

Peer over the verge if you dare and look down into the chasms of the Silent City.

As you travel from Bryce Point to the appropriately called Inspiration Point, stroll among stoic pine forests and ancient bristlecone pines. You can watch hikers ascending Wall Street’s steep switchbacks from Sunset Point.

Between Sunrise Point and Fairyland Point, pay attention to the aspen’s trembling rustling. At the same time, the world’s most extensive array of hoodoos is right beneath your feet.

Put on your snowshoes for a spectacular winter stroll above Bryce Canyon’s icy spires and pinnacles. The Rim Trail at Bryce Canyon offers unending views.

Tower Bridge Trail

The Tower Bridge Trail, a section of the Fairyland Loop Trail, is the ideal intermediate-distance hike for hikers to Bryce Canyon National Park.

Take in views of some of the most recognizable hoodoo formations in Bryce Canyon National Park, including the Chinese Wall or Crescent Castles.

At the midway mark of this climb, the Tower Bridge, the show’s true star, is waiting. You can reach the foot of this creation, which resembles London’s most iconic structure, by way of a 200-yard-long spur trail.

Wait a bit to take in the stunning natural architecture before beginning the ascent back to the rim. You might even meet the Steller’s Jay, a graceful park inhabitant.

Active hikers can opt to add a few more miles by continuing on the Fairyland Loop Trail.

Mossy Cave Trail & Bristlecone Loop Trail

Families will love these beautiful, quick hikes. Mormon settlers dug an irrigation ditch from the East Fork of Sevier River in the 1890s along the short (0.8 miles roundtrip) Mossy Cave Trail.

It has a small cascade and Mossy Cave, an underground spring-formed grotto with an overhanging that is wrapped in moss or, during the winter, with icicles.

The one-mile Bristlecone Loop Trail meanders through a spruce and fir forest and passes past cone-bearing pines that are close to 1,800 years old while traversing the highest part of the park, rising to a height of 9,100 feet.

Tips To Have The Best Hiking Experience at Bryce Canyon

If you hike Navajo Loop Trail or any other hikes in Bryce Canyon, these few things will help you get the best out of your time experiencing each!

Start Early: Early arrival has many benefits. You can avoid the crowd and avoid the midday heat during summer.

Don’t Rush: The elevation of Bryce Canyon is relatively high. Even with short climbs, it is typical to feel out of the air in this location. Taking your time and taking multiple breaks to gather your breathing on the way back up is best because the last ascent out of the amphitheater might be difficult.

Connect Hikes: To enjoy further what the canyon offers, consider connecting different hikes if possible. This way, you’ll be able to take in the scenery better than just taking a stroll on a single trail.

Guided Tours: You can opt to join a guided tour around the canyon for convenience. Guides can give you knowledge, share a great spot in the area, and access other things that are difficult to do on your own.

Other Activities To Do After Hiking the Navajo Loop Trail

Hiking The Navajo Loop Trail In Bryce Canyon Utah: The Complete Guide
astropics.com

If you get tired after hiking the Navajo Loop Trail or any other trails, here are some additional activities you can do while at the Bryce Canyon National Park.

Stargazing

The National Park Service has referred to Bryce Canyon as “the last grand sanctuary of natural darkness” because of its better air quality and lack of light pollution.

Since 1969, the area has held regular astronomy-trained ranger-led midnight viewing events. These guides, also known as “Astronomy Rangers,” plan stargazing excursions for guests interested in learning more about the night sky.

Visitors can see the whole spectrum of the Milky Way’s pulsating hues and the shadows Venus and Jupiter’s brilliance cast on the atmosphere.

The Salt Lake Astronomical Society (SLAS) sponsors the park’s annual astronomy festival, which is open to enthusiastic stargazers. Moon lovers should plan their trip to match a full moon, including ranger-led full moon hikes.

Scenic Driving

The numerous picturesque overlooks that line Highway 63’s 18-mile route through the park’s central area offers some of the best perspectives of the entire area.

As you travel south, the eastern portion of the park road, or the left, is where all of the park’s overlooks are available.

These include the Sunrise, Sunset, Inspiration, and Bryce perspectives, among many more. Hang a left only one mile down the park’s border onto the route to Fairyland Canyon, where the hoodoos are at the line of sight, to get a close-up look of the red-rock spires.

Horseback Riding

Swap your hiking poles for reins and grab a ride on a horse or mule to the Bryce Amphitheater from spring through fall. An adventure unlike any other in the park, the wranglers at Canyon Trail Rides provide 2 to 4 trips into the amphitheater on a designated horse trail along the Peek-A-Boo Loop Trail.

Winter Sports

Bryce Canyon’s colors start to stand out in the winter. Bright white snow contrasts dramatically with the cliffsides’ crimson, pink, and orange rock spires.

The Fairyland Road or Paria Point Road remains unplowed for cross-country skiers and snowshoers. At the same time, most of the park’s other routes are still accessible to hikers using hiking boots with additional traction, such as mountaineering crampons.

After significant snowfalls, join one- to two-mile ranger-led snowshoe excursions that depart from the visitor center for a guided tour of Bryce’s frozen attractions.

Cycling and Mountain Biking

Cycling is permitted on all park roads, although not on trails or off-trail areas. On Scenic Byway 12, which passes through the northeastern portion of Bryce Canyon, road cyclists can put their endurance to the test.

Although the journey is challenging due to the steep elevation climbs and several switchbacks, the breathtaking sights are guaranteed to ease your aching legs.

Mountain bikers can experience their delights on open trails close to the park. One of them is Thunder Mountain Trail, 8.1-mile one-way singletrack that winds through ponderosa pines and is generally smooth, hard track to provide breathtaking views of Thunder Mountain.

The Cassidy Trail got its name after the gunslinging criminal Butch Cassidy, who formerly roamed these parts; it is 8.9 miles long and offers rides through red cliffs and pine forests. The Casto Canyon Trail is 5.5 miles long.

Final Thoughts

We threw out some other activities for you to do there! Bryce Canyon National Park is indeed a sight to behold. Hikers and non-hikers alike will find something to meet their outdoor desires.

Either hiking the famous Navajo Loop Trail, combining it with other trail systems in the area, or engaging in a scenic drive, the park will not disappoint.

Hopefully, this Navajo Loop Trail hiking guide gave you a good idea of where to start. Hiking the Navajo Loop Trail is amazing and is one of those hikes that’s totally worth it! It’s absolutely one of our favorite Bryce Canyon hikes and is where we recommend any hiker begins the journey at Bryce Canyon.

Related: Zion To Bryce Canyon: 2, 3, and 4 Day Road Trip Itineraries


22 Best Things To Do In Idaho Springs, Colorado

Idaho Springs is one of our favorite hidden gems in Colorado because it’s full of wild west history and feels like it belongs in the past. If you are looking for the best things to do in Idaho Springs, Colorado, or are new to the city, this article is for you!

A few miles west of Denver, along Clear Creek Canyon, you can find the town of Idaho Springs nestled in the mountains above Golden. It’s only about an hour’s drive from Boise, making Idaho Springs accessible to tourists. But many tourists drive right by and don’t know that Idaho Springs exists!

150 years ago, Idaho City was the largest city in the Northwest. At the time, it had more than 7,000 inhabitants and was larger than Portland, Oregon. It was primarily an influx of miners seeking gold that caused this. About 3,000,000 ounces of gold were produced, equivalent to almost a billion dollars at current gold prices.

In the years following the mining decline, Idaho City’s population was drastically reduced to approximately 104, making it a ghost town. Although Idaho City no longer technically qualifies as a ghost town, its charm and history still make it special. It has around 485 inhabitants now.

If you want to learn about history and experience natural Colorado, we highly recommend you check out Idaho Springs. Surprisingly, there are a ton of activities to do in this small town. Here are our favorite 22+ things to do in Idaho Springs!

Quick Guide:

22. Relax at Indian Hot Spring

Best things to do in Idaho Springs | Idaho springs CO | Colorado travel | Colorado vacation in Idaho Springs

On the way back from the mountains, Indian Hot Springs provides a relaxing diversion. It is one of the nearest hot springs to Denver, conveniently situated in Idaho Springs, Colorado, off Interstate 70.

The resort has a swimming pool fed by hot springs, private baths, caverns, housing, a gift store, and a café. There is also a comprehensive spa with a variety of treatments.

The indoor swimming pool has a tropical dome filled with hot mineral water. Banana trees, palm trees, and other flowering plants are all around the pool, making it a unique tropical experience in the middle of Colorado. In addition, many of the outdoor jacuzzis are filled with mineral water between 106 and 110 degrees Fahrenheit and enclosed by privacy fences; these jacuzzis are available for rental.

Due to the clothing-optional nature of the caverns, kids and teens under 18 are not allowed to enter.

You can rent one of eleven private indoor rooms if you want a more private hot springs experience. Each features a single 8′ by 4′ by the 3′-deep tub. They are full of hot mineral water and are about 106° F. “Club Mud” has mud baths where you cover your whole body in clay full of minerals. The mud will take the toxins out of your body and make you feel calm and rejuvenated.

If you want to feel like you’re a part of nature while still being pampered then this is by far one of the best things to do in Idaho Springs. But make sure to carve out at least half a day for the mineral springs – this isn’t an experience you want to rush through!

21. Drive The Mount Evans Scenic Byway

Best things to do in Idaho Springs | Idaho springs CO | Colorado travel | Colorado vacation in Idaho Springs

Mount Evans Byway is North America’s highest (in altitude) paved road. Along the 28-mile journey to over 14,000 feet, there are many things to see and do, such as high alpine lakes and beautiful wildlife.

The Mount Goliath Nature Area, Summit Lake Park, and the Crest House at the top are all great places to stop along the byway. It’s also worthwhile to visit Echo Lake Park, near the Mt. Evans Welcome Station. The trip starts at 7,526 feet in Idaho Springs and winds up to 14,130 feet.

South of Idaho Springs, at about 10,600 feet, the second half of the drive-by Echo Lake starts. For the next 14 miles, you can follow the road to the top. Once you get to the top parking lot, it’s a short but worthwhile hike to the 14,271-foot summit.

You must pay a vehicle fee per visit if you plan to park at the top.  It’s open from late May to the middle of October.

On the Mt. Evans Recreation Area and Scenic Byway, there are many things to do besides drive. You can go biking, camping, fishing, and hiking.

Lastly, you’ll have access to enjoy Echo Lake Park, the Nature Center, and Summit Lake Park.

20. Go Rafting In Clear Creek Canyon

Best things to do in Idaho Springs | Idaho springs CO | Colorado travel | Colorado vacation in Idaho Springs

Clear Creek provides exciting rafting adventures near Denver and right near Idaho Springs. As the creek travels downstream from Idaho Springs, it follows a bunch of dramatic twists and turns, making it perfect for white water rafting. Clear Creek has the most rapids per mile of any professionally rafted river in Colorado!

This tiny river offers beginner, intermediate, and expert excursions. The season typically lasts from mid-May through the end of August. If you’re searching for tricky and adrenaline-packed rapids, Clear Creek is definitely the place! There are quarter, half, and full-day excursions available.

Check out one of our favorite rafting companies here!

The Dumont section is the first popular whitewater rafting part of the Clear Creek River. Before reaching the hamlet of Idaho Springs, the route runs over 5.5 miles of Class III-IV whitewater rapids. The Dumont section is fun and exciting but not too complex, making it perfect for novice rafters.

Black Rock is the most challenging portion of Clear Creek, and even professional rafting companies seldom choose to navigate it. Black Rock is exceedingly difficult, with Class IV – V rapids covering a total of 6.5 miles of steep and narrow streams. This part is for experienced riders only.

White water rafting in Clear Creek is definitely one of the best things to do in Idaho Springs for adrenaline junkies! We highly recommend booking an excursion with a professional company – Clear Creek Rafting Co. is great.

19. Explore the Trails Around Echo Lake Park

Best things to do in Idaho Springs | Idaho springs CO | Colorado travel | Colorado vacation in Idaho Springs

Echo Lake Park, located right near Mt. Evans, is a fantastic destination if you’re searching for a spot to appreciate nature and have a good time. The park has several trails for hiking and biking and a lake for swimming and fishing.

The 0.8-mile-long, out-and-back Echo Lake Trail traverses Echo Lake. The simple trek to Echo Lake Lodge offers views of the lake and Mount Evans as it winds through the forest. Dogs are permitted but must be on a leash.

There are some really gorgeous views at Echo Lake! We definitely recommend it if you’re looking for an easier but picturesque hike.

Check out more info about the available trails here.

18. Hike St Mary’s Glacier

Best things to do in Idaho Springs | Idaho springs CO | Colorado travel | Colorado vacation in Idaho Springs

The trip to St. Mary’s Glacier offers breathtaking panoramic views, just what you’d expect from the perfect short hike in Colorado. You can get stunning views of the Rocky Mountains to the west by walking around St. Mary’s Lake and climbing up the glacier, too.

If you hike to the top, it is a short journey—a 1.5-mile round trip—but if you only walk to the lake and back, it is just about a mile. Since there is always snow above the lake, the St. Mary’s Glacier Trailhead, approximately an hour from Denver, is a terrific place to escape the summer heat. It gets seriously cool up there, even in the hottest months!

Check out more information about the available trails here.

St. Mary’s Lake is stunning, particularly in the early morning stillness when the glacier is reflected in the lake’s mirror surface. Before starting the climb back down the mountain, it’s a great area to enjoy a picnic.

It only takes around three-quarters of a mile to reach the top of St. Mary’s Glacier, but the path is shockingly steep and rough. Smaller kids find it challenging to clamber over some more immense boulders along the way. We recommend going to the top if you’re an intermediate-advanced hiker. Otherwise, the hike to the lake is plenty!

The path is mostly dry in the bottom part, but as you get to the glacier, you have to cross a lot of wet, thick snow. We advise wearing hiking boots or, at the absolute least, wearing traction-enhancing, water-resistant shoes.

17. Discover Argo Gold Mine & Mill

Best things to do in Idaho Springs | Idaho springs CO | Colorado travel | Colorado vacation in Idaho Springs

The Argo Gold Mine & Mill is a national historic monument approximately 45 minutes outside Denver. The tunnel, the mine, and the mill focus on year-round excursions guided by seasoned guides. There is a live demonstration of how to crush, grind, and drill rocks.

It all began in 1893 when the Argo Tunnel was constructed. The tunnel reached Central City, about 4.5 miles distant, after 17 years. The tunnel enabled the delivery of gold from several mines along the route, making it a really important area during the gold rush.

Argo’s Mill processed mined gold ore. When finished, the Argo Mill was the biggest of its type in the world. It processed more than $100 million of gold ore at prices between $18 and $35 per ounce.

Gold Mine tours run for one hour, so wear comfortable footwear and a light jacket: it can get chilly in the mines. You’ll learn about the history of the mines, take the tour, and get the opportunity to try gold panning. Plus, you can keep any jewels you discover. You can even purchase bags of soil guaranteed to contain placer gold and gems.

We LOVE any history about the Gold Rush so this was right up our alley. It’s definitely one of our favorite things to do in Idaho Springs!

Check out more details about tour availability here.

16. Visit The Underhill Museum

Best things to do in Idaho Springs | Idaho springs CO | Colorado travel | Colorado vacation in Idaho Springs

Dr. James Underhill arrived in Idaho Springs in 1897 and was a notable surveyor and mining engineer in Colorado. He left behind several books on surveying as a significant part of his legacy.

Dr. Underhill attended the University of Colorado in Boulder and was the first person in Colorado to get a Ph.D. in geology. He became a professor at the Colorado School of Mines later on.

In the Underhill Museum, you can view fine furniture from the period, nineteenth- and twentieth-century images of Idaho Springs, and rare Underhill family antiques. It’s basically a museum of all things relating to Idaho Springs, Dr. Underhill, and the mines.

Lucy Underhill’s Victorian Garden and Courtyard sit in the residence’s backyard. She was a passionate gardener who cultivated delphiniums considerably taller than herself. She delighted in hosting her visitors in the courtyard.

If you’re interested in more specific town history, this is one of the most unique things to do in Idaho Springs. It’s really niche but you’ll learn some info you won’t find anywhere else.

15. Have A Drink At Tommyknocker Brewery & Pub

Best things to do in Idaho Springs | Idaho springs CO | Colorado travel | Colorado vacation in Idaho Springs

Tommyknocker Brewery & Pub, founded in 1994, has become a mainstay in Idaho Springs thanks to its award-winning craft beer and cuisine. Since its inception, Tommyknocker Brewery & Pub has received more than 100 medals in various local, national, and international contests.

This place is a must for everyone wanting the authentic Colorado dining experience. German Bocks, Cocoa/Honey Winter Blend, Pumpkin Harvest Ales, Own Custom Line of Sodas, and a lengthy list of craft beers are among their award-winning selection!

With their American-style cuisine, everybody can choose a meal that pairs well with their beer. You’ll find salads, sandwiches, shakes, burgers, classic pub fare, regional specialties, and local food on the menu.

If you’re going to indulge in food and drinks, why not do it at Tommyknocker Brewery & Pub? It’s a local favorite for a reason!

14. Go Skiing At Echo Mountain

Best things to do in Idaho Springs | Idaho springs CO | Colorado travel | Colorado vacation in Idaho Springs

Visiting in winter? Echo Mountain Park, the nearest ski resort to Denver, is between Idaho Springs and Evergreen and is a must-do if you’re a skier.

This site is an ideal mountain for night skiing close to the capital city. It is also suitable for freestylers and those seeking to improve their racing technique. In addition, a newbie learning their sport will find a home here.

The mountain boasts several intermediate runs. There are rails, jumps, a black diamond tree run, and a double chairlift to return to the summit. It’s a little ski resort, but it’s nearer to the city, more affordably priced, and offers breathtaking views of the Front Range. Several routes are devoid of jumps and rails, making them ideal for cruising, too.

In addition, Echo Mountain Park is a large winter playground for beginner/intermediate skiers and snowboarders, as well as freestyle skiers and riders wanting to have fun. It is constantly developing new features to enhance the freestyle experience. In the Westside Glades, Echo even provides tree skiing.

On certain nights, night skiing is one of the most popular activities at Echo. Night skiing is available until 9 p.m. after other Colorado ski resorts have shut down.

13. Go Underground At Phoenix Gold Mine

Best things to do in Idaho Springs | Idaho springs CO | Colorado travel | Colorado vacation in Idaho Springs

Phoenix Gold Mine is a working gold mine located close to Idaho Springs that offers tours led by qualified and experienced personnel. The journey is around an hour long and ascends 750 feet into the mountain.

The price of your excursion includes gold panning. Try your luck and take some genuine gold with you! Next to the mine is a creek where panning takes place; this stream brings gold from the mountains to the mine, where teachers teach gold panning.

The annual average temperature within the mine is 45 degrees Fahrenheit, so dress correctly. Bring suitable footwear, water, and a packed lunch, since none are given at the mine. There are scenic picnic places nearby but you’ll have to have all of your own food and supplies.

12. Fuel Up At Smokin’ Yard’s BBQ

Best things to do in Idaho Springs | Idaho springs CO | Colorado travel | Colorado vacation in Idaho Springs

With more than 35 years of experience in the culinary industry, this three-brother-run barbecue restaurant has helped bring authentic flames, taste, and warmth to Idaho Springs.

Smokin Yard’s BBQ has made a name for itself by being one of the most incredible barbecue restaurants in the Rockies — a must-visit establishment for everyone traveling through this region.

It provides barbecue staples like pork, chicken, brisket, Sloppy Joe, and Po’ Boy. In addition to these barbecue basics, Smokin Yard’s BBQ offers a variety of traditional side dishes. There is a complete bar with unique brews and local beers. Relax and enjoy the authentic BBQ atmosphere and experience!

It is the perfect location for your next dinner since it offers enough portions to satisfy even the most ravenous diners, complimentary boiled peanuts, a variety of sauces, and outdoor seating. If you’re looking for the best things to do in Idaho Springs for the full local experience, you definitely need to stop into Smokin Yard!

11. Eat Pizza At Beau Jo’s

Best things to do in Idaho Springs | Idaho springs CO | Colorado travel | Colorado vacation in Idaho Springs

Every day in Colorado has the potential to be an adventure, and Beau Jo’s believes that your pizza should be as spectacular. Beau Jo’s, originators of Colorado’s most fabulous pie, is your local hangout and the go-to destination for truly excellent Colorado-style pizza.

So, what exactly is Colorado-style pizza? It’s the type of pizza you need after a day of visiting our beautiful state; it’s sold by the pound and meant to provide an unfathomable quantity of cheese, toppings, and sauce.

Named after the crust mountains that provide a one-of-a-kind confinement system for your preferred pizza toppings, the restaurant’s distinctive mountain pies are a substantial dinner that will fill just about anyone. Beau Jo’s pizzas are legendary in Colorado for a reason!

Our Mountain pie features a hand-rolled edge of daily-made dough to satisfy an adventurous appetite that acts as a barrier to hold in a mountain of fresh toppings. The Mountain pie sizes are one, two, and five in pounds. The crust provides a built-in dessert for honey dipping. When ordering sizes, we recommend one pound per hungry individual.

The prairie pie lacks a hand-rolled edge and has fewer quality ingredients. The prairie pie is available in small, medium, large, and extra-large sizes. The pizzas match Colorado’s varied topography, from mountains to plains.

If you love pizza, this is the place to visit when you are in Idaho Springs!

10. Grab A Bite At The Vintage Moose

Best things to do in Idaho Springs | Idaho springs CO | Colorado travel | Colorado vacation in Idaho Springs

This down-to-earth and welcoming pub debuted in 2009 and has since been a popular place for residents and tourists to unwind and drink with friends. Everyone is welcome at Vintage Moose, renowned for its friendly and knowledgeable employees who provide delicious drinks and fast food. They were voted 2019’s Best Nightlife for a reason!

According to the Vintage Moose’s owners, “When you’re here, you’re a local.” And it’s true: the Moose really gives off the feeling that you live in Idaho Springs. If you want to go back in time and experience life in a Colorado small town, this is the place to be.

The food is kept light and essential so that you can enjoy their extensive range of booze and drinks! Local, domestic, and international beers are available, plus the Moose serves food until closing time, so it’s a great place for late-night bites.

Regardless of where you’re from, The Vintage Moose is your neighborhood dive bar in Idaho Springs.

9. Shop on Miner Street

Best things to do in Idaho Springs | Idaho springs CO | Colorado travel | Colorado vacation in Idaho Springs

Miner Street shopping is a must-do among the activities to do in Idaho Springs. Of course, you must take something with you when leaving one of Colorado’s most excellent mountain communities!

Idaho Springs shopping provides more than simply souvenirs and trinkets. Find lovely antiques at Annie’s Gold, trendy tie-dye clothing at A Vivid Earth, and aromatic mixes at the Spice and Tea Exchange.

Or visit Feral Mountain Co., which is also one of the favorite shops in Idaho Springs. This reasonably priced company offers new and pre-owned outdoor equipment suitable for various outdoor activities.

Don’t miss The Hospice Shop and Heartisan Boutique, housed in historic structures in lovely downtown Yreka of the street! This shop provides a superb selection of hand-made, one-of-a-kind, and gently worn quality things. You can find some serious treasures here, especially since many wealthy travelers stop off on their way to some of Colorado’s top mountain towns and donate designer pieces.

8. Drink Local Beer At Westbound & Down Brewing Co.

Best things to do in Idaho Springs | Idaho springs CO | Colorado travel | Colorado vacation in Idaho Springs

The Westbound & Down Brewing Company is another fantastic place to enjoy delicious cuisine and drinks!

It is referred to as a “brew-pub,” but they provide more than chicken wings and celery sticks. As it should be, its cuisine is prepared with as much attention as its beer.

Find some of your favorite foods and spend some time having fun here with your friends! Again, the Westbound is a great place to try some local brews and experience true Idaho Springs culture.

7. Eat Ice Cream At Sit N Chill

Best things to do in Idaho Springs | Idaho springs CO | Colorado travel | Colorado vacation in Idaho Springs

Sit N Chill Ice Cream is a family-owned business that serves the unique ice cream flavors in town! They have ice cream, fudge, sundaes, shakes, and even a store where you can buy souvenirs.

When there are a dozen kinds of ice cream, deciding which one you want can be hard because they’re all delicious. Sit N Chill also has Colorado-made drinks like the Jack Daniels, which is coffee ice cream with Jack Daniels® and chocolate chips mixed in, and the Sleepless (coffee ice cream mixed with chocolate-covered coffee beans).

The ice cream shop can also provide a variety of delectable fudge. If you want a chewy, chocolatey treat, you can choose from flavors like Red Velvet, Peanut Butter, or Mint. Stop by and see what new flavors they have this week.

At Sit N Chill, you can get a dessert and enjoy the view of historic Miner Street. This is the best dessert in Idaho Springs!

6. Hike Summit Lake Park

Best things to do in Idaho Springs | Idaho springs CO | Colorado travel | Colorado vacation in Idaho Springs

If you are a hiking enthusiast residing near Idaho Springs or planning a trip there, you should include this location in your list of hiking destinations. Summit Lake Park, a 40-acre park purchased by Denver in 1924, is regarded as Denver’s highest mountain park at roughly 12,800 feet.

Summit Lake is a prime example of the contiguous United States Arctic tundra. It is between the villages of Evergreen and Idaho Springs on Mount Evans.

This national natural landmark is 3,836 feet above sea level and visually displays the alpine tundra environment. Because of the extreme cold, wind, and poor soil conditions, there are no trees at this height, making it a really unique spot.

Summit Lake originates from Bear Creek, which runs through Mt. Evans Wilderness. This vast wilderness region borders the Arapaho National Forest and the Mt. Evans Special Wildlife Area.

The park is accessible through Mt. Evans Road along Mt. Evans Scenic Byway. You have the option to ascend Mount Evans via the Mt. Evans Trail. Or, if you prefer a shorter trip, two short paths are available inside Summit Lake Park, where the Summit Lake Loop also provides access to the lake beach and Chicago Lakes Overlook Trail.

In addition to hiking, Summit Lake Park will provide you with a spot to reflect and enjoy a stroll through nature in Denver’s highest mountain park. Their amenities for hikers include parking, paths, a shelter, and trail signs and markers.

5. Skate at the Frozen Fire Rink

Best things to do in Idaho Springs | Idaho springs CO | Colorado travel | Colorado vacation in Idaho Springs

Want something to do for the whole family that’s right downtown? If so, then this is one of the best things to do in Idaho Springs by far.

Frozen Fire Rink provides year-round entertainment for families and friends who want fun on the ice, no matter the season. Spend the day outside skating, chasing your friends in the ice bumper cars, or running around the baseball fields.

The rink is in the picturesque mountain town of Idaho Springs and offers some pretty views. Since the ice rink is synthetic, you can experience skating on ice outside all year round which is just so cool!

Glice is a fantastic alternative for actual ice and goes great with ice bumper cars.

4. Tour the Town with Jeep Tours Colorado by Native Jeeps

Best things to do in Idaho Springs | Idaho springs CO | Colorado travel | Colorado vacation in Idaho Springs

Native Jeeps offers expert-led, YOU-DRIVE custom Jeep tours on the beautiful mountain roads and old mining trails of Clear Creek County, Colorado.

Their 4×4 tours are less than 45 minutes west of Denver’s city center.

From May to October, tours run every day, and you can choose from different trails and tour lengths. If you’re a new 4×4 owner, you can use their tough and capable Jeeps and also choose to be shown how to drive on the trails in your vehicle. Experts can tell you how to stay safe on Colorado’s backcountry roads.

Argentine Pass, Spring Creek, Saxon Mountain, Bill Moore Lake, and Red Elephant Hill are some of their 4×4 routes.

For the Four-Wheel Drive instruction for new Jeep or 4WD owners, learn how your vehicle works safely by following the guides through the network of trails so you can concentrate on having fun and getting better.

The half-day tour lasts 3 hours, while the full-day tour takes 5–6 hours.

Check out the various Jeep tour options here.

3. Try Gold Panning at Hidee Gold Mine

Best things to do in Idaho Springs | Idaho springs CO | Colorado travel | Colorado vacation in Idaho Springs

This true gold mine in Central City provides a rare opportunity to tour a real, operational gold mine.

The mine sits in the center of the Virginia Canyon-Glory Hole Area, which is regarded as the “richest square mile.” Since 1859, the region’s mines have generated more than 5 billion dollars.

Patented in 1896, the Hidee Gold Mine was first accessed through a shaft atop the mountain. From its inception until the present, it has been used intermittently. Longtime local miner Charles “Choppo” Fetterhoff opened the mine in the 1980s for instructional tours for schools and mineralogists through a walk-in entrance.

He continued to work the vein until he died in 1996. The mine was transferred to his acquaintance Mr. Lewandowski, with whom he had worked. Today, the vein continues to be mined, and tours are still available.

The Hidee Gold Mine offers tours 365 days per year, seven days per week. This family-friendly attraction has been accessible to the public since 1988. Everyone on tour receives samples of gold ore.

Learn both historical and modern mining techniques. The tour includes an opportunity to slice gold ore samples from a 5-foot vertical gold vein using a single jackhammer and chisel. The piece is yours to keep!

Go panning for gold and other precious minerals, and keep everything you uncover. Gold and gem ore help teach panning. This seasonal activity is unavailable during the winter months.

Observe experienced panners to learn skills. Practice with actual mineral specimens to understand how to wash away the lighter stuff while allowing the more prominent gold particles to sink to the bottom.

If you’re looking to visit an actually operational gold mine and learn more about today’s mechanics rather than the history of the mine, this is one of the best things to do in Idaho Springs, Colorado.

2. Hike Mount Evans National Recreation Trail

Best things to do in Idaho Springs | Idaho springs CO | Colorado travel | Colorado vacation in Idaho Springs

Mount Evans, another of Colorado’s fifty-eight Fourteeners, may be reached by a short but somewhat scenic climb along Mount Evans Trail. 1979 saw the designation of Mount Evans Trail as a National Recreation Trail.

It has been a favorite of Denverites and Coloradans for decades, especially for hiking, nature watching, and close-up animal observation. It ascends 14,271-foot Mount Evans.

Mount Evans National Recreation Trail is near the midpoint between Idaho Springs, Clear Creek County, and Evergreen. Mount Evans’ 14,265-foot peak is reachable through a 0.17-mile, one-way ascent from the end of Mount Evans Road.

Due to the trail’s short length, low degree of difficulty, and breathtaking vistas, it is famous from June through September. The trip up the Mount Evans Byway to the trailhead is free; however, parking at the top requires payment. This route is available seasonally from late May until mid-October, if the weather permits.

The ascent will take between 15 and 20 minutes and include an elevation gain of 82 feet. You may believe this is a moderate trek, but you should never underestimate its difficulty. Keeping in mind that you are still rising above 14,000 feet might make this simple terrain a bit tougher. The summit is 4,400 meters above sea level.

Now, before you attempt your first fourteener, consider the following advice. Prepare yourself for the altitude. Consider the weather, including dramatic temperature fluctuations, wind, and storms. Bring plenty of water and keep your pets on a leash.

In unauthorized locations, you can’t do camping and open a fire. Mount Evans Road may be blocked even in July if winter-like conditions occur, so do your research in advance.

This is definitely one of the best things to do in Idaho Springs, CO for adrenaline junkies!

1. Learn Rock Climbing Through Via Ferrata

Best things to do in Idaho Springs | Idaho springs CO | Colorado travel | Colorado vacation in Idaho Springs

What is the most recent trend in Colorado outdoor activities? Almost certainly, you have heard of Via Ferrata by now.

When translated from Italian, “Via Ferrata” means “iron route” and is super popular among outdoor enthusiasts seeking an adrenaline rush. A Via Ferrata path is ideal for individuals who crave the excitement of rock climbing or mountaineering but lack the necessary skills or equipment.

Via Ferrata dates back to the early 20th century when troops in World War I required assistance traversing the Dolomites area of Italy. There are presently more than one thousand Via Ferrata paths throughout the European Alps, with the majority located in Austria and Italy.

A standard course consists of steel cables and ladders (or rungs) fastened to a rock face, with two ropes tied to the protected path and harnesses for climbers. It lets the climbers secure themselves as they traverse the route, preventing potential falls. Other attachments, such as stairs, bridges, and ladders, offer safe footing and handholds for climbers.

Most routes demand a minimum age of 12 to participate in this enjoyable family activity. There are several options, from the original Via Ferrata in Telluride to one of the most recent routes developed with the ropes course in Idaho Springs.

Favorite Hotels In Idaho Springs:

There aren’t a ton of hotel options in Idaho Springs. But there are some GORGEOUS Airbnbs, including many cozy and upscale cabins situated on nearby lakes. If you really want the full local experience and want a nice place to stay, we recommend checking out Airbnb first.

Otherwise, check out Bearadise Motel, Creekside Cabins, Flying Moon Cabins, Silverlake Lodge, or Indian Hot Springs.

Hopefully, this list of the best things to do in Idaho Springs, Colorado, will help you plan your trip, whether you’re just passing through or are staying in the area for multiple nights. 

The 18 Must-See Glaciers In Alaska To Seek Out

While cities in Alaska have a variety of sites and activities to see, the state (often dubbed The Last Frontier) is also recognized for its vast outdoors, particularly the enormous gleaming glaciers that captivate the imagination and are a highlight of any journey to the far north. Some of the glaciers in Alaska are the most beautiful in the world!

The state has over 100,000 glaciers covering an area the size of South Carolina. Many terrestrial glaciers are reachable with a short walk or drive. And don’t forget all of the Alaska glaciers you can check out by air charters or mountaineering treks. Trust me: there are plenty of options to see glaciers in Alaska!

If visiting glaciers in Alaska up close and personal is on your dream list, then keep reading! Here are some of the most stunning glaciers in Alaska (and our favorites!) that you shouldn’t miss.

18. Exit Glacier

Best glaciers in Alaska | Alaska glaciers to check out during your Alaska travel vacation

You can drive to certain glaciers, but only a few are accessible by foot. BUT you can hike straight up to the Kenai Fjords National Park’s Exit Glacier, only a 10-to-15-minute drive from Seward.

Exit Glacier, one of the world’s most popular glaciers, was named after grateful backcountry visitors. It drops 3,000 feet in a few miles, creating a beautiful natural ramp for climbers leaving the massive Harding Icefield. Its grooved and crevassed hard ice sits near a visitor center Kenai Fjords National Park.

You can hike the trails, get close to an active glacier or join a ranger-led hike. It’s a site where you can see Alaskan glaciers reshape a landscape up close and discover how plant life reclaims barren rocky ground revealed by a glacier’s retreat.

The most impressive time to visit the Exit Glacier Area is during the winter when outdoor activities such as cross-country skiing, fat bike riding, and snowmobiling are available.

This Alaskan glacier is easily accessible, with a 30-minute trek to the lookout and a 1.5-hour hike to its edge. If you have never seen a glacier,  try this to get to see one. It’s one of our favorite glaciers in Alaska for a reason!

We especially recommend visiting this glacier if you are traveling from Seward to Anchorage.

17. Matanuska Glacier

Best glaciers in Alaska | Alaska glaciers to check out during your Alaska travel vacation

This massive Alaskan glacier is the largest vehicle-accessible glacier in the United States. The Matanuska Glacier, one of Alaska’s most navigable glaciers, is a stable 27-mile-long river of ice that flows almost to the Glenn Highway from the Chugach Mountains.

This Alaskan glacier is the most renowned attraction between Anchorage and Glennallen, with a broad terminal visible from one of Alaska’s major highways.

Matanuska Glacier State Recreation Area is south of Glacier Park at Mile 101 of the Glenn Highway. This state site offers some of the best views of the Matanuska Glacier and the river’s headwaters, including a 12-site campground.

Another popular destination in this tourist attraction is the Glacier Park at Mile 102 of the Glenn Highway. A private road leads to a parking lot at the terminal moraine where guided treks begin. These tours are accessible year-round and last 1-2 hours.

We found this glacier unforgettable. No amount of images is enough to depict the beauty you see. While there’s tons of beauty within this state, this is certainly one of the most beautiful glaciers in Alaska.

The guide was highly informative and gave us time to explore the caverns and different areas. You’ll want to go prepared because there are many choices here!

The actual glacier trek is somewhere between simple and moderate. Despite the cleats, we were more concerned about the icy patches. Overall, it took us 1 hour, but if you walk there and back, plan for at least 2 hours.

16. Worthington Glacier

Best glaciers in Alaska | Alaska glaciers to check out during your Alaska travel vacation

Worthington Glacier is a small valley glacier with accumulation areas and terminal moraines. While it’s not as large or impressive as some of these other glaciers in Alaska, it’s really beautiful and is often extremely quiet since it’s not the most popular.

This State Recreation Site is home to one of Alaska’s most accessible glaciers. Tourists can park near the glacier and stroll it. In 1968, it was designated as a National Natural Landmark, covering 5,744 acres.

You can find this 1.6-kilometer out-and-back track near Valdez, Alaska. It takes 35 minutes to accomplish this route, which is rated difficult. This track is ideal for hiking and rock climbing, and you won’t run into many other people while exploring it due to its challenging itinerary.

The ridge trek is challenging and risky, but it’s also a lot of fun. You can go so high up that you couldn’t even stand on the trail. The view is breathtaking, but the steep and narrow pathways are a trade-off.

Pets are also permitted, provided they are leashed no longer by 9 feet. The glacier is rapidly receding, and each year the glacier’s face grows taller and steeper, so you’ll need to be well-prepared.

Worthington Glacier is a pleasant location to stretch your legs and observe a glacier. The landscape is well-kept, and the concrete route leading to a lookout is spotless, contributing to a pleasant walk. There is even a little store with a few souvenirs and extraordinary beverages.

15. Mendenhall Glacier

Best glaciers in Alaska | Alaska glaciers to check out during your Alaska travel vacation

The Mendenhall Glacier is one of several largest glaciers in Alaska that connect to the massive Juneau Ice Field, a 1,500-square-mile remnant of the last ice age sheltered high in the peaks of the Coast Mountains.

The Mendenhall Glacier Visitor Center lets you take in the beauty of Mendenhall Glacier. You can see the views of Mendenhall Lake’s 13-mile-long ice river, blue icebergs, and southeast Alaska’s Coast Mountains here.

Stairs, elevators, and a gentle slope lead from the parking lots to the Mendenhall Glacier Visitor Center making it one of the easiest and most accessible Alaska glaciers for just about everyone to visit. Rangers from the United States Forest Service are on hand to answer inquiries and explain the landscape.

Multiple trails of varying lengths and degrees of difficulty lead to cascading waterfalls and salmon streams. Expect to see black bears, porcupines, beavers, bald eagles, arctic terns, waterfowl, sockeye, Coho salmon, and other species.

We highly suggest the well-planned canoe tours that are very doable, even for novices. The guide is well organized. Before starting, everyone got a full safety briefing, and during the trip, many details were given. There is also good equipment provided for you to return dry.

If you’re just starting out on your adventure journey, then this is one of our most-recommended glaciers in Alaska! It’s SO accessible and is really fun with lots of attractions and options.

14. Hubbard Glacier

Best glaciers in Alaska | Alaska glaciers to check out during your Alaska travel vacation

At 7 miles broad, 76 miles long, and 30 stories in height above the waterline, this is the largest tidewater glacier in North America. While most glaciers are receding, Hubbard Glacier has grown.

Hubbard Glacier is one of Alaska’s most fascinating natural wonders. On a Hubbard Glacier tour, you’ll see this magnificent ice mountain from every perspective.

In an Alaskan voyage to Hubbard Glacier, you will witness a beautiful snowy landscape as your ship navigates freezing waters moving from Yakutat Bay into Disenchantment Bay. Strong currents and riptides between Gilbert Point and the glacier induce daily calving throwing ice chunks into the bay.

No words can explain the trip we experienced on this glacier. It was incredible and was a highlight of our entire Alaskan trip. It was thrilling to watch the ice shatter and fall into the lake with a resounding boom – seriously, nature is just so incredible!

The cruise is about 4 hours so you’ll need to block out half a day.

Witness this awe-inspiring spectacle in the Gulf of Alaska’s mist. You can also spot whales, harbor seals, and otters in the Disenchantment Bay. The sound of ice cracking over the sea will send shivers down your spine—an once-in-a-lifetime experience.

13. Portage Glacier

Best glaciers in Alaska | Alaska glaciers to check out during your Alaska travel vacation

Portage Glacier is among the most accessible glaciers in Alaska, having many access points, including Portage Pass and Portage Lake. It is just a short distance from Anchorage, the gateway to Alaska for many tourists, and getting there is one of the most beautiful picturesque drives in all of Alaska.

There are several options for viewing this glacier. Day cruise, paddling opportunities, hiking options, and winter options – each provides a unique experience of the place. You’ll want to choose depending on the season you visit and your level of adventure.

The 80-foot MV Ptarmigan carries most summer guests. It’s a family-friendly boat ride with colorful guides.

You can also paddle kayaks from the north Portage Lake. Boats must stay on the north side of the lake and land at Portage Pass. The south side of the lake and glacier are off-limits. You must be very cautious of the hazardous waves and harsh winds.

If you want to hike, there is a short, steep trek to Portage Pass on the Whittier side of the tunnel, which offers a spectacular front-row view of the glacier and its ascent into the mountains. The pass is 2 miles long and 750 feet high. Be on the lookout for black bears and dress for wind and rain.

The winter experience is unique. When Portage Lake freezes, people ski, trek, ice skate, or bike three miles to Portage Glacier. From glare ice to heavy snow to sloppy overflow, conditions can vary greatly. Seeing the gleaming, beautiful glacier face on a sunny winter day can be exhilarating!

12. Columbia Glacier

Best glaciers in Alaska | Alaska glaciers to check out during your Alaska travel vacation

The Columbia Glacier is a massive tidewater Alaskan glacier that flows south from Alaska’s Chugach Mountains to Prince William Sound. Its terminus has retreated 20 kilometers since 1980, making it one of the world’s most quickly moving glaciers.

This 550-meter-deep, 400-square-mile glacier is stunning from a boat or airplane. If you’re considering taking an airplane tour of Alaska glaciers we highly recommend this one!

We strongly recommend taking the tour to get up on the ice field on land. You can hike it alone or with a group, although it is pretty tricky.

You could ride in an “Ice Explorer” at the Glacier Experience. This truck boasts some of the largest tires you will ever see, crucial for driving down steep ice sheets. It’s definitely an extreme adventure.

A tour boat from Valdez can bring you near (or close enough) to the face of the Columbia Glacier. Watch out for the chunks of ice that the glacier loses, approximately 13 million tons of ice per day! These enormous chunks of ice will fall from the glacier into the lake below every day, meaning you’ll definitely get to witness this.

It was exciting to slip all-around ice and see everyone snapping photos. We recommend you check it out.

11. Holgate Glacier

Best glaciers in Alaska | Alaska glaciers to check out during your Alaska travel vacation

The Holgate glacier runs through Kenai National Park for three miles. It began in the Harding Icefield, covering 300 square miles (770 square kilometers), and is the United States’ largest icefield.

This coastal glacier is a favorite location for visitors looking for a beautiful ice adventure. It is a day’s trip from the city of Seward. Its calving events reverberate like distant thunder of the sheer fjord walls, blanketing the surrounding seas with brash jewel ice.

Seals and seabirds frequently hunt among the ice sheets for their next meal in the nutrient-rich seas.

Kayaking from a safe distance of this Alaskan glacier will give you an awesome experience of its natural scenery. The sight of glacial calving or the process in which enormous sections of the glacier fall into the water is just insane.

We loved the stunning view and the crew we had on the tour. Alcoholic and non-alcoholic beverages and snacks were available for purchase. We also recommend bringing binoculars to enjoy the scenery to the next level.

10. Ruth Glacier

Best glaciers in Alaska | Alaska glaciers to check out during your Alaska travel vacation
mensjournal.com

With ice up to 3,800 feet thick, the Ruth Glacier fills the bottom of the mile-wide gorge. The glacier drops from 5,200 feet to 3,200 feet in the 10-mile gorge, moving at a glacial rate of 3.3 feet per day.

One of the most magnificent canyons on the planet is the Great Gorge of the Ruth Glacier. This gorge is flanked on both sides by massive granite cliffs that rise 5,000 feet above the glacier’s surface, is beautiful, and offers world-class mountaineering opportunities.

The Great Gorge’s walls are lined with several mountains: Mount Barrile, Mount Bradley, Mount Church, Mount Dickey, Mount Grosvenor, Mount Johnson, Mount Wake, Peak 9100, Bear Tooth, Broken Tooth, Eye Tooth, Sugar Tooth, Wisdom Tooth, The Shield, and Rooster Comb.

You can adore these in the comfort of Air Taxi, which is the most popular mode of transport for visiting the Great Gorge. We definitely recommend this Alaskan glacier if you want to visit by air! Year-round, mountaineering rangers with firsthand knowledge of the national park are ready to assist visitors with trip planning and route selection.

Camping is also an option here, unlike many other Alaska glaciers. Remember to choose your campsite carefully, as icefalls and avalanches are common in the Great Gorge of the Ruth Glacier.

9. Byron Glacier

Best glaciers in Alaska | Alaska glaciers to check out during your Alaska travel vacation

A short day trek provides expansive views of the Byron Glacier and begins just a few hundred meters from the Begich Boggs Visitor Center. The glacier is just beyond the terminus of a level, well-maintained trail that ascends a short, glacier-carved valley south of Portage Lake.

Byron Glacier originates from the same ice field that supplies Portage Glacier and Blackstone Glacier.

The trail is a living example of how an ecosystem recovers from the glacial period, with large trees and yielding forest way to alder thickets. The retreating ice has only recently been revealed.

The upper valley is harsh and untamed, with silt-blackened detritus covering the ice, evoking a sense of adventure amid Alaska’s coastal interior.

It is an ideal trail for families! Anyone of any age may attend. It is a short, easy, and level dirt walk. We observed senior persons, children, pets, etc., sharing this walk with ease. It’s one of the most accessible glaciers in Alaska for those who do want to walk.

Plus, it’s entertaining to have an impromptu snowball fight in snowfields left behind by winter avalanches or to follow one of the numerous side trails that will lead you to the edge of the valley, where bouldering opportunities exist.

We find the trek here easy. The average individual can complete the three-mile trail in approximately thirty minutes round. We suggest taking your time to do the walk to enjoy the landscape.

This valley is notorious for trapping clouds that generate everything from steady drizzles to less frequent (but pelting) rainfalls. Don’t forget your rain gear and you are good to go!

8. Castner Glacier

Best glaciers in Alaska | Alaska glaciers to check out during your Alaska travel vacation

Castner Glacier is one of several accessible glaciers along the Richardson Highway. It is also a rare location where you can climb gigantic ice caves!

Around 2.5 hours away, Fairbanks is the nearest major city to the glacier. Take the Richardson Highway to mile marker 217, where the entrance to the glacier and its ice caves is located.

The Castner Glacier is approximately a 2.2-mile round-trip hike with breathtaking mountain views.

Be cautious when approaching the ice caves! You should only enter if you are accompanied by expert mountaineers or park personnel, as it might be pretty dangerous.

It was quite a spectacle to reach the ice caves. You can see many hues of blue ice accumulated on the top of the cave, like gemstones.

The difficulty of getting there, the frosty weather, and the fact that we had to walk back was forgotten entirely when we reached it. Every struggle to get to these caves is worth it because they’re incredible.

7. Margerie Glacier

Best glaciers in Alaska | Alaska glaciers to check out during your Alaska travel vacation

Margerie Glacier is located near the northernmost tip of Tarr Inlet, at the end of the Glacier Bay canal. The glacier is situated in a spectacular location, creating a steep valley through high mountain peaks and abruptly ending at the sea’s shore.

Since it reaches the ocean, Margerie Glacier is a tidewater glacier, described as a glacier that interacts with salt water from the sea.

From its beginning in the Fairweather Mountain Range at altitudes greater than 9000 feet, the Margerie Glacier is approximately 21 miles long. Due to mountain snowfall and slope steepness, Margerie Glacier is expected to flow 6 feet each day.

This glacier is best observed by boat. A trip to the glacier’s face offers spectacular views of the blue ice, which floats on the lake despite a 100-foot foundation.

The Margerie Glacier is located in Glacier Bay National Park and Preserve. It is one of just eight glaciers in North America that is actively advancing, rather than retreating, at 30 feet per year!

The view of this massive glacier was so worth it! You can spend hours gazing at and shooting several photographs of it. Ensure that this is an integral component of your voyage!

6. Aialik Glacier

Best glaciers in Alaska | Alaska glaciers to check out during your Alaska travel vacation

Aialik Glacier is the biggest glacier in Aialik Bay and sits in Kenai Fjords National Park. While very steady, the glacier is most active during May and June.

Take a cruise from Seward to Aialik, or paddle your way through! Watch for whales, porpoises, and seals while you are there. You can even spot bears on the beach.

The glacier is an excellent location for kayaking, whale watching, and cruises! A two-hour cruise lets you observe the glacier and migratory humpbacks and orcas. It’s a terrific addition to your Alaskan itinerary if you’re not up for kayaking.

A full-day excursion in this glacier can feature different activities such as iceberg-filled fjords, breathtaking scenery, majestic alpine and tidewater glaciers, towering waterfalls, and world-class wildlife. It is one of the most popular single-day sea kayaking adventures among tourists.

The trip to this glacier can begin with a water taxi ride close to Aialik Bay. You can encounter incredible wildlife, including humpback whales, stellar sea lions, tufted puffins, seagulls, harbor seals, etc. It is a stellar opportunity to see not just stunning landscapes but also to observe wildlife!

Aialik Glacier was calving during our tour, and we will never forget the sound of that white thunder as the ice chunks plummeted into the lake. Plus, we encountered an entire pod of orca whales. The experience was literally insane!

5. Spencer Glacier

Best glaciers in Alaska | Alaska glaciers to check out during your Alaska travel vacation

Spencer Glacier climbs 3,500 feet from a lagoon of royal-blue icebergs 60 miles to the south of Anchorage. This ice-age setting has mile-high peaks, vertical headwalls, waterfalls, and braided rivers.

The site offers lodging, hiking, glacier exploration, ecological hikes, paddling, and sightseeing.

An entire rail ride takes you from Turnagain Arm to Spencer Glacier Whistle Stop. A roofed shelter, facilities, and the trailhead for a 1.3-mile well-maintained path to the Spencer Glacier viewpoint on the Shore of Spencer Lake are all available at the Whistle Stop.

Before boarding the train back to civilization, travelers are open to exploring on their own or participating in one of the many guided excursions provided at Spencer Glacier. Staying overnight is also possible at the Spencer Glacier Whistle Stop, which has campsites and a public use lodge.

Hiking, guided and unguided at Spencer, is common along with kayaking. There is a 9-10 hour adventure with guided hiking that includes a helicopter trip, an alpine trek, a glacier lake tour, river rafting, and a train ride! It’s an extensive, bold tour de force from Alaska for those of you who want the full experience.

Independent travelers with advanced glacier travel skills may venture up the glacier to an ice field at a higher elevation. The same accumulation zones feed the spectacular tidewater glaciers of Blackstone Bay in Prince William Sound as Spencer.

On Spencer Lake, you can witness the floating icebergs left behind by the retreating glacier or camp in the Chugach National Forest backcountry for a more adventurous time!

4. Twin Sawyers Glacier

Best glaciers in Alaska | Alaska glaciers to check out during your Alaska travel vacation

One of the most popular destinations on many Alaska cruise itineraries is the Tracy Arm Fjord. Scenic cruising through the area, which is known for its brilliantly blue icebergs, waterfalls, and the Sawyer Glaciers, is something you’ll want to include in your cruise itinerary.

Tracy Arm is the heart and most frequented fjord of the 653,000-acre Tracy Arm-Fords Terror Wilderness, located 45 miles south of Juneau.

North Sawyer Glacier and South Sawyer Glacier, otherwise known as Twin Sawyers Glacier, are about 30 miles long and are located in the fjord named after Secretary of the Navy Benjamin Franklin Tracy, who served under President Harrison.

Migratory orcas and sea lions are frequently sighted at the Sawyer Glaciers, which are twin glaciers. Harbor seals have been reported to rear their young pups in the region throughout June.

Mountain goats, black and brown bears, and bald eagles can also be seen exploring the shorelines when cruising there.

The Tracy Arm Fjord contains the Twin Sawyer Glacier is 23 miles long, with two large chunks creeping over the surface and calving at their ends.

Calving made the river change hues at least three times and was so calm that you could see the neighboring mountains reflected in it when we visited. Simply stunning!

3. Kennicott Glacier

Best glaciers in Alaska | Alaska glaciers to check out during your Alaska travel vacation

Kennicott Glacier is an ice badland with silt mounds, visible fins, lateral moraines, odd landforms, and exposed ice patches. This glacier dominates all views west of Kennecott, a historic mill town in Wrangell-St. Elias National Park (essentially “across the street” from the Kennicott Glacier Lodge).

Due to the town’s placement halfway up the mountainside above the glacier, virtually every location in Kennecott offers a view of Kennicott Glacier.

From McCarthy, walk, ride a bicycle, or take a shuttle approximately five miles up the road to the Kennecott town and tourist center; then, seek out any vantage point with a view to the west.

The ice will yawn beneath your feet! A second alternative entails a 1.5-mile hike from McCarthy to the glacier’s toe, not far upstream of the Kennicott River crossing.

The Wrangell St. Elias National Park is huge. 13.2 million acres in size, to be precise! Taking a supervised aerial hike to the Kennicott Glacier is the best way to appreciate the unspoiled natural splendor of this fantastic park.

An aerial trip will enjoy a bird’s-eye view of the spectacular Kennicott Glacier and the blue pools. You can observe the glacial scenery, Donoho Peak, and the ancient Erie Mine Bunkhouse.

Besides the scenery, the actual cabins were attractive and brimming with intriguing documents and antiques from the old mill. The entire crew was courteous and helpful. We were astounded that they could provide such fresh and varied cuisine in such a distant place.

The accommodations were adequate, but we spent as much time outdoors as possible and explored the surroundings. This is the perfect way to connect with nature and have a break from the technology-driven world.

2. Taku Glacier

Best glaciers in Alaska | Alaska glaciers to check out during your Alaska travel vacation

A tidewater glacier along the rugged Southeast Alaska coast, 30 kilometers northeast of Juneau, has generally defied global trends by gradually advancing for most of the last century while most glaciers on Earth retreated.

Taku Glacier is a 55-kilometer-long and almost 1,500-meter-thick tidewater glacier that has been the subject of ongoing scientific analysis for over 70 years. Some records date back to the mid-eighteenth century.

Taku provides an unparalleled location to study tidewater glaciers and their response to Earth’s fast-changing climate, thanks to its lengthy observation record, year-round accessibility, and closeness to Juneau and nearby research facilities.

With one of the top Juneau helicopter tours, you can explore Juneau’s largest glacier by helicopter, airboat, and foot all at once!

An exhilarating airboat trip along the Taku River and right up to the face of the glacier is included in the Taku Glacier Adventure by Air, Water, and Ice. This three-part journey consists of a glacier hike and a breathtaking helicopter flight over the Icefield.

The trip here is truly fantastic and is indeed a once-in-a-lifetime chance worth it. After flying over the glaciers and landing at the lodge, a meal was served, and everything about it was delicious! Plus, there is an excellent short hiking route with a waterfall and a couple of local bears.

We highly suggest this Alaskan glacier if you want the full experience in less time. It’s great for tourists who are semi-adventurous but not too athletic.

1. Knik Glacier

Best glaciers in Alaska | Alaska glaciers to check out during your Alaska travel vacation

25-mile-long Knik Glacier flows out of the Chugach Mountains and into an iceberg-studded lake that feeds Knik River. With a 5-mile-wide front and regular calving, the glacier is a stunning sight. 400-foot-tall ice walls emerge from a lake where icebergs float, spin, and break apart.

This glacier used to cause havoc in the Mat-Su Valley by damming a lake that flooded each summer which was considered a National Natural Landmark. But the glacial recession has stopped the floods and produced a 6-square-mile lake at the glacier slope.

The Knik Glacier is an easy excursion from Anchorage and the Mat-Su Valley (90-minute round-trip flights), and there are beautiful tours to get you close to sight. You can enjoy the scenery here by land or by air.

Also known as Alaska’s “sunny glacier,” its peculiar microclimate or “rain shadow” has generated a remarkably diversified environment. A northern desert surrounded by snow-capped peaks, hanging glaciers, and waterfalls awaits!

The tour is great for people of all ages. The experience was entertaining without being dangerous at ALL. Try this one with your kids and loved ones if you want an awesome excursion to one of the top glaciers in Alaska.

Alaska has so many beautiful glaciers to offer. Whether you want to sightsee by land, sea, or air, there are plenty of options that you can choose based on your preference.

RELATED: Alaska Northern Lights: How To See Them (The Ultimate Guide)

Visiting Acadia National Park In Winter: The Ultimate Guide

Visiting Acadia National Park in the winter means fewer tourists, more parking, and the chance to explore Maine’s natural beauty beneath a gorgeous snowy cover.

But visiting Acadia in the winter can be challenging because (duh) it’s Maine, so we’ve put together this guide to help you make the most of your time.

What to Know Before Visiting Acadia in Winter?

Acadia national park in winter

Things do slow down during the winter months in Acadia. During the winter in Bar Harbor, many businesses, including hotels, are closed.

Acadia National Park will also begin its winter hours and shut key hiking routes and portions of Park Loop Road in December.

However, this allows space for snowshoeing and cross-country skiing enthusiasts! And as long as you know when and where to go, visiting Acadia National Park in the winter can be a really awesome and unique experience.

Reasons to Visit Acadia in Winter:

Acadia National Park in Maine is far less congested during the winter months. If you don’t mind cold weather, you may be able to enjoy the park all to yourself (as long as you’re dressed adequately).

Acadia’s spectacular snowshoeing and cross-country skiing trails are another incentive to spend the winter there.

There are plenty of trails in Acadia (almost 45 miles of carriage roads) and it is a lovely destination in winter for people wishing to appreciate the outdoors in a gorgeous environment. During February and other winter months, it is one of the most incredible places in the US to visit or to engage in winter sports.

When Is Considered Winter In Acadia?

Acadia national park in winter

Acadia’s winters are notoriously lengthy. The end of October through April or May are possible starting points, but it all depends on the year. Classic “winter” at Acadia National Park is most common in December, January, and February, lasting far into March.

Does Acadia National Park Get Snow?

It snows at Acadia National Park, and the amount varies depending on the month. Acadia National Park receives around 60 inches of snow on average.

How to Get to Acadia National Park?

To access Acadia National Park, you can travel to Boston Logan International Airport and get a direct flight to Hancock County–Bar Harbor Airport, provided by Cape Air, Silver Airways, JetBlue, and United Airlines, a short 10-minute drive from the park.

Your trip goes along Maine’s Coastal Route 1, which passes through several of the state’s most scenic coastal communities.

It takes roughly an hour to drive inland from Mount Desert Island to Bangor International Airport. But, only a tiny handful of airlines fly into this airport, including Allegiant, American, Delta, and United.

Portland International Jetport is still another choice, particularly if you wish to tour Portland additionally. Acadia National Park is within a three-hour drive south of this airport. Airlines servicing this airport include American, Delta, Frontier, JetBlue, Southwest, and United.

You’ll need a vehicle to go around Acadia National Park, whether you fly into Boston, Bangor, or Portland.

Where to Stay in Acadia National Park In Winter

Acadia national park in winter

There are several good lodging options in and near Acadia National Park. We’ll give you some of our favorite hotels, Airbnb, and camping/glamping recommendations in and around Acadia.

One of the famous lodging options in the park is Bar Harbor Hotels and Inns. However, hotels and restaurants shut-in Bar Harbor during the winter months. Thus, we recommend the following top-rated establishments that remain open and eager for business!

  • Quimby House Inn & Spa
  • Atlantic Oceanside Hotel
  • Saltair Inn

Airbnbs in and Nearby Acadia National Park

Acadia National Park and Bar Harbor are home to several fantastic Airbnbs, but here are a few of our favorites:

  • The Seamist Cottage
  • Coyote’s Den at the Howling Woods
  • Hulls Cove Cottage in Bar Harbor
  • Little Frog at the Howling Woods

Winter Glamping and Camping Near Acadia

There are four campsites inside Acadia, but online reservations are not available. These are the:

  • Schoodic Woods Campground
  • Seawall Campground
  • Blackwoods Campground
  • Duck Harbor Campground

If you plan to camp in Acadia during the winter, these campsites are still available and near the park.

  • Connors Family Compound
  • The Howling Woods
  • Schoodic Woods near Ocean
  • Off-grid Oceanfront Acadia A-frame

Best Things to Do in Acadia During Winter

Acadia National Park in winter can be one of your best options if you want to enjoy a full-fledged winter tourist experience.

During the winter, there is less traffic than in the summer. There are a variety of exciting activities such as designated drives, cross-country skiing, snowshoeing, snowmobiling, birding, winter camping, and picturesque hiking sites.

Here are the best things to do in Acadia during winter:

Ocean Drive

Acadia national park in winter

Except for Ocean Drive and Jordan Pond Road, Park Loop Road closes on December 1st.

This trip will take you to some of the park’s most popular attractions, including Thunder Hole, Sand Beach, the Beehive, and other majestic cliffs.

Schooner Head Road leads to a tiny stretch of Acadia’s Loop Road. Snowmobiles only have access to the left side of the road, thus remaining in the right lane.

You can get off the Ocean Drive and onto Route 3 through Otter Cliff Road.

Snowshoeing

Individuals who prefer snowshoeing have an excellent opportunity to spend their time on six trails out of 120 miles of hiking terrain.

Gorham Mountain, which is 525 feet, is one of the six trails and has several breathtaking natural landscapes. The moderate slope of the cliff makes it an ideal spot for snowshoeing.

Cadillac South Ridge has an even gentler slope than Gorham and is the longest path at 3.5 miles.

Ship Harbor and Wonderland are better options for inexperienced hikers due to their length (about 1.5 miles), but they are also renowned for breathtaking ocean views. Choose the Day Mountain Trail if you wish to walk a carriage road that continues to the summit.

It is accessible through Jordan Pond and Seal Harbor to the south.

Last but not least, the alternative 6-mile path of Witch Hole Pond has one of the wildest auras in the area, but along this route, you will be able to witness the Duck Brook Bridge and Paradise Hill, both of which are well worth the time and effort spent on the trip.

Hiking Cadillac North Ridge Trail

Cadillac North Ridge Trail is a 6.4-kilometer out-and-back trail situated in Bar Harbor that gains 341 meters in height. This trail is suitable for hikers who like seeing the dawn or sunset.

It provides a variety of exercise opportunities accessible throughout the year, and it’s worth noting that it has the enticing beauty of nature. On these trails, dogs are permitted but must remain on a leash.

The hikers have two alternatives from Park Loop Road to begin their journey.

The first option begins at the Take Kebo Brook Trail intersection and the Cadillac North Ridge Trail, while the second option begins at the one-way stretch leading to Sand Beach. Please be aware that there is no parking at all at this location.

Snowmobiling

It’s vital to note that you can only do snowmobiling on unplowed highways, including the 27-mile Park Loop Road. The maximum speed allowed is 35 miles per hour. The park’s winter activities website has all of the rules and restrictions.

If there is enough snow, people can drive snowmobiles in the park. During excellent weather, a portion of the road remains open to offer free access to tourists of Thunder Hole, Sand Beach, and Otter Cliffs.

Hiking Pemetic Mountain

Acadia national park in winter

If you want a hike that includes both easy treks and challenging ascents while still taking in the beauty of the terrain, Pemetic Mountain should be at the top of your Acadia bucket list.

The mountain is 1,248 feet tall (380m). The hike’s difficulty level is “advanced,” so we don’t think it will be easy.

Native Americans gave the peak its name, which translates to “sloping land” and accurately defines the whole island. The region is accessible from the north (Cadillac Mountain, Bar Harbor, etc.) and the south (Mt. Desert Island).

If you’re an experienced hiker, you should know that when you reach the top, you’ll be able to see Jordan Pond, Bubble Pond, Little and Great Cranberry Islands, and many other places as clearly as if you were holding them in your hand.

If you like the outdoors and are adequately dressed, hiking in Acadia in the winter is one of the most remarkable activities.

Jordan Pond

Acadia national park in winter

Jordan Pond might have a few ice fishing shacks. The pond is accessible throughout the winter via the Park Loop Road, which ends at the Jordan Pond House Restaurant, and is known for an ample supply of landlocked salmon and lake trout, making it an ideal site to cast a line. Although the restaurant is closed during the winter, the views of Jordan Pond are breathtaking.

The routes around Jordan Pond will have your pulse racing and your lungs filled with fresh mountain air. Prepare yourself before embarking on the 3.4-mile Jordan Pond Full Loop Trail. In the summer, it’s a moderate level, and in the winter, it’s a great step up from intermediate.

Hiking Carriage Roads

The carriage roads are ideal for hiking, cross-country skiing, and snowshoeing since they are wide and level. The Carriage Roads are the core of Acadia’s winter wonderland, with 45 miles of groomed tracks and ungroomed regions.

Make sure you have crampons on hand for any winter hiking. Hiking poles will help maintain balance. When hiking, stay to one side of the groomed cross-country routes to avoid cutting into the ski lanes.

The spacious meadows and mild slopes of the carriage roads will appeal to cross-country skiers. The thrilling ride along the picture-perfect tree-lined pathways is terrific.

Cross-Country Skiing

Friend of Acadia volunteers and the Acadia Winter Trails Association groom and track the region if there are at least 6 inches of snow and the road is frozen, allowing cross-country skiers to enjoy the park during the winter fully.

The grooming process utilizes cutting-edge technology. There are 45 miles of carriage roads, 32 maintained, and include skate lanes.

Check the cross-country skiing conditions before going since they are not always consistent and often vary.

Waterfall Climbing

Ice climbing is a fantastic winter task. The Acadia Mountain Guides Climbing School is eager to teach you how to climb securely and enjoyably.

Their professional guides will teach you the fundamentals of waterfall climbing in an introductory ice climbing program. They also provide half-day and full-day climbs that will put your abilities to the test while pumping your adrenaline.

This excursion is perfect for those seeking that one-of-a-kind, Instagrammable experience.

Birdwatching at Schoodic Point

Acadia national park in winter

Birdwatchers flock to Schoodic Point in particular. Visitors to Acadia National Park may join a guided tour to learn about the park’s distinctive bird species.

Examples include eagles, owls, razorbills, murres and dovekies, black-capped chickadees, and Harlequin ducks. The Schoodic Peninsula is about an hour’s drive from Mount Desert Island’s Hulls Cove Visitor Center.

The Frazer Point Picnic Spot, featuring a picnic area, is located immediately after entering the park, followed by the one-way route to Schoodic Point.

You can enjoy the splendor of the vistas along the route and visit Mount Desert Island on your way to the destination.

Exploring the Eagle Lake

The Eagle Lake Circuit is a 6-mile-long circuit that offers one of the most breathtaking experiences in the park. To acquire the best perspective, you can reach the ice and take in the scenery.

With a view of the lake, mountains, and trees, Eagle Lake is one of the park’s most spectacular places. The hike to the lake isn’t tricky; there are a few ups and downs.

The west side of the lake’s 3.7-mile route is maintained and bordered by carriage roads.

Those who prefer a smoother and flatter approach can ski the lake itself when the lake is frozen in the winter.

Witnessing The Sunrise On Cadillac Mountain Summit

Acadia national park in winter

Cadillac Mountain’s peak is the first place in the nation to watch the dawn between October and early March. The sun’s first rays shine brightly over the Gulf of Maine, Frenchman Bay, and Bar Harbor, displacing the drab morning light. During the winter, you can watch the event from the privacy of your own home.

Typically, you’d drive up Cadillac Mountain to reach the peak, but during the winter, it’s closed. Make the 3.5-mile journey on foot, skis, snowshoes, or even a skimobile if you’re a brave walker.

The morning is spectacular, but you’ll notice that other hikers have arrived for their “first break” when the light shifts and the stars disappear. If you decide to go, be aware that the peak will have a minimum of a 20-degree plunge.

Bass Harbor Head Lighthouse

Acadia national park in winter

On Mount Desert Island, the Bass Harbor Head Lighthouse is accessible by car. The Bass Head Harbor Light Station is positioned on Maine’s famously rugged shoreline. The Lighthouse offers a spectacular picture of Bass Harbor and Blue Hill Bay while safeguarding seafaring boats from the rocky terrain.

Thunder Hole

Thunder Hole is a semi-submerged cave that resounds like thunder an hour or two before high tide. The waves pounding against the cliffs are visible and audible from the viewing platform. The path down to the caverns is slick and needs considerable agility during the warmer months. It’s particularly hazardous in the winter. The vistas, though, make it worthwhile to pause.

Seafood From The East Coast

The daily catch in Maine is seafood, especially Maine lobster. At Peekytoe Provision, you can order a Local Lobster Roll on a toasted split-top bun with mayo or sautéed in butter. Try the Fresh Haddock Sandwich on a Challah bread with avocado or bacon as an alternative. Order your Lobstah roll with a New England accent to mix with the locals.

What to Pack for Winter Trip in Acadia National Park?

The most challenging element of packing is choosing the correct clothing, but you must also consider other items. Here are some things we usually bring with us when we go to cold regions in the winter.

Hiking Boots: These are the way to choose if you want comfort on your trip

Socks: Socks are also essential for convenience while exploring.

Hiking Backpack:  For weekend trips, we usually bring a hiking backpack. It makes a significant difference to have it since we can get food, clothing, and whatever else we need on our adventures.

Water Bottles: It’s critical to carry adequate water, whether hiking or simply exploring!

Mobile Power Bank: Weather will drain your phone’s battery. Bring a mobile power bank so you can take pictures anytime you want!

Extra Camera Batteries: If you like photography but have never attempted it in a freezing environment, you’ll want to pack additional batteries. Like phone batteries, the camera battery drains faster in cold weather. We also carry a USB charger for camera batteries in our mobile power bank in case of need.

Dry Bags: Some days during your winter trip to Acadia will be snowy and cold, so don’t destroy your stuff!

Where to Eat During Winter in Acadia National Park?

Here are the two establishments you should visit for some delicious food for your winter trip to Acadia National Park

Havana

For 20 years, Havana has been dishing up American food with a Latin twist. The restaurant in Bar Harbor is noted for its local and organic meat, fish, and vegetables. It also offers an extensive wine selection, especially in the off-season.

Choco-Latte Café

Chef-owned Choco-Latte Cafe serves fresh-baked goodies, sandwiches, and locally-roasted coffee. The cafe’s walls are covered with vibrant artwork from Maine and New England artists. It’s open from 7 a.m. to 6 p.m. all year.

Tips for Visiting Acadia National Park in the Winter

Acadia national park in winter

Acadia National Park is no exception to Maine’s winter enchantment. If you visited during the busy summer months, you might not recognize it; popular places during the summer are frequently shockingly silent during the winter.

Here are some tips for making the most of your visit to Acadia National Park during the winter.

What’s Open and What Isn’t

Off-season access to several of Acadia’s most famous sites is limited. Park Loop Road is closed from December until early April except for the stretch between Sand Beach and Otter Cliff Road; Park Loop Road is closed from December until early April. (Winter weather may prolong its closure.) It includes the Cadillac Mountain road.

Many businesses in neighboring Bar Harbor are also shuttered for the winter. While year-round shops in this Maine small town will still carry staples, you won’t have the same shopping possibilities as in the summer!

Many fantastic hikes await daring hikers, mainly when the ground is bare. Acadia’s services, including most restrooms, are unavailable in the winter. Know your limitations, and don’t push yourself too far.

The Shuttle Ceases in October

From late June through mid-October, the Island Explorer operates. You will need a vehicle to visit Acadia National Park in the winter since it does not provide services.

Never Forget To Leave No Trace

It’s critical to pack away everything you brought in and not leave any rubbish behind. You can quickly dispose of your waste at some locations, including trash containers. You can dispose of your waste at a local gas station or convenience shop if they do not have trash containers.

Remember to Purchase Travel Insurance

Travel Insurance Master looks at your insurance choices and finds the best fit for you! All you have to do now is plan your getaway!

Prepare for a Winter Acadia Visit

Maine’s winters are famous. It’s crucial to plan your activities around the weather. Maine’s weather is unpredictable and might catch you by surprise.

Spend a lot of time outside? Layer up! Remember that Acadia National Park has intermittent mobile phone connections, so notify someone of your intentions ahead of time.

FAQs About Visiting Acadia National Park In Winter:

What are the main attractions to explore & activities to do in Acadia National Park in winter?

A winter visit to Acadia National Park opens the door to a variety of captivating activities that allow you to engage with the park’s natural wonders in a whole new way. One of the most popular pursuits is snowshoeing, an exhilarating experience that lets you traverse snow-covered trails and explore hidden corners of the park that might be inaccessible during other seasons. As you navigate through the serene landscape, you’ll have the chance to witness stunning vistas, discover frozen waterfalls, and encounter wildlife that’s adapted to the winter conditions.

Cross-country skiing is another fantastic option for immersing yourself in Acadia’s winter charm. The park’s carriage roads, with their gently rolling terrain and sweeping views, transform into a winter playground for skiers. Glide through the tranquil forest, taking in the sight of snow-draped trees and pristine lakes, while enjoying the cardiovascular workout that skiing provides.

If you’re seeking a more leisurely activity, winter photography in Acadia is a rewarding pursuit. The park’s natural beauty takes on a new dimension when cloaked in snow, and the interplay of light and shadow creates captivating scenes for photographers to capture. From the iconic silhouette of the Bass Harbor Head Lighthouse against a snowy backdrop to the intricate patterns formed by frost on plant life, Acadia’s winter landscape provides ample opportunities for creative expression.

Can I drive along the Park Loop Road in winter?

While most of the Park Loop Road is closed during winter due to snow and ice, the section from the entrance station to Otter Cliff Road remains open year-round, providing access to some beautiful coastal views.

Are there guided tours or ranger programs in the winter?

While ranger programs are limited during the winter months, the park occasionally offers guided snowshoe hikes and talks. Check the official Acadia National Park website for the latest information on winter programs.

Can I go wildlife watching during the winter months?

Yes, winter can be an excellent time for wildlife watching in Acadia. Keep an eye out for deer, squirrels, and even snowy owls. Remember to maintain a respectful distance and avoid disturbing the animals.

What makes Acadia National Park special in the winter?

The tranquility and unique beauty of Acadia in winter are truly captivating. The peacefulness of the snow-covered landscapes, the crisp air, and the chance to experience the park in its quieter state make winter visits a memorable and rewarding experience.

How’s the weather during the winter in Acadia National Park?

The winter weather in Acadia National Park creates a captivating and ever-changing landscape that’s a world away from the bustling summer crowds. From December through February, the park experiences a true New England winter, characterized by cold temperatures, snowfall, and occasional storms. This seasonal transformation blankets the park in a serene and magical aura, offering a unique and enchanting experience for visitors.

Temperature: During the winter months, temperatures in Acadia National Park typically range from the mid-teens to mid-30s Fahrenheit (-9°C to 1°C), although they can occasionally drop even lower. It’s important to dress warmly in layers, including insulated clothing, waterproof outerwear, gloves, and a hat to stay comfortable while exploring the park.

Snowfall: Snowfall is a defining feature of Acadia’s winter climate. The park receives an average of around 61 inches (155 cm) of snow annually, covering its trails, mountains, and forests in a pristine blanket of white. The snow creates a picturesque setting that’s perfect for winter sports and photography.

Winter Storms: Winter storms are not uncommon in Acadia, and they can add an extra layer of drama to the landscape. Snowstorms can bring heavy snowfall, strong winds, and challenging conditions for outdoor activities. However, they also offer a chance to witness the park in a beautifully wild state, with snow-draped trees and cliffs.

Icy Conditions: With the freezing temperatures, trails and pathways can become icy and slippery. It’s essential to exercise caution while hiking and exploring, and it’s recommended to use appropriate footwear with good traction, such as crampons or ice cleats, to prevent accidents.

Changing Weather: The weather in Acadia National Park during the winter can be unpredictable, with rapid changes from clear, sunny days to overcast skies and snowfall. Checking the weather forecast before heading out and being prepared for changing conditions is crucial to ensure a safe and enjoyable visit.

Benefits of Winter Weather: Despite the challenges, the winter weather in Acadia offers a unique and quieter experience compared to the bustling summer months. The tranquility of the snow-covered landscapes, the crispness of the air, and the absence of large crowds create an atmosphere of serenity and solitude. It’s a time to connect with nature on a more intimate level, to hear the crunch of snow underfoot, and to appreciate the park’s natural beauty in a different light.

How do I prepare for a winter hike in Acadia National Park?

Winter hiking in Acadia National Park offers a unique and invigorating experience, but it also requires careful preparation to ensure your safety and enjoyment. First and foremost, dressing appropriately is crucial. Layering is key to regulating your body temperature, so start with a moisture-wicking base layer to keep sweat away from your skin. Add an insulating layer to retain body heat, and finish with a waterproof and windproof outer layer to protect against the elements. Don’t forget to wear warm gloves, a hat, and sturdy waterproof boots with good traction to navigate icy trails.

Before embarking on your hike, it’s essential to check the weather forecast and trail conditions. Winter weather can be unpredictable, so being informed about any incoming storms or rapidly changing conditions is vital. Make sure to bring essential items like a map, compass, headlamp, and a fully charged cell phone, as daylight hours are shorter during winter.

Safety should always be a top priority, so let someone know your hiking plans, including your intended route and estimated return time. It’s a good idea to hike with a companion whenever possible, as having a partner can provide assistance in case of emergencies. Lastly, be flexible with your plans. Winter conditions can sometimes lead to unexpected trail closures or challenging circumstances, so having a backup plan or being willing to adjust your itinerary ensures a safe and enjoyable hiking experience in Acadia’s winter wonderland.

What are the benefits of experiencing Acadia National Park in the winter compared to other seasons?

Experiencing Acadia National Park during the winter offers a distinct and captivating perspective that sets it apart from the more bustling seasons. While summer draws large crowds seeking warm weather and vibrant landscapes, the winter months provide a tranquil and serene ambiance that allows for a deeper connection with nature.

One of the most notable benefits of a winter visit is the opportunity for solitude and introspection. The park’s trails, which may be crowded in the summer, often become quiet pathways for introspective exploration. The hush of falling snow, the crunch of your footsteps on the trail, and the absence of bustling crowds create a serene environment that encourages mindfulness and reflection.

Photographers and artists also find inspiration in Acadia’s winter landscapes. The interplay of sunlight on snow, frost-covered vegetation, and the striking contrast of dark evergreen trees against the white backdrop offer endless creative possibilities. Whether you’re an amateur photographer or a seasoned artist, the winter scenery invites you to capture its beauty in unique and captivating ways.

Moreover, experiencing Acadia’s iconic landmarks, such as Cadillac Mountain and Jordan Pond, under a blanket of snow provides a new perspective on their grandeur. The transformation of these familiar sights adds an element of novelty and intrigue, even for those who have visited during other seasons.

In conclusion, the benefits of experiencing Acadia National Park in the winter extend beyond the surface beauty of snow-covered landscapes. The solitude, creative inspiration, and unique perspective offered during this quieter time of year make a winter visit a truly memorable and enriching experience for nature enthusiasts, adventurers, and anyone seeking a deeper connection with the natural world.

What safety measures should I take when exploring Acadia National Park in winter?

Exploring Acadia National Park in winter offers a serene and enchanting experience, but it’s important to prioritize safety to ensure a memorable and trouble-free adventure. The winter environment can present unique challenges, so here are some essential safety measures to keep in mind:

1. Check the Weather: Before heading out, always check the weather forecast for the park. Winter weather can be unpredictable, and conditions can change rapidly. Make informed decisions based on the forecast and be prepared for cold temperatures, snowfall, and potential storms.

2. Dress Appropriately: Layering is essential to stay warm and dry during winter outings. Dress in moisture-wicking base layers, insulating clothing, and waterproof outerwear. Don’t forget warm gloves, a hat, and insulated, waterproof boots with good traction. Dressing in layers allows you to regulate your body temperature as you move.

3. Trail Conditions: Be aware of the trail conditions before setting out on a hike or snowshoeing adventure. Snow and ice can make trails slippery and challenging to navigate. Carry traction devices such as crampons or ice cleats to improve grip and stability, especially on steep or icy terrain.

4. Inform Someone of Your Plans: Always let someone know your itinerary and estimated return time. This is crucial in case of an emergency. If you’re going solo, consider sharing your plans with a friend or family member, and carry a map or GPS device.

5. Daylight Hours: Winter days are shorter, and it gets dark earlier. Plan your activities with the available daylight in mind to avoid being caught out after dark. Starting your outdoor excursions earlier in the day gives you ample time to enjoy the park safely.

6. Stay Hydrated and Nourished: Even in colder temperatures, staying hydrated is important. Carry enough water and energy-rich snacks to keep your energy levels up. High-energy foods like nuts, trail mix, and energy bars can provide a quick boost and help maintain body heat.

7. Wildlife Awareness: While wildlife sightings can be exciting, remember to keep a safe distance. Animals are adapted to winter conditions and may be more focused on conserving energy. Maintain a respectful distance to avoid stressing the animals or putting yourself at risk.

8. Be Prepared: Pack essential items such as a map, compass, headlamp with extra batteries, a fully charged cell phone, and a basic first aid kit. These tools can be invaluable in case of unexpected situations or emergencies.

9. Know Your Limits: Winter conditions can be physically demanding. Choose trails and activities that match your skill level and physical fitness. Pushing yourself too hard in challenging conditions can lead to exhaustion or injury.

10. Respect Closures: Some areas of the park, including certain trails and facilities, may be closed during the winter season. Respect these closures for your safety and to help protect the park’s natural resources.

By taking these safety measures, you can fully enjoy the serene beauty of Acadia National Park in winter while minimizing risks and ensuring a safe and memorable experience.

Zion To Bryce Canyon: 2, 3, and 4 Day Road Trip Itineraries

Utah has breathtaking scenery and once-in-a-lifetime hikes. And Zion and Bryce Canyon are some of the state’s stunning national parks! These national parks in Southern Utah have unique and distinctive views that will astonish you.

The most accessible approach to exploring Utah’s most incredible hikes and its distinctive beauty is to combine these national parks on a short road trip.

Zion and Bryce Canyon provide something for everyone, from views to hiking routes. Luckily, driving from Zion to Bryce Canyon is straightforward, so you can easily combine the two!

If you planning a road trip itinerary that will take you from Zion to Bryce Canyon National Parks OR vice-versa, we’ll show you how to plan an enjoyable three-day trip to maximize the experience.

What if you don’t have enough time? We’ll also give itinerary alternatives for a two-day and four-day Zion to Bryce Canyon road trip so that every traveler can plan the ideal holiday.

Let’s plan your road trip to Zion and Bryce Canyon National Parks!

Zion vs. Bryce Canyon

While both Zion and Bryce Canyon National Parks are stunning, Zion is more suited for adventurous hikers and canyon enthusiasts, while Bryce Canyon is excellent for families and photographers. Less than an hour apart, these parks are a must-see.

On your southwest Utah road trip plan, it’s ideal for visiting both parks.

Your heart rate will slow as you hike through Zion’s bucket list trails, then rise again as you marvel at the hoodoos in Bryce Canyon’s bowl-shaped amphitheater.

We’ve been to both parks twice and want to visit again, so we highly recommend seeing both!

Elevation: Zion National Park vs. Bryce Canyon

The elevation of each landscape varies greatly between Zion and Bryce Canyon. Springdale in Zion is 3,900 ft high, whereas Bryce City is 7,650 ft.

When driving from Zion to Bryce Canyon, you’ll definitely feel the elevation rise. Altitude sickness isn’t usually a concern until 8,000 ft, but Bryce Canyon isn’t far from that, so bring medicine if you’re prone to it (anything with Acetazolamide works well).

Why Take the Zion to Bryce Canyon Road Trip?

Even though Zion National Park and Bryce Canyon are in the same state, the experience at each is massively different. But there are things in between/along the way that you wouldn’t want to miss, too. The Grand Staircase is a line of multicolored cliffs that connects Zion and Bryce Canyon in Southern Utah’s Colorado Plateau area. It is the lowest rock stratum of Bryce Canyon and is a must-see.

One road trip can easily cover both Zion and Bryce Canyon. And there’s plenty to do along the way that it’s really worth it to turn this small road trip into an adventure.

In about two hours, you can travel from Zion to Bryce Canyon. It’s hard to grow tired of the views because the sights are incredible. You’ll see beautiful mountain vistas in Zion and hoodoos in Bryce Canyon.

How Far is Bryce Canyon from Zion?

Because Bryce Canyon and Zion National Parks are so close, many visitors combine their visits.

The quickest route to Bryce Canyon is by US-89 from Zion National Park. The travel is around 74 miles long and takes about 1 hour 30 minutes.

The travel from Zion National Park’s south gate or Springdale takes longer due to the winding Zion-Mount Carmel Highway (State Route 9). This section of your trip from Bryce Canyon to Zion National Park is stunning and should be on your Zion National Park bucket list, even though it’s a bit further away.

This tour will take you through sandstone tunnels, the Checkerboard Mesa’s cross-cut pattern, and some Desert Bighorn Sheep! They tend to hang around between the Zion-Mount Carmel Tunnel and the East Entrance in the mountains. The 84-mile travel takes at least 1 hour and 45 minutes, and we think it’s definitely worth the extra few miles.

How to Get from Zion to Bryce Canyon?

We suggest flying into McCarran International Airport in Las Vegas for your Bryce Canyon and Zion trip. The travel to Zion National Park takes little under three hours. You can also fly into Salt Lake City, but it’s a five-hour drive to Zion National Park.

After your tour from Zion to Bryce Canyon, you can fly out of McCarran or Salt Lake City. Both are roughly 4 hours from Bryce Canyon.

Next, we’ll go over our favorite aspects of each part, then we’ll talk about the best road trip stops in between these two national parks.

Why Visit Zion National Park?

Zion to Bryce Canyon

Angels Landing, The Narrows, and The Subway are world-famous trails in Zion National Park. Canyons with 2,000 ft sandstone cliffs surround valleys, rivers, and streams with hiking routes and natural beauty.

In 2019, Zion was the fourth most visited US National Park with 4.5 million recreational visitors.

The park comprises three major sections: Main Zion Canyon, Kolob Terrace, and Kolob Canyons.

Angels Landing and the Narrows are among the most renowned hikes in Zion National Park and the most popular in the US National Park system.

In addition to hiking, there are many other things to do in Zion.

Zion National Park: Important Notes

Before you go, here are some highlights about Zion National Park to help you organize your trip:

Best Time to Visit: The perfect time to visit Zion is during the Spring and Fall, specifically April to May and September to October. You can avoid crowds by going shortly before or after the busy season, from April to October.

Where to Stay: You can stay in Zion Lodge, South Campground, or Watchman campground if you prefer to stay inside the park. Springdale has attractive yet pricey hotels outside the park.

How to Get There: Las Vegas Airport is 3 hours away from Zion National Park, and Salt Lake City International Airport is 4-5 hours.

How to Get Around: Most of the year, travelers to Zion Canyon must utilize the complimentary shuttle service. However, you will need a vehicle to navigate the park. We recommend renting a car at the airport if you’re flying in. It’s just not worth it to come to Zion without a car.

Permits: You need permissions for Angels Landing, Backpacking, The Subway, The Narrows, and Rock Climbing.

Zion National Park Tips

Zion to bryce canyon

Here are some helpful tips when getting to Zion National Park:

1. Arrive Early for Parking

Parking at Zion National Park is difficult since places are restricted and fill up rapidly. Arrive early to grab a parking place.

When we visited this park in August, the parking lot was almost complete by 7:00 am. Crowds are typical in Zion from early February to late November.

If parking at Zion National Park is not enough, use the free Springdale shuttle to get to the park. The shuttle may pick you up at nine different locations to get to Zion from town.

2. Obtain Permits and Book Trips Ahead of Time

Daily, hundreds of people visit the US National Parks. The NPS increased its ticketing system for Zion National Park to safeguard the park’s peaceful environment. Permits required for popular Zion trails include:

To secure Angels Landing and the Subway tickets, you must apply months ahead of time.

Reservations for a hike from Chamberlain’s Ranch to the Narrows can be made up to two months in advance on recreation.gov.

Every 5th of the current month, reservations for the following month become available. Check out the permit system here.

3. Learn about the Zion Canyon Shuttle System

Zion to bryce canyon

The Zion Canyon Scenic Drive is restricted (not available for private cars) from March to November. You can only enjoy the gorgeous drive by shuttle or bicycle. You’ll need to know the shuttle schedules and stops to visit most of the highlights in Zion National Park. What’s more, it’s free to use!

It’s totally worth it to take a trip on the Zion shuttle. The views are literally incredible!

4. Catch the First Shuttle

The shuttle parking lot fills up quickly, so arrive early to catch the first shuttle. Thus, you can spend more time in the park and explore more popular activities without the crowds.

5. Evaluate the Weather

If you want to trek the Narrows, one of the most crucial factors is the river’s flow. Flash floods and powerful currents are particularly hazardous. During the summer, thunderstorms are frequent in Utah. Check the weather before visiting Zion.

6. Know the Trail Conditions

Primary rock falls in Zion National Park can alter trail conditions. Check the park’s website or drop by the visitor center for the most up-to-date information.

7. Start Your Day With a Narrows Hike

Even though many people avoid getting wet in the morning, it is one of the least congested times. It’s best to hike the Narrows early in the day to avoid the crowds.

8. Arrive at Canyon Junction Bridge One Hour Before Sunset

Arrive early to see the sunset at Zion National Park’s most famous sunset point. Many photographers will seek to capture the classic shot of Canyon Junction Bridge. We went there an hour before sunset and grabbed the best location on the bridge!

Why Visit Bryce Canyon National Park?

Zion to bryce canyon

Bryce Canyon is one of America’s lesser-known National Parks. It is in the American Southwest and has lovely scenery.

The canyon has the world’s most extensive hoodoo collection. The Bryce Canyon Amphitheater at the park’s entrance has the most hoodoos.

Explore the park by hiking the beautiful trails, driving the picturesque route, and stopping at the numerous views. You can also take a park tour or go horseback riding.

Bryce Canyon National Park: Important Notes

Here are some essential notes about Zion National Park that will help you plan your trip:

Best Time to visit: Spring and fall, or April to May and September to October, are the best times to visit Bryce Canyon National Park.

Where to Stay: North or Sunset Campgrounds and The Lodge at Bryce Canyon are alternatives for lodging inside the park. For a reasonable price, you can stay outside the park.

How to Get There: The closest airports to Bryce Canyon National Park in Utah are Las Vegas which takes 4 hours and 10 minutes by car, and a 4-hour 5 minutes drive to Salt Lake City. We would suggest that you go to Zion National Park first. From there, Bryce Canyon is only a short 1.5-hour drive away.

How to Get Around: You can take the free Bryce Canyon Shuttle, which takes you to all the viewpoints and trailheads, or you can drive your car in the park, whichever you prefer.

Permits: None!

Bryce Canyon National Park Tips

Below are some helpful Bryce Canyon National Park tips to maximize your enjoyment here:

1. Recognize the Altitude

With almost 8,000 feet in elevation, Bryce Canyon National Park is much higher than Zion. You can feel out of breath really quickly. Taking it easy and stopping to see the stunning scenery is always a good option.

2. Learn About the Bryce Canyon Shuttle

Parking at Bryce Canyon is limited and can fill up quickly, so use the free Bryce Canyon Shuttle to avoid the hassle. The shuttle operates from April to October and visits the most incredible sights in the park.

The shuttle operates from 8:00 am to 6:00 pm, so you’ll need to drive to witness sunrise or sunset.

3. Take the First Shuttle

If you’re taking the Bryce Canyon shuttle, get there early. It allows you to enter the park before the crowd.

4. Hoodoo Photo Op

You can photograph the stunning blood orange hoodoos of Bryce Canyon National Park from different angles. Your list should include Sunrise, Sunset, Bryce, and Inspiration Points.

Visit such locations at dawn or golden hour for unique picture opportunities. The golden hour is between sunrise and sunset.

5. Wear Layers

The temperature difference between morning and night might be variable. Dress in layers to cope with temperature variations.

6. Watch for Wildlife

We saw prairie dogs bursting out of their caves and deer lounging in the pine trees along the Bryce Canyon Scenic Drive. You could also see mountain lions, pronghorn deer, and rattlesnakes.

7. Hike Navajo Loop

The Navajo Loop is the most popular walk-in Bryce Canyon National Park, so go around sunrise or sunset. You’ll escape the crowds and enjoy the trip in the best light!

What to Pack for a Zion to Bryce Canyon Trip?

Zion to bryce canyon

The weather can change quickly in both Zion and Bryce Canyon, from cold mornings to storms in the afternoon. Make sure you bring these things on your trip to be ready for anything.

National Park Pass

There is a fee to get into both Zion and Bryce Canyon. Obtaining America the Beautiful National Park Pass is a great idea to visit more than one national park this year. You can go to more than 60 national parks and more than 400 monuments and sites for a year. Here, you can buy a national park.

Hiking Backpack

We usually bring an empty hiking backpack in our carry-on for exploration. It allows us to carry food, clothing, and other items for our adventures.

Hiking Boots

In these parks, hiking is the best thing to do. You’ll need hiking boots or trail runners that are sturdy, comfortable and have good grip. Before your trip, don’t forget to wear your shoes.

Wool Socks

Inappropriate socks ruin good hiking boots. Always go for merino wool. They’re costly, but they will keep your feet dry and prevent blisters for a long time.

Layers

In Spring and Fall, the weather can change from day to night in Zion National Park and Bryce Canyon National Park. Even though the mornings are chilly, the afternoons may be sweltering. Comfortable hiking clothes and fleece layers are essential.

Rain Jacket

During the summer, thunderstorms might occur suddenly. A rain jacket or poncho is always helpful, even just a brief light rain.

Camera

From Zion to Bryce Canyon, you decide how to capture each scene. Any iPhone will do. Also, if you plan on taking a quality camera with you on your hike, we highly recommend a camera clip.

Hat and Sunblock

Many of the trails in Zion and Bryce have no shade, so it’s essential to wear sunscreen. Sunscreen is necessary, but a sun hat will also do a lot to keep you from getting sunburned.

Zion To Bryce Canyon Road Trip Itineraries

Now that we’ve covered the basics of both national parks, let’s get to the road trip itinerary section!

This guide will present you with three road trip itineraries of these two gorgeous parks.

For the three Zion To Bryce Canyon road trip itineraries here (2-day, 3-day, and 4-day), we’ll focus most on the 3-day since it is the best time frame to enjoy these two parks fully.

We’ll give you an overview of the 2-day and 4-day Zion to Bryce Canyon road trip itineraries to best plan your adventures.

2-Day Zion To Bryce Canyon Road Trip Itinerary

Zion to bryce canyon

The 2-day trip will provide you enough time to visit the finest of both Zion and Bryce Canyon and some versatility in how you divide your time. However,  the number of time-consuming treks you can squeeze in will be restricted.

One day in Zion and one day in Bryce Canyon are options. You could also spend a day and a half in Zion and just a few hours at Bryce Canyon.

Spend most of your hiking trip in southern Utah at Zion National Park. If you’re there for photography, though, you should plan on spending the whole day in Bryce Canyon, including sunrise.

Here is how to spend two days in Zion and Bryce Canyon:

Day 1: Zion

For day 1 in Zion, you can either do the following:

As you can see, there’s a lot to do in Zion. We recommend hiking The Narrows if you’ve never been, just because it’s the most famous, but we also really love the Emerald Pools and the Kolob Canyons. So stretch your trip to three days if at all possible!

You should drive to Bryce Canyon later in the day and spend the night in its hotel or campground, no matter which option you choose, so you’re ready to go for the following day.

Day 2: Bryce Canyon

For the day 2 in Bryce Canyon, spend the day doing the following:

You can definitely fit in all of these activities in one day.

Best 3-Day Zion to Bryce Canyon Road Trip Itinerary

We’ll get more details in this 3-day road trip from Zion to Bryce Canyon now, and it is the ideal time frame to explore these two incredible national parks.

In three days, you can quickly travel while seeing many of the highlights of each park. There may be a few concessions, and you won’t be able to view every part of Zion, but you’ll get the best parts of each.

Day 1 (Zion): The Narrows And Watchman

If you’re coming from Las Vegas, get there early, or get an early start if you stay in Springdale. Make sure to get any necessary gear the night before to head out before stores open.

Park at the main visitor center if you are just getting to Zion. You can also walk or take the village shuttle bus from a Springdale hotel or campground to the visitor center.

No matter what time of year you go, don’t forget to rent a walking pole. Without it, you won’t get very far.

The Narrows

Zion to bryce canyon

Hiking the Narrows with as few people as possible is ideal for starting your Bryce Canyon and Zion tour. The Narrows is generally peaceful at sunrise.

The trail begins with a mile of Riverside Walk before entering the river. The Narrows is unique in that you can trek it for as long as you desire. Most people hike the first 1-3 miles of the path, which is 10 miles roundtrip.

Hiking through a river takes much longer than walking on a conventional route, so keep that in mind while planning your schedule. Consider the following while planning your trip across the Narrows:

  • Because your feet will be in the water for the whole trip, we recommend bringing a change of shoes for your later excursions.
  • Since the Narrows region is prone to sudden floods, check the weather forecast before trekking there.
  • Also, because the river is prone to cyanobacteria, you should avoid submerging your head, swimming, or drinking the water.
  • Keep in mind that you should only hike as far as you feel comfortable and that you must return the same distance you walked in.

Watchman

Zion to bryce canyon

Return to the visitor center on the shuttle and drop off your stuff at Zion Outfitter. You’ll be more than ready to change into something comfier by now!

It should be late afternoon, giving you plenty of time to trek The Watchman.

Watchman begins in the tourist center, where you just left off your belongings. Before going up to Watchman Overlook, it’s a good idea to get some dinner in Springdale.

The sun should be setting by the time you get to Watchman Overlook. Stay up here to see the sunset before returning to your Springdale hotel or campsite. Seeing the sunset here is totally worth it and is a must-do!!

Day 2 (Zion): Angels Landing, Emerald Pools, and Canyon Overlook

Apply for an Angels Landing permit in advance or receive a walk-in permit the following day. We suggest that you choose the first time slot so that you can hike to Angels Landing in time for sunrise.

Get up early, pack your tent or check out your hotel, and get on one of the earliest shuttles into the canyon. You don’t want to be on this path with dozens of other hikers since there’s not a ton of room.

Take the shuttle to The Grotto, stop #6. Starting on the other side of the road, follow the route towards Scout Lookout and Angels Landing.

Angels Landing

Zion to bryce canyon

If you obtain a permit, you will be given a specified start day and time for your hike. You can rearrange your trip to accommodate the commencement time on your permit. Angels Landing in Zion National Park’s most famous hike is not for the faint-hearted.

This 5.5-mile roundtrip expedition starts with a rugged ascent via switchbacks before continuing along a ridge with lengthy, steep dropoffs. It’s an adrenaline-pumping adventure with breathtaking vistas that will leave you breathless!

Remember to be cautious and aware of your surroundings when climbing.

You never know how other people will respond when they are terrified, so be alert to what is happening around you.

Emerald Pools Trail

Zion to bryce canyon

The Emerald Pools hike is a 3-mile out-and-back that passes through the only waterfalls in Zion National Park. Although the waterfalls are modest in size, they are stunning!

Beginning opposite the Zion Lodge, the route follows a straightforward approach to the Lower Emerald Pools, where you can stroll under a waterfall. You can end your hike or continue to Middle and Upper Emerald Pools.

You should be prepared for a significantly more steep route if you want to hike to the Middle and Upper Emerald Pools. The Middle Emerald Pools are located on top of the rock and waterfall you just passed under.

Due to its location at the foot of towering cliffs, Upper Emerald Pool is one of the most scenic spots along this hike. It is a beautiful spot that few people hike to!

Zion Canyon Overlook

Zion to bryce canyon

The Canyon Overlook trailhead starts only a few meters from the tunnel’s mouth. This hike will be considerably gentler on the nerves and more suited to children/families.

This hike has many entertaining features, including sloping wooden footbridges and a crescent-shaped cave. So it’s fun but not too tricky, making it a great afternoon hike.

Find a secluded location on either side of the information board and take in some of the most outstanding views in Zion, this time across Pine Creek Canyon, as you reach the summit.

Return to your vehicle, continue down UT-9 beyond the east entrance and turn onto US-89 North. The journey between Zion and Bryce Canyon should take around two hours.

Take a slight detour to Many Pools and Checkerboard Mesa on the way out of Zion if you have the time.

Day 3 (Bryce Canyon): Incredible Sunrise Over the Amphitheater, Navajo Loop and Queens Garden Trail, and Bryce Point Perspective

Today is another early start, but you won’t have to battle any crowds, at least not right away. Here is how you’ll start day 3 in Bryce Canyon National Park.

Incredible Sunrise Over the Amphitheater

Zion to bryce canyon
pinterest.com

Check Bryce Canyon sunrise timing and get up there at least 30 minutes before sunrise.

Drive to Sunrise Point, set up your camera and tripod in the best possible position, and then relax with a coffee and breakfast while waiting for the sun to rise above the Eastern horizon.

The sight of the Bryce Canyon amphitheater burning a fiery red hue in the morning light is breathtaking.

As the early sunshine poured over the countryside, we were astounded by how vivid and intense the red and orange colors shimmered.

Navajo Loop and Queens Garden Trail

Zion to bryce canyon

Next, it’s time to hike. This hike is one of the most remarkable ways to see the hoodoos and spires of Bryce Canyon National Park. This fantastic walk passes by notable park landmarks, including Queen Victoria and Thor’s Hammer.

Begin by hiking the Navajo Loop Trail to Sunset Point, which offers spectacular canyon views. You can go right here and enter Wall Street, a tiny canyon. This route follows the Navajo Loop Trail’s eastern side. After crossing Thor’s Hammer and the Two Bridges, you’ll reach the Queens Garden trail intersection, home to some of the park’s most beautiful formations.

The Queens Garden Trail offers views of towering hoodoos and rocky formations.

During their creation, hoodoos go through numerous phases. First, water erodes stony plateaus into fins. When they become thin, a hole forms in the middle, producing a window. A hoodoo appears in place of the top of the windows after further erosion.

Frost wedging causes most erosion in Bryce. Rain pours into rock fissures, freezing and expanding when the temperature decreases, widening the fractures.

Turn left at Sunrise Point to return to the parking lot via the Rim Trail.

Bryce Point Perspective

Zion to bryce canyon

Suppose you still have enough time after the Navajo Loop and Queens Garden Trail. If so, you can finish your trip to Bryce Canyon by driving (or better yet, riding the park shuttle) to Inspiration Point and Bryce Point for various views of the magnificent theater.

It should be mid-afternoon, giving you plenty of time to get to your next location before dark. If you’re behind schedule, just skip this step and head home.

Bryce Canyon is much smaller than it seems, though, so it’s pretty easy to see the top sights here all in one day.

4-Day Zion To Bryce Canyon Road Trip Itinerary

When traveling to Bryce Canyon from Zion National Park, the 4-day trip provides you more flexibility. You can take your time and appreciate every detail of both parks without feeling hurried.

You could divide your time between Zion and Bryce Canyon and spend two days in each, or spend three days hiking in Zion and reserve the final day for Bryce Canyon.

We would do the latter and hike in Zion for three days before going to Bryce Canyon for sunset on the third evening.

Because there aren’t many “things to do” within Bryce Canyon, you won’t need to spend two full days there.

Here are some ideas on how to spend your four days in Zion and Bryce Canyon:

Day 1: Zion

You can spend the night in Springdale.

Day 2: Zion

  • Spend the day hiking through The Narrows or sunrise hike with Watchman
  • Then go to Observation Point (wilderness) via the East Rim Trail

Day 3: Zion

Day 4: Bryce Canyon

What About A Bryce Canyon To Zion Road Trip?

While we personally enjoy doing the Zion to Bryce Canyon road trip in that order, you can also do a Bryce Canyon to Zion road trip just as easily.

One plus of the Bryce Canyon to Zion road trip is that you won’t experience any altitude sickness because you’re starting at a higher altitude and slowly moving to a lower altitude (Zion).

Simply reverse any of these itineraries when planning your Bryce Canyon to Zion road trip. But keep in mind that you won’t want to spend more than a day at Bryce Canyon, so there will be a bit more driving during the early part of your trip.

Where to Stay Near Zion and Bryce?

Both Zion and Bryce Canyon have lodging options ranging from camping to resorts. Here are our favorite spots near both parks!

Where to Stay Near Zion National Park?

From camping beneath the stars for free to stay in a fancy resort, Zion offers something for everyone.

If you want to stay in Springdale outside the park, you must reserve four to six months in advance.

Make reservations for campsites and the Zion Lodge 6 months in advance. Every year at the beginning of the month, the lodge accepts bookings for the entire month.

Inside Zion National Park

There are three campgrounds in Zion that need to be reserved ahead of time. Camping in the park is very popular, and campsites tend to fill up fast. There are only three places where camping is allowed:

If you don’t want to camp, you can stay at the Zion Lodge. It is the only place to stay in the whole park.

Outside Zion National Park

You can camp for free on BLM land on Dalton Wash Road, about 30 minutes outside the park.

Hotels in Springdale are costly, so if you want to spend the night in this charming small town, be prepared to spend a few bucks. Some of the best choices are:

Where to Stay Near Bryce Canyon National Park?

Staying inside the park’s limits takes considerable preparation. Book lodgings 3–6 months in advance.

Make reservations for the famous Lodge at Bryce Canyon a year in advance.

Inside Bryce Canyon National Park

There are two campgrounds inside the park of Bryce Canyon. Both campgrounds are great places to camp because they are close to the park’s main things to see and do. Visit the National Park Service website to find out more about each campground and how to make reservations. Here are the two campgrounds:

The only hotel in the park is the Lodge at Bryce Canyon for lodging.

Outside Bryce Canyon National Park

Even though the towns near Bryce Canyon aren’t as big as Springdale near Zion National Park, they offer places to stay outside the park.

You can camp anywhere along Forest Road 1173 (on BLM land) for free just outside the park.

For camping outside, you have Ruby’s Inn RV Park and Camping.

You could spend the night in one of the following beautiful hotels close to Bryce Canyon National Park:

General Tips for Both Parks

When preparing for a trip from Zion to Bryce Canyon National Park, you should know the following:

1. Get an America the Beautiful Pass

For only $80, you can buy an America the Beautiful Pass. It is the best way to save money on all National Parks and even more National Park Service Sites. Here are a few reasons why you should buy the pass:

  • Give access to more than 2,000 public lands is free for an entire year
  • Pay for itself quickly, and you can’t beat the price!
  • Have six different types of America the Beautiful passes, so there is one for everyone
  • Share your pass with family and friends
  • Support giving money to the United States’ Public Lands

2. Get Your Day Going Early

Zion and Bryce Canyon are both well-known national parks that get a lot of visitors every year. Start your day soon after sunrise to find the best places to park and avoid crowds. Even if you’re not a morning person, it’s worth it to get up early and beat the crowds for this trip.

3. Have NPS Apps on Your Phone

Download the National Park Service App and the Recreation.gov App if you haven’t already.

The National Park Service app is a helpful app that gives information on all National Park Service locations in the United States. You can identify nearby places, and you can use it to keep track of the National Parks you’ve visited and those you want to see. This app makes it straightforward to begin arranging a vacation to any US National Park.

Most people are familiar with the Recreation.gov app for reserving campsites, particularly in the United States National Parks, but it offers much more. You can buy permits, excursions, shuttle tickets, and passes and obtain more information on various places and activities through the app or website.

4. Rent a Car Rather Than an SUV To Save Money

We usually hire a larger car with all-wheel drive on national park outings. But it isn’t necessary at Zion and Bryce Canyon since all roads are paved and readily accessible. Renting a smaller car will save you money.

5. Stop at the Visitor Centers

A simple trip to one of the US National Park visitor centers can be highly beneficial. A qualified park ranger can provide you with further information on the park. You may also buy merchandise, see park exhibits or films, use the toilet, and refill your water bottle.

6. Book in Advance for Your Stay

When bookings are offered on a rolling 6-month basis, campsites fill up quickly. If you wish to stay in a park lodge, reserve 13 months in advance when reservations open.

7. Adhere to the Principles of Leave No Trace

It is critical to remember the Leave No Trace principles while exploring and enjoying the outdoors. Respect and cherish nature so that future generations might experience its splendor.

Hopefully, this Zion to Bryce Canyon road trip guide gives you lots of information to plan an amazing trip!

The Ultimate Guide To Hiking The Colchuck Lake Trail

In Washington State’s Alpine Lakes Wilderness Area, the Colchuck Lake Trail is steep and rugged, but anybody who can manage the 2,300-foot elevation rise will be rewarded with breathtaking views.

And the Colchuck Lake Trail is seriously gorgeous, especially when you break through the woods and glimpse that deep turquoise lake for the first time. Then, as you descend to the coastline, the vista expands even more, with Dragontail Peak towering above. You experience the moment that every hiker dreams about: the one when time slows down and nature reminds us of our position in the world.

Colchuck Lake Trail is one of the most well-known hikes in Washington State. It has been on our bucket list for years, and we finally made the time a few summers ago.

Hiking the Colchuck Lake Trail requires planning, particularly concerning scheduling, permits, parking, and preparation. So we’re writing this article to give you all the information to hike the Colchuck Lake trail successfully.

Overview of the Colchuck Lake Trail

Hiking the Colchuck lake trail

Here’s a brief rundown of the Colchuck Lake Trail near Leavenworth, Washington, before we get into the meat of the trip.

Highlights: One of the gorgeous lakes along the main Enchantments trail is Colchuck Lake. The green and blue lake is breathtaking, and the Dragontail and Colchuck peaks provide a dramatic background.

Distance: 9 miles out-and-back

Difficulty: Challenging

Elevation Gain: 2,283 feet

Land: Alpine Lakes Wilderness Area

Trailhead Location: Turn south on Icicle Road from Leavenworth’s west end on Highway 2. After about 8.4 miles, go left onto Forest Service Road 7601 (FR-7601). The 3.7-mile gravel road to the Stuart Lake trailhead is sometimes tricky and steep.

Hiking Time: It typically takes 4 hours and 34 minutes to finish.

Passes: A valid Recreation Pass is required at the Stuart Lake trailhead.

Permit Info: Permits into the Alpine Lake Wilderness are needed. At the trailhead, they are self-issued. Special overnight permits are necessary for the unique Enchantments Area from May 15 to October 31.

Restrictions:

  • Wilderness Trail is a non-motorized trail that does not allow bicycles.
  • The maximum number of people per group is eight.
  • Dogs are not permitted on the Colchuck Lake trail, Stuart Lake trail, and the Enchantment Permit Area. All pets, including dogs, are restricted.
  • Campfires are not permitted.
  • Stock is no longer allowed on the trail.
  • Colchuck Lake has designated hiker campsites.

When to Hike Colchuck Lake

Hiking the Colchuck lake trail

From November through May, FR-7601 is closed; particular dates vary year to year based on snowfall, so check the forecast before going out. Snow is likely to fall by November 1 in the fall and until June 30 in the summer. We don’t recommend going this in May since the trek and drive will still be snowy.

Summer and October are undoubtedly the best times to visit Colchuck Lake.

Deciduous conifers may be found all around the lake, at the foot of Asgard Pass, and amid the evergreens. To the inexperienced eye, alpine larches, sometimes known as tamaracks by locals, seem to be little evergreen trees.

The needles of these ordinary-looking trees become a dazzling, golden yellow by the middle of October, while tints of blue and green predominate throughout the summer. It’s as if Bob Ross was painting a landscape and used yellow instead of green and then went all in.

The tough larches are also among the most extraordinary survivors at this elevation, making for a stunning color contrast against the rocky backdrop.

If you’re visiting Colchuck in October, we suggest staying in Leavenworth and spending time along the river, where the golden motif continues. It’s a lovely time to visit! What’s more, Oktoberfest is a must-attend event.

Getting to the Trailhead

From Leavenworth, you have to turn onto Icicle Creek Road from US2 to get to the trailhead. Turn left onto FR-7601 after 8.4 miles. The Stuart Lake trailhead is 3.7 miles along a rough, occasionally potholed dirt road.

For roughly 6 miles, take I-5 North to WA-520 East toward Bellevue/Kirkland if you are from Seattle. Then take I-405 North for approximately 8 miles after crossing the lake (there is a toll). If you want to avoid paying the WA-520 toll, take the I-90 bridge south and then take I-405 north. After that, take exit 23 and join onto WA-522 East for about 13 miles, staying in the far right lane. For approximately 85 miles, merge onto US-2 East, taking you over Stevens Pass and into Leavenworth. Follow the instructions above from Leavenworth.

Note that FR 7601 from Icicle Creek Road to the trailhead shuts throughout the winter, usually from November to May, resulting in a limited hiking season in the summer.

Parking at the Trailhead

The first thing to remember is that parking for this hike is quite limited, particularly during the summer weekends.

You’ll need an annual Northwest Forest Permit, which you can purchase at the parking lot entrance.

We recommend coming early to avoid parking a mile away from the trailhead. There is enough room for 20-35 cars, depending on how skillfully the early birds organize their vehicles. Overnighters with special permissions can park in about half of the lot.

Remember that this is a well-guarded area. You will get penalized if you park without a pass. Also, you’ll receive a penalty if you park in an overnight area with a pass but no overnight permission.

Between the Stuart Lake and Eightmile trailheads, there is parking along the right side of the forest service road.

Hiking Colchuck Lake

Hiking the Colchuck lake trail

It’s a religious experience to turn the curve and emerge from the woods at Colchuck Lake for the first time. The lake’s icy waters are suddenly spread out before your feet — deep blue in the shade, dazzling aquamarine in the day — while the twin spires of Dragontail and Colchuck Peaks, far above you at the other end of the lake, appear to blot out the very sky.

While the final approach to the lake is steep and rugged in parts, the cumulative elevation increase of 2,300 feet makes Colchuck’s beautiful landscape accessible to hikers of all abilities. The trailhead parking area and the road leading to it are packed with vehicles in the summer.

As if Colchuck Lake wasn’t already enticing enough, it’s also one of the two entrances to the Enchantments. Additionally, the trailhead leads to Stuart Lake, a less demanding but equally beautiful destination.

The Beginning of the Hike

The Stuart Lake Trail #1599 is an excellent place to start. Within hearing and occasionally sightline of Mountaineer Creek, the first mile and a half rises steadily through woodland, first thick and gloomy, then thinner and brighter. On occasion, you can view the valley’s sheer cliffs through gaps in the woods.

The trail crosses to the right bank of Mountaineer Creek over a solid log bridge at the end of the first mile and a half. Hikers can get some welcome reprieve from the wind coming off the roaring whitewater of the stream by standing near the midway of the bridge on hot days.

The trail steepens and becomes rockier after the bridge, giving you a taste of what’s to come in the hike’s second half.

The Second Half of the Hike

Hiking the Colchuck lake trail

The trail flattens out and dips after three-quarters of a mile before reaching a trail intersection. The route to Stuart Lake continues straight ahead, while the Colchuck Lake Trail branches off to the left.

Following the path to the left, you will come to another log bridge that will carry you over a narrow, turbulent portion of Mountaineer Creek after a short length in the forest. As you leap stones in a significant talus slope along the creek’s side, the trail becomes a mess. You’re again at the stream a little while later, but its waters are sparkling smooth; a good area for a quiet rest before resuming your ascent.

The hike is gentle at first, but it becomes steeper and rockier as you approach closer to the lake.

Views of the valley you’ve just climbed out of open up at numerous points along the trip, first to the valley you’ve just climbed out of, then up to the toothy ridge of Dragontail Peak. The trail jogs to the right after one last steep section, descends into a bit of swale, and suddenly you’re at one of the best lake vistas in the Cascades.

Reaching Colchuck Lake

Hiking the Colchuck lake trail

The trail ends at a large granite face with a lake view. It is a fantastic spot to have a bite to eat while admiring the environment.

The majestic peak of Dragontail Peak is seen across the lake. Aasgard Pass, located to the left of Dragontail, is the very steep “shortcut” to the Enchantments. The Colchuck Glacier remains to the right, as do the slopes of Colchuck Peak, with its absolute top hidden by granite towers.

If you still have the energy, the Colchuck Lake trail continues for another two-thirds of a mile along the shoreline, sometimes uneven and difficult to follow. At a big tarn, one of the least visible route junctions occurs — it’s typical to follow the well-trodden dirt to the right, but the trail follows rocky slopes to the left.

After a series of curves and ups and downs through the forests, the track comes to a rock field at the Colchuck Glacier’s terminal moraine base. Subalpine firs give place to larches here, and the official trail gives way to a rock-hopping approach that leads to Aasgard Pass.

Where to Stay Near Colchuck Lake

Hiking the Colchuck lake trail

There are several lodging alternatives available near the Colchuck Lake trail, depending on your preferences. Remember that the campgrounds are close to downtown Leavenworth and should be on your itinerary. A day is not enough to explore this Bavarian beauty!

Here are the options where you can spend the nights:

Camping

Two camping alternatives will allow you to wake up, park at the trailhead, and hit the trail.

Bridge Creek:  Only six spots are available, and they are all first-come, first-served. They also offer specific group sites that you must reserve ahead of time.

Click here to rent an RV.

Eightmile Campground: This bustling campground, situated 8 miles out of town and off Icicle Creek, is available for tent and RV camping and offers a 60/40 mix of reserved and first-come, first-served spaces.

Click here to rent an RV.

Hotels Near Leavenworth

From large hotels to tiny B&Bs, there are many fantastic places to stay in and around the Bavarian town of Leavenworth.

Abendblume: It is a small Bavarian retreat with old-world charm, featuring seven individual rooms and a complimentary traditional Austrian breakfast.

Click here to book.

Downtown Loge: With a beer garden and café on-site and full access to the Riverside outdoor amenities, the classic hotel rooms can accommodate 2–4 people. Seasonal pricing varies.

Click here to book.

Mountain Resort Sleeping Lady: This quiet resort, located on Icicle Road outside of town, provides rustic private accommodations, gourmet cuisine, spa services, and a gift store.

Click here to book.

Riverside Loge: It has private 2-person cottages overlooking the river with common fire pits, green lawns, and an outdoor kitchen with a Traeger beckoning. Seasonal pricing varies greatly.

Click here to book.

Packing List for the Colchuck Lake Experience

Hiking the Colchuck lake trail

While backpacking expertise is not required for hiking the Colchuck Lake, we would strongly advise having someone in your company who is familiar with the ins and outs of backpacking and can advise you on gear. You want to be prepared for the Colchuck Lake trail hike!
Here are the things you should bring for hiking Colchuck Lake:

Tent: You’ll want to make it for a group of two to three people and keep it light. Yes, it is more costly, but it is well worth it.

Sleeping Bag: You generally won’t need to go below 25 degrees unless you’re in the fall.)

Sleeping Pad: Consider the following factors: weight, size, R-Value (how warm it will keep you), and toughness.

Water Filter: On every backpacking trip, this is a must-have. You have the option of using a gravity filter or a pump. We choose gravity filters because they are simple to use.

Quality Backpack: Yes, this is something you should indulge in. You want to be able to walk with ease. We suggest a 55L to 65L backpack if you’re traveling for four days.

Hiking Boots: We suggest high ankle boots protect your ankles when climbing Asgaard Pass. The gravel and dirt may be slippery.

Hiking Poles: It comes highly recommended by us. Any brand would suffice.

Cooking system: Of course, you need it to cook food.

Fuel: For one journey, a tiny can will do. It is something you’ll have to get from a shop.

Food: Dehydrated meals from Backpackers Pantry or Mountain House are also attractive options. It’s a must-have for refueling meals. Breakfast and lunch might be less expensive and lighter options.

Clothes: Hiking base layers, Midlayers, Outershell, Socks, Hiking Pants, Short, Leggings, and Hat/Beanie

First Aid Kits: Rather than purchasing a ready-made kit, we recommend assembling it yourself.

Other items that are useful on the Colchuck Lake trail:

  • Towel
  • Sunglasses
  • Sunblock
  • Hand Sanitizer
  • Toilet Paper

Nice To Have but Not Required

Hiking the Colchuck lake trail

These things are nice to maximize your experience, but they are not required. Some of these are especially useful if you’re hiking the Colchuck Lake trail in the winter.

  • Microspikes
  • Ice Axe
  • Binoculars
  • Helmet
  • Pillow
  • Camera and Accessories
  • Hammock
  • Insulated Water Bottle
  • Bug Head Net
  • Bear Spray
  • Bug Spray
  • Portable Charger
  • Sandals
  • Swimsuits

Everyone is unique. Some people prefer a more significant load and a more luxurious camping experience. Some people like to travel light and rough it. There is no such thing as a correct response. Decide on whatever makes you feel most at ease!
Additional Information You Should Know About Colchuck Lake

Hiking the Colchuck lake trail

We’ve included this section with more information on Colchuck Lake for your convenience.

What Are the Enchantments?

The Enchantments are a Central Cascades area with some of the country’s most extraordinary hiking. Because the Enchantments Trail is 23.5 miles lengthy, most people backpack the trail over many days. However, you will need an overnight permit to camp.

Due to the trail’s popularity, only a few overnight camping permits are available via a very competitive lottery. Each year, these licenses are necessary from May 15 to October 31. Some people choose to trek the Enchantments in a single day, covering the whole 23.5-mile trail. It is something we’ve known individuals to do, and it’s not for the faint of heart.

If you intend to trek the Enchantments from beginning to end, be sure you have enough hiking experience and are physically fit enough to complete the journey.

When Must You Arrive at the Trailhead to Park at Colchuck Lake?

The parking area quickly fills up with hikers heading to Colchuck Lake, Stuart Lake, and the Enchantments. As a result, plan to arrive early, particularly if you’re hiking on the weekend. We arrived in the parking lot around 6:50 AM on a Tuesday in August.

About a dozen parking spaces remained, and many cars approached the road behind us. By 7:30 AM, we’d guess that the parking lot was completely packed. Although we did not hike on the weekend, trip reports indicate that the optimal time to arrive is between 5 and 6 AM.

Is It Possible To Swim at Colchuck Lake?

You can swim in the lake throughout the summer. We packed our swimsuits, but the water was much colder than imagined. Rather than that, we bathed our feet after a lengthy stroll. Some individuals leap into the water! Bring dry clothing and a towel to restore your body heat swiftly.
What Kind of Animals Will You Encounter?

There were a few deer and a slew of chipmunks that you could see. The chipmunks are somewhat pushy as they will attempt to eat your meal. Several of them may approach you exceptionally near to you. It is very vital not to feed wildlife! You can also encounter a mountain goat or two on your trip if you’re fortunate!

Some hikers reported that they observed a black bear near the trailhead. Generally, it’s good to speak loudly not to startle a bear. Just in case, bring bear spray with you.

Is There a Toilet Nearby?

There are pit toilets at the trailhead and the lake itself. Just bring hand sanitizer and toilet paper with you.

Tips for Hiking Colchuck Lake

If you’re planning to visit the Colchuck Lake Trail, you should have a few critical considerations. Here are tips for a successful Colchuck Lake Hike:

Arrive Early

Arrive early in the morning to see the most extraordinary dawn views and secure a parking spot. The parking lot quickly fills up, and you’ll have to locate another location to park your vehicle. If you don’t intend on staying the night, it’s also a good idea to start the trek early in the morning, tour the whole area, and return home safely by sunset.

Check the Weather

Check the weather forecast and trail conditions before heading out to the Colchuck Trail Hiking. Your journey will be considerably more pleasurable and relaxing if the weather is pleasant. Make sure you choose the appropriate option based on the current weather conditions at Colchuck Lake Trail.

Follow the Hiking Directions Map

Although the journey to Colchuck Lake is not difficult, it is essential to follow a map to get there and then continue on the trail. Trails may be challenging and hard to manage, and you can sometimes get disoriented. That is why it is critical to adhere to a map.

Wear Your Hiking Boots

Hiking boots have more ankle covering, which helps avoid ankle sprains, and firmer midsoles, which give more support. When hiking, it’s risky to wear classic sneakers or tennis shoes since you risk spraining your ankle and injuring yourself.

Hike Between July and October

July to October are the most lovely months at Colchuck Lake. Extreme winters can be hazardous and exceedingly cold due to the snow. In contrast, intense summers can be humid and sweaty. Thus, we recommend visiting between July and October.

Bring Water With You

When planning a journey, ensure that you bring several bottles or cans of water with you. While you may not feel thirsty while exploring the lake, going along the trail may be strenuous, and you will undoubtedly need to drink water. So, bring your water bottles with you in your bag.

Don’t Forget Sunglasses and Sunscreen

It is vital to use sunblock and sunglasses when hiking on the Colchuck Lake Trail. If you are not used to wearing sunglasses, ensure that you apply sunscreen. Due to the heightened trail, your skin might get quite tanned by the end of the day. So, don’t forget sunglasses and sunscreen if you don’t want that to happen.

Final Thoughts

The Colchuck Lake Trail has several challenges. The path is often steep and rough, so take caution—plan with the weather in mind.

Don’t forget to use a map. New areas might be confusing, and you don’t want to get lost. It definitely pays to plan ahead when hiking the Colchuck Lake trail.

After all, Colchuck Lake is one of the most stunning alpine lakes ever, and it’s worth the effort!

We hope this post helps assist in your preparations for hiking the Colchuck Lake Trail. Enjoy!

11 Incredible State Parks In The Florida Keys

Is siesta time what you’ve been craving, or how about a breath-taking deep-sea excursion? If you’re heading to southern Florida, then the beautiful Florida Keys State Parks should be on your must-see list, regardless of whether you want to snooze or scuba dive. There’s something for everyone!

The Florida Keys are a chain of subtropical islands between the Gulf of Mexico and the Atlantic Ocean about 125 miles west of Florida. And there’s so much to do in the Keys!

There are 11 State Parks (most only knew ten) located in the Florida Keys you can have tons of fun at. Each has its beauty and vast landscape. Getting some peace in any of these state parks is simple, but there are plenty of opportunities for outdoor adventure, too.

Do you want to relax in the shade with a book? Or take a deep breath and experience an underwater theme park? With this comprehensive guide to the most incredible State Parks in the Florida Keys, you’ll be able to pack it all in.

Here are the 11 best State Parks in the Florida Keys that you definitely won’t want to miss.

11. Dagny Johnson Key Largo Hammock Botanical State Park

Location: Key Largo | Entry Cost: $2.50 per person | Vibe: Tropical, woodsy, secluded

The best state parks in the Florida Keys including state parks in Key West and other Florida Keys state parks

On County Road 905, about half a mile north of Mile Marker 106 on U.S. Highway 1, you’ll find Dagny Johnson Key Largo Hammock Botanical State Park.

It boasts one of the most oversized West Indian tropical hardwood hammocks in the United States. It contains almost 6 miles of shaded and typically paved pathways accessible to bikes and wheelchair users.

This 2,500 acres State Park is home to 84 endangered species, and a self-guided nature walk has signage with information on the park’s habitat and species.

A short paved walking/biking track leads to the main public area of the habitat, where you can see breeding populations of Black-whiskered Vireos, Mangrove Cuckoos, and White-crowned Pigeons. During spring and fall migration, you can witness 20+ species of wood-warblers.

Look for Ruddy Daggerwings and Zebra Longwings fluttering through the hammocks if you’re interested in butterfly watching. There are some seriously gorgeous species of butterflies at this state park!

After getting a free backcountry pass, you can access an extra 4 miles of paved routes and off-trail options (at the neighboring John D. Pennekamp State Park). Brown-crested Flycatcher, La Sagra’s Flycatcher, Thick-billed Vireo, and Zenaida Dove are just a few of the rare species found here – you’ll see lots of wildlife if you choose to hike.

You will also find a picnic area and bathrooms on-site for additional convenience. We advise using insect protection and long sleeves and trousers since mosquitoes are prevalent here, especially during summer.

This is one of our favorite State Parks in the Florida Keys because it offers an exclusive up-close experience with nature but the hike isn’t too aggressive.

10. Bahia Honda State Park

Location: Big Pine Key | Entry Cost: $8 per vehicle | Vibe: Beachy, great for camping

The best state parks in the Florida Keys including state parks in Key West and other Florida Keys state parks

Where else can you immerse yourself in nature while learning about the region’s rich history? Visitors to Bahia Honda State Park can participate in various activities. This award-winning beach, named by Spanish explorers centuries ago, is a draw for historical lovers and environmental enthusiasts alike as well as anyone who just wants to lay on the sand.

Sand and sea enthusiasts will delight at the 500-acre Bahia Honda State Park, which has powdery white beaches, crystal-clear seas, and awe-inspiring sunsets. You can have close-up views of vibrant coral and exotic fish when you snorkel or kayak here. To gain a bird’s eye perspective of the lake below, climb the century-old original trestle railroad construction.

There is also much history associated with the Bahia Honda Bridge because it was one of the most challenging to construct in the region. This bridge has had its fair share of difficulties, from dealing with uneven ground to being battered by big storms.

The best state parks in the Florida Keys including state parks in Key West and other Florida Keys state parks

If you like, take a walk in the woods to see the local species and flowers. Alternatively, you can take the Overseas Highway to Big Pine Key, where you can dive and snorkel in some of the most excellent reefs in the Florida Keys.

To conclude the day, return to Bahia Honda and pull up a piece of the sand on the shore. Let yourself be lulled to sleep by one of South Florida’s most spectacular star-studded sky while you relax on the white-sand beaches.

No matter what time of year you visit, you’re guaranteed to have a good time with your family here. Bring sunscreen and sunglasses, and don’t forget your outerwear. You can choose between a cabin, an R.V. site with electricity and water, or a tent site at the park. Bahia Honda is a great place to relax and enjoy the warm weather all year round.

If you’re planning to visit any of the State Parks in the Florida Keys then I definitely recommend Bahia Honda. It’s just so beautiful and has the true “Keys” beachy vibe while offering a bunch of nature experiences.

9. Curry Hammock State Park

Location: Marathon | Entry Cost: $4.50 per person | Vibe: Undeveloped, lush forest

The best state parks in the Florida Keys including state parks in Key West and other Florida Keys state parks

Are you in search of a unique experience? Curry Hammock State Park is a well-kept secret. This 1,000-acre park is the most significant uninhabited area between Big Pine Key and Key Largo set aside for preservation. Tourists seeking a genuinely “natural” experience in the Florida Keys love the park’s peaceful island environment and abundance of wildlife.

You can see mangrove tunnels, deep water lagoons, the open ocean, and grassland flats while hiking the nature route.

You can also explore vast Florida Keys mangrove wetlands, tropical hammocks, and seagrass beds, or get out on the water and try your hand at kayaking, paddleboarding, or even snorkeling. Set out a line and see what it takes.

Take flight like a kite if you want to take things a step further. Take to the water on a kite-powered board and enjoy the emerald green waters of Florida Bay. Kite-flying is also a great way to unwind at Curry Hammock, and is a tremendously popular pastime in this area.

The park also consists of a collection of islands in the Middle Keys, with public access to swimming, picnic tables, playground, grills, and showers on the ocean side of Little Crawl Key.

Each year, a 28-site campsite along the seashore is available from November 1 to May 31. A dump station and water and power connections are accessible to all campers at any campground’s 28 sites.

When planning a winter camping trip here, book early to avoid disappointment. It fills up quickly! This is definitely one of the more popular State Parks in the Florida Keys for campers who want to experience true untouched nature.

8. Indian Key Historic State Park

Location: Islamorada | Entry Cost: $2.50 per person | Vibe: Exclusive island living

The best state parks in the Florida Keys including state parks in Key West and other Florida Keys state parks

Are you drawn to less-trodden paths? Indian Key Historic Park is at mile marker 78.5 off the coast of Islamorada. You can only reach this eight-acre island by boat, either hired or owned.

The Florida Keys shoreline, which has been the location of innumerable maritime tragedies throughout the years, gave rise to the profitable profession of cargo salvaging. In the early 1800s, Indian Key was crowned “Wrecker King” of the Florida Keys by Jacob Housman. However, the island’s prosperous civilization was destroyed by the catastrophic storm of 1935.

Indian Key, a fascinating ghost town, is defined with unsettling reminders of the community’s history. You’ll sense their presence as you traverse the streets and examine the remains of old structures. Learn about one of the most intriguing footnotes in Florida Keys history on a self-guided educational tour that culminates in an ascent to the observation tower.

Indulge in various water-based activities such as kayaking or swimming at this remote location. Fishing is also huge at this Florida Keys State Park.

Bonefish on the flats and Tarpon in the channels are just a few of the many species available to anglers. You can also catch Snook, Snapper, and Spanish Mackerel in the area.

Because of the nearby small grass flats, understanding the waterways is essential. Most flats can be traversed by kayaks or canoes, allowing visitors to witness a wide range of marine species, including dolphins, manatees, sharks, and rays. Robbie’s Marina and other nearby marinas hire out powerboats and kayaks to visitors.

You can snorkel at Indian Key, but all snorkeling must take place at least 100 feet away from the dock at all times. Remember that a diver down flag is a must for any snorkeling activities.

If you want to get that exclusive, private island vibe while still experience tropical nature, then this will be one of your favorite State Parks in the Florida Keys.

7. Lignumvitae Key Botanical State Park

Location: Islamorada | Entry Cost: $2.50 per person | Vibe: Exclusive island living

The best state parks in the Florida Keys including state parks in Key West and other Florida Keys state parks

Do you want to explore a remote island paradise? Take a stroll around Lignumvitae Key Botanical State Park, a little-known jewel on the 11-acre island of Islamorada, and let your hair down. An old-growth hardwood hammock forest in the Florida Keys makes this state park a shelter for endangered flora and protected birds.

You can only get to Lignumvitae Key by boat or kayak. Fortunately, you can lease rental boats and kayaks from local merchants. It is home to a magnificent wind-powered house and Native American cultural sites.

When Miami chemist William J. Matheson purchased the island in 1919, he erected a caretaker’s house with a windmill for power and a rainwater cistern. His secret lair is now the island forest’s tourist center.

There are no ranger-guided tours available at this time. You can use a self-guided tour booklet to understand more about the house and the many elements scattered around its lawn.

Visit a unique Dade County Pine house built in the late 1800s or join a ranger-led trek to see stunning coral formations. It is an excellent place for photography, therefore don’t forget your camera while hiking in this woodland. Learn how to paddle a kayak to explore seagrass beds and twisting mangrove waterways.

This really is one of the more remote State Parks in the Florida Keys and is totally worth a visit if you’re feeling adventurous. It’s also a great day trip to take from any of the resorts in Islamorada.

6. Long Key State Park

Location: Long Key | Entry Cost: $4.50 per person | Vibe: A bit of everything

The best state parks in the Florida Keys including state parks in Key West and other Florida Keys state parks

Where do you go when you want to experience the best of both worlds? In the vicinity of mile marker 67.5, head to Long Key State Park.

Long Key, once a retreat for the wealthy and famous, is now a peaceful haven for nature lovers and anybody else looking to unwind on the coastline and take in the view of the Atlantic Ocean. It’s definitely one of the most relaxing State Parks in the Florida Keys and is a great place to vacation.

Take a trip aboard a glass-bottom boat to see the underwater world close. Or, take advantage of the crystal-clear water and short depths to go snorkeling and see what’s under the surface. Explore a series of lagoons in a kayak or canoe by yourself.

Get out on the water and try your hand at some of the most incredible fishing the Florida Keys has to offer. There’s so much wildlife here!

Observation tower views of one of the most beautiful Florida Keys State Parks await those who make an effort to reach there. Hike the 1.1-mile Golden Orb Nature Trail to see the park’s diverse array of plants and animals. There are many places to see animals, including the nests of uncommon birds, so bring your binoculars with you.

Do you want to remain a little longer? Camping in Long Key State Park is a great way to spend the night beneath the stars.

You’ll find 60 full-service campsites that face out over the Atlantic Ocean at the Park. In addition to the standard amenities like a picnic table and ground grill, every campground has access to running water and electricity.

There are three bathrooms in the middle of the park with hot showers. Up to eleven months in advance, you can reserve a room. Because these locations fill up rapidly, it’s essential to prepare ahead of time.

5. Fort Zachary Taylor Historic State Park

Location: Key West | Entry Cost: $6 per vehicle | Vibe: Beachy and historical

The best state parks in the Florida Keys including state parks in Key West and other Florida Keys state parks

Do you like to learn about the past while also taking in the natural beauty of a place? Fort Zachary Taylor State Park is a great place to spend some time outdoors. The park is located on the southern tip of Key West and has one of the most popular beaches in the area.

This is definitely one of the most popular State Parks in the Florida Keys, mainly because it’s located in Key West and has one of the best beaches on the island. But there’s a ton of history here, too.

Historic Fort Taylor dates from before the American Civil War and is home to the world’s most outstanding collection of Civil War armament. Aside from its historical importance, the park also serves as the southernmost State Park in the United States.

Fort Zachary Taylor’s red-brick passageways, past cannon and gun ports, bring history to life in a way that pictures and literature can’t capture. Visitors can learn about the fort’s crucial involvement in both the Civil and Spanish-American Wars through tour guides and interpretative panels on display. On the third weekend of every month, local re-enactors bring history to life by staging historical re-enactments.

The beach at Fort Zachary Taylor is often regarded as the loveliest region. It’s rocky, so you’ll need water shoes that are either useful or required, but it’s still one of the best beaches in Key West (an island that isn’t known for beaches).

On the other hand, the water is a beautiful Caribbean blue, blending Gulf and Atlantic water. There are some beaches in Key West where the water is murky and sluggish.

The rough bottom and rock formations off the coast of Fort Zachary Taylor attract various tropical species, making it an excellent location for beach snorkeling. Because snorkeling requires swimming into water that is too deep to stand in, life preservers are an absolute need for young snorkelers. And the water can get rough depending on the day, so you’ll want to research ahead of time.

There are picnic tables on the beach in the shade of Australian trees. Locals in the Keys pleaded to maintain this exotic tree species, and tourists are grateful for its benefits.

As one of the top State Parks in Key West, the fort is totally worth a visit.

4. Windley Key Fossil Reef Geological State Park

Location: Islamorada | Entry Cost: $2.50 per person | Vibe: Historical, scientific

The best state parks in the Florida Keys including state parks in Key West and other Florida Keys state parks

Have you ever wondered what all the fuss is about concerning coral? Do you have a thing for prehistoric artifacts? The Florida Keys, one of the world’s most fascinating coastal environments, is revealed in all its mystery at Windley Key Fossil Reef Geological State Park.

On Windley Key, just north of Islamorada, you’ll find this Florida Keys State Park at Mile Marker 84.9.

Quick tip: Poisonwood, a frequent Florida poisonous tree, may be found in the tropical forest, therefore stay on the paths that have been well designated.

After the railroad was finished, the quarry made the beautiful and unique ornamental stone known as Keystone for more than half a century. Historic quarry walls are now open to the public, allowing tourists a glimpse into Florida’s 20th-century past as they stroll along 8-foot-high walls to see cross-sections of the old coral. At the park, you can see examples of quarry equipment and can learn exactly how it is used.

Self-guided tours of the island’s five short trails are an excellent way for visitors to take in its natural splendor. There are also picnic tables on hand.

Mosquito repellant is a must if you plan on spending time outside. During specific periods of the year, you may come across substantial golden digger wasps on the park trails, so make sure to follow the signage.

3. San Pedro Underwater Archaeological Preserve State Park

Location: Islamorada | Entry Cost: None | Vibe: Underwater

The best state parks in the Florida Keys including state parks in Key West and other Florida Keys state parks

Are you up for some serious detective work? The San Pedro Underwater Archaeological Preserve State Park is an excellent place for snorkeling or scuba diving. The San Pedro, a 287-ton Dutch-built ship that drowned in Hawk Channel about 300 years ago, was part of a Spanish “treasure fleet.”

San Pedro is now reduced to a 90-foot-long and 30-foot-wide mound of ballast stones after massive salvage activities in the 1960s. Seven replica guns, an anchor, and a plaque have been added to the submerged site.

You can explore the ship’s surviving ballast stones, replica guns, and anchors by snorkeling or scuba diving. Examine the soft and hard coral growth on the ship’s wreckage up close. The abundance of fish (about 65 different species), crustaceans, and other marine life made this structure their home mesmerized.

The only way to get to this State Park is via boat, which is relatively unusual among Florida Keys State Parks. The location is situated a little over a mile offshore, south of Indian Key.

Those who don’t want to get their feet wet can still enjoy the area’s natural beauty by taking a glass-bottom boat excursion. While this Florida Keys State Park is underwater, we totally think it’s worth a visit whether or not you intend to swim because the water is just gorgeous.

2. John Pennekamp Coral Reef State Park

Location: Key Largo | Entry Cost: $8 per vehicle | Vibe: Aquatic

The best state parks in the Florida Keys including state parks in Key West and other Florida Keys state parks
2traveldads.com

When it comes to aquatic life, John Pennekamp Coral Reef State Park is a genuine goldmine for those who seek it out. You can find the Key Largo Dry Rocks, the only living coral reef on the mainland of the United States, inside this 70-nautical mile underwater park. Snorkeling and scuba diving allow you to get a closer look at the park’s vibrant coral reefs and rich aquatic life.

Take a boat trip with a glass bottom to see this unique ecology, or take a dip in the ocean and see for yourself. Swim through an exotic underwater rainforest to get to the park’s centerpiece: Christ of the Deep, a bronze figure sculpted to celebrate the world under the seas.

Recreational canoeing and kayaking are popular, and fishing is allowed in specified portions of the park’s waterways.

The best state parks in the Florida Keys including state parks in Key West and other Florida Keys state parks

Short hikes through tropical hammocks, picnics, and swimming at the beach are also available to visitors. Several big saltwater tanks house a variety of aquatic life, and in the theater, nature documentaries are screened regularly. There are also full-facility and youth/group camping options.

We love the affordable costs, experienced tour guides, and snorkeling experience, although the beaches might have foul-smelling seaweed depending on the present circumstances. But still, this is altogether one of our favorite State Parks in the Florida Keys because you can learn a ton while still having that vacation vibe.

1. Florida Keys Overseas Heritage Trail

Location: Key Largo | Entry Cost: None | Vibe: Biking/walking paths

The best state parks in the Florida Keys including state parks in Key West and other Florida Keys state parks

Even if you’ve been to the Keys, you may not know about this Florida Keys State Park. The 106-mile Florida Keys Overseas Heritage Trail (FKOHT) includes more than 90 miles of current paved trail. The Overseas Highway from Key Largo to Key West goes through this park, which offers a lovely cycling track.

A highlight of this path, even if you don’t bring a bicycle, is the network of bike and pedestrian bridges that span the Florida Keys. Take a stroll over one of these unique bridges and enjoy the numerous tones of blue.

For the Florida Keys, the FKOHT is a multi-use bicycle and pedestrian facility that acts as a recreational and alternative transportation route. Incorporating 23 of the historic Flagler Railroad bridges, this recreational pathway provides a magnificent venue for hiking, jogging, biking, skating, sightseeing, fishing, and paddling.

The ten State Parks above, Everglades National Park, Key Deer National Wildlife Refuge, Biscayne National Park, Great White Heron National Wildlife Refuge, and Crocodile Lake National Wildlife Refuge, are all accessible by this path. It kind of connects all of the State Parks in the Florida Keys together, which I think is so cool.

Visit Florida Keys’ State Parks: Here Are Some Insider Tips!

  • Trails and viewing points are available for disabled visitors in most state parks in the Florida Keys.  Prepare for your visit by checking out the State Park websites to learn about the facilities and concessions available at each location.
  • Take your time if you’re going to be exploring the backcountry paths and hammocks. Learn about the animals and plants by reading and listening to the signs. You can take them a picture and explore the parks with your best “green” knowledge.
  • Have lunch in a fabulous, shaded location. There are plenty of beautiful spots in every park.
  • Prepare what you need. A camera is a must, but you’ll also want to carry a lot of water, snacks, energy bars, and insect spray.
  • Taking a nature walk is an excellent way when you’re seeking something other than the usual tourist sites, beaches, and nightlife. Get away from the modern world for a while and recharge your batteries!

There you have it! These State Parks in the Florida Keys have a wide range of activities, from sunbathing on the sand to exploring the coral reef in the United States. Discovering the fascinating history of the Florida Keys while strolling through the wonders of nature is only one of many reasons why these State Parks are so amazing.

Hopefully, this list of amazing State Parks in the Florida Keys can help you plan your journey. Enjoy!