Ultimate Guide To Kanarra Creek: The Kanarra Falls Hike

Looking to do the Kanarra Falls hike? Today we’re sharing everything you need to know about hiking in Kanarra Creek!

Kanarra Creek is a beautiful narrow canyon located in BLM land just north of Zion National Park’s Kolob area and to the east of Kanarraville’s Hurricane Cliffs. The 600-foot hike through this attraction provides an extraordinary trekking experience in Utah.

What was once an undiscovered gem, the Kanarra Falls hike has become a hotspot for outdoor enthusiasts. Unlike the nearby Zion Narrows, it’s smaller and less crowded, making for a more enjoyable slot canyon climb.

A trip to Kanarra Falls Utah offers a slot valley with river crossings, stairs, and boulders to ascend, two waterfalls, and stunning scenery. Don’t miss the opportunity to journey through the river and witness a spectacular waterfall nestled amid towering canyon walls.

To make the most of your visit to Kanarra Creek, read on for everything you need to know about the Kanarra Falls hike!

Quick Peek at Kanarra Falls Hike 

The Kanarra Falls Hike | Visiting Kanarra Creek in Utah

Highlights: Two waterfalls cascade down a beautiful slot canyon. Same landscape as Zion Narrows but with fewer visitors due to the permit system.

Distance: 4 miles out-and-back

Difficulty: Moderate

Elevation Gain: around 700 feet

Trail: Dirt, water, rock

Trailhead Location: Just east of Kanarraville, UT, the trailhead for Kanarra Creek can be found at the end of E 100 N St. The trailhead is in a large parking lot that is simple to discover. Restrooms, picnic tables, and water for post-hike clean-up are available at the trailhead.

Hiking Time: 3-5 hours

Permit Info: To hike Kanarra Creek, $12 hiking permits per person are required.

Restrictions:

  • There are only 150 hikers allowed to Kanarra Creek daily. Without the permission system, this spot could grow fairly crowded, detracting from the experience while endangering the area’s natural splendor. The limit of people per group is eight.
  • You must obtain a permit to become one of the lucky 150. Permits cost $12 each and can be purchased online for four-year-olds or older. However, these tickets usually sell out weeks in advance due to the hike’s popularity, so hurry!
  • Dogs at Kanarra Falls are not allowed. The Kanarra Creek watershed is Kanarraville’s primary source of drinking water, and dog waste can contaminate it.

How To Get Permits for the Kanarra Falls Hike

The Kanarra Falls hike has become a highly sought-after attraction, especially on weekends from spring through fall. However, due to its recent surge in popularity, a permit is now required to access the trail. While the cost of the permit may seem a bit steep for a short day trek, it serves as an effective crowd control measure by limiting the number of hikers allowed each day.

To secure a permit, you can purchase them online or at the trailhead. However, it’s important to note that these non-refundable tickets sell out quickly and cost $12 per person. We strongly recommend purchasing your permit in advance to avoid disappointment.

If you do purchase a permit in advance, be sure to print or save a copy as you’ll need to present it to a kiosk attendant at the trailhead. Additionally, it’s worth noting that the permits for the entire year go on sale in January or February.

Things To Consider…

Here are things to consider when you hike Kanarra Falls!

Weather Condition

If you’re planning on hiking Kanarra Falls in Utah, it’s important to take the same safety precautions as you would for the Narrows. Flash floods are a significant concern during the summer months, particularly in July, August, and September when afternoon thunderstorms are more likely. This applies not only to Kanarra Falls but to other slot canyons as well.

Before starting your hike, make sure to check the weather forecast. If there’s any chance of rain or storms, it’s best to avoid Kanarra Falls altogether. Even if the rain is kilometers away, the slot canyon can still be vulnerable to floods.

It’s worth noting that Kanarra Falls may be closed if there’s a possibility of severe rain or thunderstorms. Therefore, it’s crucial to check the weather before embarking on this hike.

Leave No Trace

It would be best to treat the hikes in Kanarra Creek as your backyard. Follow “leave no trace” principles anytime you venture into the great outdoors.

In general, you should try leaving this region and trail in better shape than when you arrived. Stick to approved paths if there are any, use public restrooms to avoid contaminating water sources, and take out everything you bring on the trail with you.

We’re fortunate that the Kanarra Falls Hike is still available to the public, particularly given its popularity and closeness to Zion National Park. Tourists or hikers will lose access to this trail if it is not maintained correctly.

When to Hike Kannara Creek

The Kanarra Falls Hike | Visiting Kanarra Creek in Utah

Regardless of the time of year, there are a few things to remember when visiting Kanarra Falls in Utah.

Here’s what you can expect during each season:

Spring: Spring is an excellent time to visit Kanarra Falls Utah as the weather is mild, and the water levels are typically low. This means you can enjoy the hike without worrying about flash floods, and the scenery is lush and green.

Summer: Summer is the busiest time to visit Kanarra Falls Utah, but it’s also the riskiest due to the increased chance of flash floods. If you do decide to visit during the summer, be sure to check the weather forecast and avoid hiking if there’s any chance of rain or storms.

Fall: Fall is an excellent time to visit Kanarra Falls as the crowds start to thin out, and the weather is still mild. The fall foliage adds a beautiful touch to the scenery, making it a great time for photography.

Winter: Winter is a quieter time to visit Kanarra Falls, but it’s also the coldest. The trail can be icy and slippery, so be sure to wear appropriate footwear and take extra caution. However, the snow-covered scenery can be truly breathtaking, making it a great time for photography.

Getting to the Trailhead

The Kanarra Creek Trailhead near Kanarraville, Utah, serves as the starting point for the Kanarra Falls trek. Cedar City, St. George, and Zion National Park are all within an hour’s drive away, and the trailhead is conveniently located just off I85.

Parking at the Trailhead

The parking area and road to the trailhead are concrete, making it accessible to any car. It is easy to find a parking spot, and there is lots of room, but if you are hiking on the weekend, things might be slightly different. Parking places for RVs are not available at this location.

Park only in the approved spots. If the area is highly congested, be considerate and avoid parking in front of people’s homes or on their land.

If the parking lot at the Kanarra Falls trailhead is full, there are a few other options for parking:

Overflow Parking: There is an overflow parking lot located about 0.3 miles west of the trailhead on E 100 S. This lot can accommodate around 50 vehicles and is available on a first-come, first-served basis.

Shuttle Service: During peak season, a shuttle service is available from Kanarraville to the trailhead. The shuttle service operates from 8:00 am to 4:00 pm and costs $15 per person. The shuttle picks up passengers at the Kanarraville Town Park, which is located at 60 S 100 E.

Hiking Kanarra Creek

There is a lot to grasp and do along Kanarra Creek, a beautiful little canyon that you can walk for up to six hours at a leisurely pace. Depending on how far you want to go in the canyon, you can experience a worthwhile adventure and glimpse of rewarding scenery.

The Beginning of the Hike

The Kanarra Falls Hike | Visiting Kanarra Creek in Utah

The beginning of the Kanarra Trail is a dry and straightforward half-mile section. The trailhead is located just a short walk and set of stairs away from the parking lot. Once you arrive, you’ll find the ticketing or check-in booth on the other side of the gate. A friendly ranger will greet you here and scan your ticket or help you purchase one if needed. They will also provide you with general information on the trail and the potential dangers you may encounter.

Once you’ve checked in, you’ll begin your hike by walking up an uphill gravel road for less than a quarter-mile. After this point, the trail becomes a compacted dirt path. A pit toilet is located less than a third of a mile in, which you can use if needed. However, be prepared to get your feet wet as the first river crossing is immediately after the restroom. While it’s technically possible to skip across some of the rocks, we don’t recommend it as the terrain is slippery, and there’s a nearby waterfall/drop-off.

After the river crossing, the trail is dry and easy, with only modest inclines, until you reach “the fork.” Here, the trail splits into a river path and a dry path. While the water is chilly, many people choose to walk through it in the summer to cool down. However, whichever path you choose, you’ll be in and out of the water throughout the trek. It’s impossible to stay completely dry or on the river path the entire time due to the various obstacles on the trail.

The Middle Section of the Hike

About a mile from the wet and dry trek lies the most challenging part of the Kanarra hike. The terrain can be erratic, and some hikers have complained about the unmarked path. However, with basic navigational abilities, it’s relatively easy to navigate your way around.

As you walk through the woods, you’ll be following a river in a canyon. While the path is straightforward, you’ll need to decide when and how to cross the river, which can be time-consuming. On the dry stretches of the trail, you’ll encounter some stones to scramble over, along with a few small parts of the route that require careful footing.

It’s crucial to take extreme caution during this part of the hike, especially when crossing the river. The riverbank is rocky, and it’s easy to lose your balance and injure yourself. Additionally, there are some slick descents and challenging footing to be encountered, so it’s important to stay alert and focused.

The Narrows and the First Waterfall

The Kanarra Falls Hike | Visiting Kanarra Creek in Utah

After hiking 1.6 miles, you’ll encounter the mini-narrows in along the Kanarra Falls hike. As the canyon closes in around you, your only option is to walk through the river, which can be a harrowing experience depending on the current weather conditions.

Be sure to watch your step on this brief stretch and exercise caution. As you approach the first waterfall, the flow of the river will pick up speed, and the sound of the waterfall will grow louder and louder.

The first waterfall is a picture-perfect sight that you may have seen in countless Instagram shots. At this point, you can take a few photos and turn back, or you can climb the ladder to the next level.

The ladder is made of wood with metal attached to it, and it’s important to use the rope to stay balanced when climbing up or down. This is especially helpful for those who may be less coordinated. Proceed with extreme caution and take your time on the ladder.

The Boulder

The Kanarra Falls Hike | Visiting Kanarra Creek in Utah

After crossing the first waterfall, you’ll face another challenge on the Kanarra Falls hiking trail. To avoid a large boulder, you’ll need to scale a log that’s linked to a rope.

Once you’ve reached the summit, the trail reopens, eliminating the need to wade through the water. Instead, take the path that runs parallel to the creek.

Natural Pool

The second highlight of the Kanarra Falls hiking route is the natural water slide, which is located about 0.2 miles from the summit. This spot is one of the most popular on the trail, thanks to its brief drop down the rocks into a small pool of water.

Finding the water slide is easy as long as you’re in the right place. Take some time to marvel at this cool feature before continuing on to the second waterfall.

Second Waterfall

As you approach the second waterfall, the trail will begin to narrow again, and the water levels will be at their highest point. However, you won’t have to go into the water, so there’s no need to worry.

At this point, the water is roughly shin-deep, and the Kanarra Falls trail ends at the second waterfall. While some climbers have attempted to ascend the waterfall, it’s important to note that this spot is hazardous for hikers to venture into, as it can be challenging for rescuers to reach those in need.

Before heading back, take a few minutes to admire the stunning vista and snap some photos. To exit the slot canyon, you’ll need to backtrack and follow the same trail back to the Kanarra Falls parking lot.

What To Do Before or After Kanarra Creek

You might want to check out these nearby locations if you’re looking for something to do before or after your hike.

Food

Linski’s Grill and Hotel: This restaurant in Kanarraville offers American cuisines in every meal of the day. It is an ideal place to go before and after you hike Kanarra Creek, located near the trailhead. The grill provides various delicious foods, such as burgers, burritos, sandwiches, fries, etc., at affordable prices.

Centro Woodfired Pizzeria: This restaurant provides guests with genuine thin-crust wood-fired pizza made with the best ingredients. It offers a wide assortment of craft beer and wine from throughout the country and the world. Centro is great for hanging out or relaxing after a tiring hike on Kanarra Creek, located in Cedar City. Some of the bestsellers in this restaurant are Arugula Salad, Fennel Sausage, Summer Salad, Bruschetta, and more.

The French Spot: Offering vast French and European cuisines, this café at Cedar City makes a great place to go before or after a long adventure at the Kanarra Falls. You can get or replenish energy in this place if you are about to or after trekking Kanarra Creek and other nearby hikes. Their croissant is a must-try

Hermie’s Drive-In: This institution in Cedar City is known for grilling southern Utah’s delicate burgess and finest ice creams. The restaurant offers various burgers, sandwiches, tacos, chips, and more. You can visit this decades-old restaurant to unwind before or after your trip to Kanarra Creek.

Coffee and Sweets

Kanarra Falls Snackery: Comfortable, pleasant, and cozy, the Snackery is a food shack. Enjoying a delicious meal, drink, or ice cream here after a thrilling climb, town drive, or staying at one of the nearby campgrounds is a must after any of these activities. The setting is rustic and welcoming!

Grind Coffee House: Located in the heart of Cedar City’s historic district on Main Street. The Thorley Building this cafe provides triple-certified organic coffee. In addition to a wide variety of food and drink options, it offers Vegan, Gluten-Free, and Keto alternatives. Their coffee will give you the energy you need for the hike, and it is also a great place after finishing a long cold walk in the Kanarra.

Activities

Zion National Park: A visit to the nearby Zion National Park is one of the best things to do before or after hiking Kanarra Creek. This park is a sprawling canyon land in the southwest corner of the state of Utah, bordered by the counties of Washington, Iron, and Kane. The Virgin River and its tributaries are found within its 232 square miles of high plateaus and narrow, plunging sandstone gorges. More than one thousand feet tall, Zion is also home to pine forests and a wide variety of flora, including hanging gardens, adorned with vibrantly colored flowers.

Kolob Canyons: Kolob Canyons are Zion National Park’s best-kept secret. They’re in the park’s northwest quadrant. Finger Canyons, 65 miles west of Zion Canyon’s red rock splendor, include stunning panoramas and rainbow-hued rocks. It is a haven of quiet, nature, and solitary pathways. The pleasant summer temperatures at Kolob, which are over 2,000 feet higher than Zion Canyon and 10 degrees cooler, are a gift for tourists. It’s a terrific attraction to see before or after Kanarra Creek.

Kolob Terrace: From Virgin, travel Kolob Terrace Road north to Zion’s “Kolob Terrace,” a less-visited location. The Terrace to Lava Point is a beautiful site overlooking golden valleys and the North and South Guardian Angels in the distance. You’ll find the Left Fork of North Creek on the Kolob Terrace, nicknamed “the Subway.” Lava Point, Zion National Park’s highest point, allows rustic camping. Due to a lack of plows in winter, you cannot access the highest areas of Kolob Terrace Road. You have many options in this region of Zion, which you can combine before or after a hike in Kanarra Creek.

Where to Stay Near Kanarra Creek

There are various housing options to choose from, based on your needs and desires. This list of lodging alternatives is the closest to Kanarra Creek, where you can stay comfortably before or after your hike.

Abbey Inn & Suites

Cedar City, Utah’s Abbey Inn hotel sits between Zion National Park and Cedar Breaks National Monument. Each of their 83 new elegant rooms and suites features HD television and free high-speed Internet access, and the hotel is very welcoming.

The steaming hot breakfast buffet is provided free of charge each morning and consists of items such as scrambled eggs, sausage and bacon, and a variety of other breakfast favorites. A 42-inch flat-panel TV, microwave, refrigerator, coffee maker, and ironing board round up the list of further perks.

It is a great place to have a pleasant time while trying Kanarra Creek and other Utah attractions.

La Quinta Inn & Suites by Wyndham Cedar City

This Cedar City La Quinta Inn & Suites Del Sol hotel offers luxurious accommodations with pillow-top beds for the ultimate relaxation. Each room has a 40-inch HD screen with HD Direct TV programs to keep you entertained.

You can stay connected to your virtual mobile devices thanks to free high-speed internet. Voice messages and local free calls keep you connected to your friends and family back home. For your convenience, a computer with printing and faxing features is available in the business center.

They have a massive exercise center at your disposal to help you stay on top of your fitness goals. You may get some exercise or relax with the family in the heated indoor pool and Jacuzzi. There are snacks at the Bright Side Market in the hotel if you feel hungry and don’t want to leave the property.

Overall, staying in this place will make you feel at home for its several features and amenities. Being just around 10 miles from Kanarra Creek, La Quinta is a great lodging option you can consider to have a good time on your trip.

Best Western Plus Cedar City

A little something more is always available at the Best Western Plus Cedar City. The Best Western Plus Cedar City hotel in Cedar City, UT, stands out among the city’s other lodging options because of its modern amenities and intelligent design.

If you’re a  traveler, you’ll be pleased to know that all of their guest rooms come with an ample work area, comfortable beds, and complimentary Wi-Fi. Each accommodation has an in-room mini-fridge, perfect for storing beverages and food for long-term visitors.

While on the road, you can keep up your exercise program by using their in-house gym facilities.

Best Western is an excellent option to unwind before or after a long day of Kanarra Creek hike. You can enjoy several property amenities and advantageous room features at the best value.

Magnuson Hotel Cedar City

Approximately 12 miles from Kanarra Creek, you can find this ideal and budget-friendly hotel in Cedar City.

M-Star Cedar City’s guest rooms have a flat-screen TV, conditioning systems, a fridge, and complimentary Wi-Fi throughout the property.

Some of the hotel’s features are a 24-hour front desk and quick check-in and check-out options, which are also available. Guests can also take advantage of the hotel’s complimentary breakfast. Guests can take advantage of free parking as a bonus.

Additionally, this place is near different Utah landmarks such as Gerald R. Sherratt Library, Cedar City Utah Temple, and more.

Magnuson is also an excellent option for other activities rather than Kanarra Creek. It is also nearby Artisans Gallery, Southern Utah Museum of Art, Veterans Park, and more to spend more time traveling around Utah.

This hotel is an excellent place to rest before and after you venture to Kanarra Creek, as you can complement your hike with nearby activities and attractions that you can choose to do.

Essentials When Hiking Kanarra Creek

The Kanarra Falls Hike | Visiting Kanarra Creek in Utah

Ensure the following items to make the most of your hike to Kanarra Falls.

Grippy Shoes: This walk can be challenging because most hikes are on uneven, slippery surfaces. Wear hiking shoes or footwear that are both comfortable and reliable. A shoe that provides ankle support is helpful when you have weak ankles.

Hiking Poles: If you’re not used to trekking on rocky or uneven terrain, hiking poles can come in handy to keep you steady while you cross the river and climb over the rocks.

Drybag: Ensure to safeguard your devices from the creek water because you’ll be wading through it. Using a dry bag is the ideal way to accomplish this. If you dropped your luggage in the water, you could ruin your cameras, phones, and other valuables.

Water: Carry adequate water on whatever hiking trail you choose, just like on any other. Remember that the more time you spend hiking and the hotter it becomes, the more water you’ll need. To avoid drinking from Kanarra Creek, bring more water, especially during summer hikes.

Layers: Kanarra Falls can feel like a refreshing oasis during the sweltering summer heat because of its high canyon walls. Layers are a must when traveling.

Other Things To Pack To Kanarra Creek

  • Day pack
  • Snacks
  • Sunscreen
  • Hat
  • Camera
  • Extra layers depending on the weather
  • Extra lightweight shoes
  • First aid kit

Best Tips for Visiting Kanarra Falls

Check Operation Hours: During the spring, summer, and fall, the trail to Kanarra Falls is available from dawn to dusk for visitors. In winter, business hours are significantly lesser. If there is a chance of severe rain or a thunderstorm, be mindful that the trail may be closed quickly.

Do Not Bring Small Children: A family-friendly trek, the Kanarra Falls trail does not necessitate the use of specialized equipment to explore the canyon. Bringing little children on the trip is still not recommended for the sake of the younger hikers. It is possible to encounter slippery, unstable homemade ladders, uneven surfaces, and locations where you may have to climb over obstructions.

Utilize Restroom Facilities: There are two restrooms along the route. In addition to the trailhead restrooms, there is one vault toilet just before the Kanarra Falls signpost (0.8 miles).

While visiting Kanarra Falls, these are the only facilities you should use. You must take out with you anything you carry. Don’t be irresponsible who leaves behind rubbish.

Do Not Entirely Rely on Cell Service: While climbing the Kanarra Falls trek, remember that you may not always have cell phone reception. No matter how often a signal appears, do not use your smartphone for directions or other information. This hike is a great time to unplug from the rest of the world and appreciate the beauty of nature.

Hike at Your Own Risk: The path presents various challenges throughout the year. The Kanarra Falls trek is challenging, so use your best discretion and decide how far you want to go depending on your skills, strengths, and comfort level.

Kanarra Creek Falls Frequently Asked Questions

How Strenuous Is This Hike in Kanarra Creek?

The Kanarra Falls hike is considered moderate in difficulty due to the need to cross or wade through water. As a result, it’s essential to be prepared to get wet! While the water may be ice-cold initially, you’ll soon acclimate to it.

To navigate the slippery rocks, it’s important to wear shoes with plenty of traction. Opt for grippy shoes that offer rock protection and a comfortable fit in the water. These shoes are ideal for the hike, whether you’re in or out of the water.

How Deep Is the Water?

There is an average depth of 8 to 12 inches across the trail. Remember that this depth can vary greatly depending on the season and weather.

When Should I Purchase My Permits?

The number of people using the route is steadily rising. We suggest purchasing your tickets at least two months in advance if you know exactly when you’ll be traveling.

Since the number of people each day is limited, it is better not to try getting tickets on-site as you might run out of them.

Is Kanarra Creek Worth a Tour From Zion National Park?

Kanarra Creek is a great trek and is worth it. As an alternative to The Narrows, we highly recommend this hike in a Utah slot canyon. Since it is a slot canyon, be mindful of the weather condition. Heading out on a hike like Kanarra Creek is vulnerable to flash floods.

Is swimming allowed at Kanarra Falls?

While swimming is technically allowed, the water in the canyon can be cold and the flow can be strong, especially during certain times of the year. Use caution and assess your swimming abilities before getting in the water.

Are dogs allowed on the trail?

Dogs are generally not allowed on the Kanarra Falls trail. This rule is in place to protect the sensitive environment of the canyon and to ensure the safety of both hikers and animals.

When is the best time to hike to Kanarra Falls?

The best time to hike to Kanarra Falls is during the spring and fall when temperatures are more moderate. Summer can be hot, and flash floods are a risk during heavy rain. Check weather forecasts before heading out.

Are there restroom facilities along the trail?

There are no restroom facilities along the trail. Make sure to use the restroom before starting your hike in Kanarraville town.

Are there any safety tips I should be aware of before hiking to Kanarra Falls?

Absolutely. Here are some safety tips: Stay updated on weather forecasts as flash floods are a risk in slot canyons. Wear appropriate footwear with good traction, as rocks can be slippery. Stay hydrated, and bring extra water, as the hike involves walking through water. Avoid hiking if there is a risk of thunderstorms in the area.

How long does the hike to Kanarra Falls usually take?

The duration of the hike can vary depending on your pace and the time you spend at the falls. On average, the hike takes around 3 to 5 hours. Plan for extra time if you’re a beginner hiker or if you want to thoroughly enjoy the scenery.

Are there any restrictions on photography during the hike?

Photography is generally allowed, and the canyon’s unique features make for great photo opportunities. However, be respectful of other hikers and the environment. Use of tripods might be limited in narrow sections to ensure smooth passage for all hikers.

Can I hike to Kanarra Falls alone, or is it recommended to go with a group?

While hiking solo is possible, it’s recommended to go with a group, especially if you’re unfamiliar with the trail or the area. Hiking with others enhances safety and can be more enjoyable. If you do hike alone, let someone know your plans and expected return time.

Are there any nearby attractions I can visit after the hike?

Kanarra Falls is located in close proximity to other popular destinations in Utah. You might consider exploring Zion National Park, Cedar Breaks National Monument, or the town of Kanarraville itself. Each of these places offers unique natural beauty and recreational opportunities.

Can I camp overnight at Kanarra Falls?

Overnight camping is generally not allowed at Kanarra Falls due to its popularity and limited resources. However, there are nearby campgrounds and accommodations available in Kanarraville and the surrounding areas.

Is the trail well-marked and easy to follow?

The trail is moderately well-marked, but it’s still a good idea to bring a map or use a GPS device, especially if you’re not familiar with the area. Pay attention to markers and signs, and consider downloading a map or trail guide before setting out.

The Kanarra Creek hike is a short yet enjoyable hike you should not miss. Due to its proximity to Utah’s magnificent National Parks, it is well worth the detour. The trail will take you through the tight, high canyon walls that make it unique.

The challenging and fun adventure here is gratifying that you will be witnessing the stunning scenery of Utah, from various rock formations to not just one but two waterfalls. We hope this post helps you prepare for your trip to hiking Kanarra Creek. Enjoy and stay safe!
Navajo Loop Trail In Bryce Canyon: The Complete Guide

Heading to the Navajo Loop Trail in Bryce Canyon? You’ve come to the right place! The Navajo Loop Trail is one of our favorite Bryce Canyon hikes and we’re here to guide you every step of the way.

In Bryce Canyon, there are lots of hiking paths. Some only last an hour or less and are less than a mile long, while others last all day. Despite being small, Bryce Canyon National Park offers a lot to wow visitors, and one of the best is the experience on Navajo Loop Trail. The Navajo Loop Trail ranks among the busiest trails for a reason!

What makes Navajo Loop Trail different? The hike is magnificent because of the steep fall into the canyon, the trees at the base, and the vistas on the way up.

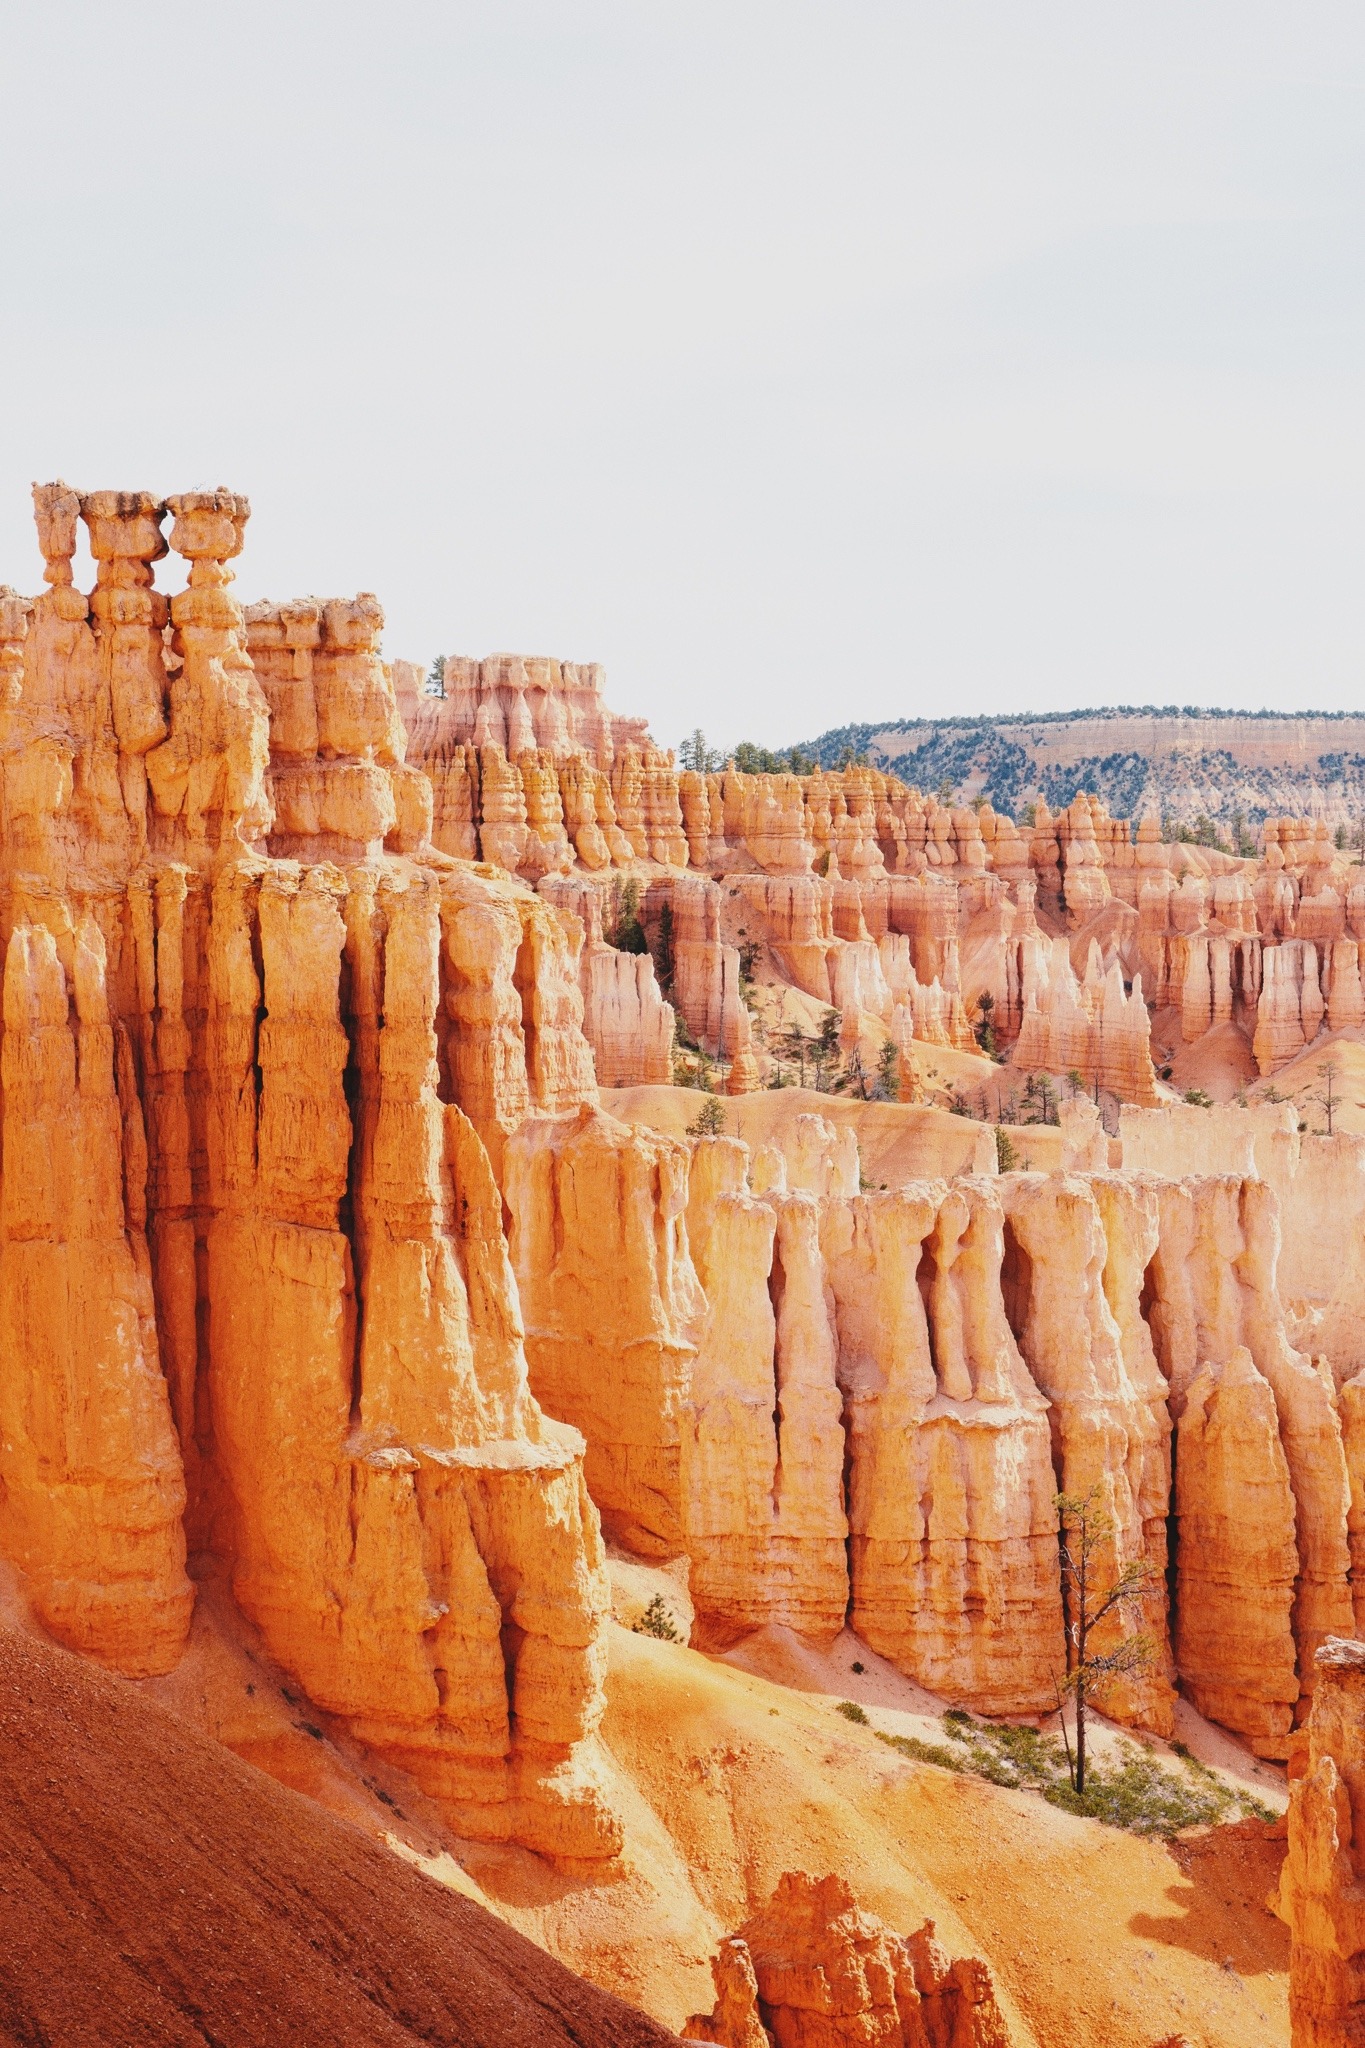
The famous Navajo Loop Trail starts and ends at Sunset Point. It goes down switchbacks between narrow walls of colorful limestone, giving you views of tall Douglas-fir trees and Thor’s hammer, the park’s most famous hoodoo.

We definitely recommend that you hike the Navajo Loop Trail if you’re heading to Bryce Canyon. The views are insane and the hike itself isn’t too difficult, making it perfect for all types of hikers.

About Bryce Canyon National Park

Hiking The Navajo Loop Trail In Bryce Canyon Utah: The Complete Guide

Bryce Canyon is one of the most distinctive national parks in the country with its sandstone rock formations and orange and pink hoodoos. With such wide-open views, there is no better spot to let yourself get carried away by nature!

Just behind Zion National Park in southern Utah is where you’ll find Bryce Canyon. Driving time from Salt Lake City is four hours. If you want to take a flight, Las Vegas is the closest airport and is about 4 hours away. McCarran Airport in Las Vegas is an excellent international airport for travelers from a distance.

The park separates into three climate regions: spruce or fir woodland, ponderosa woods, and pinyon pine or desert forest due to the area’s elevation of over 2,000 feet. Despite being bright for most of the year, Bryce Canyon National Park’s weather can be somewhat erratic. Be ready for anything during Bryce Canyon hikes, from virtually daily summertime thunderstorms to significant winter snowstorms.

About Navajo Loop Trail

Hiking The Navajo Loop Trail In Bryce Canyon Utah: The Complete Guide

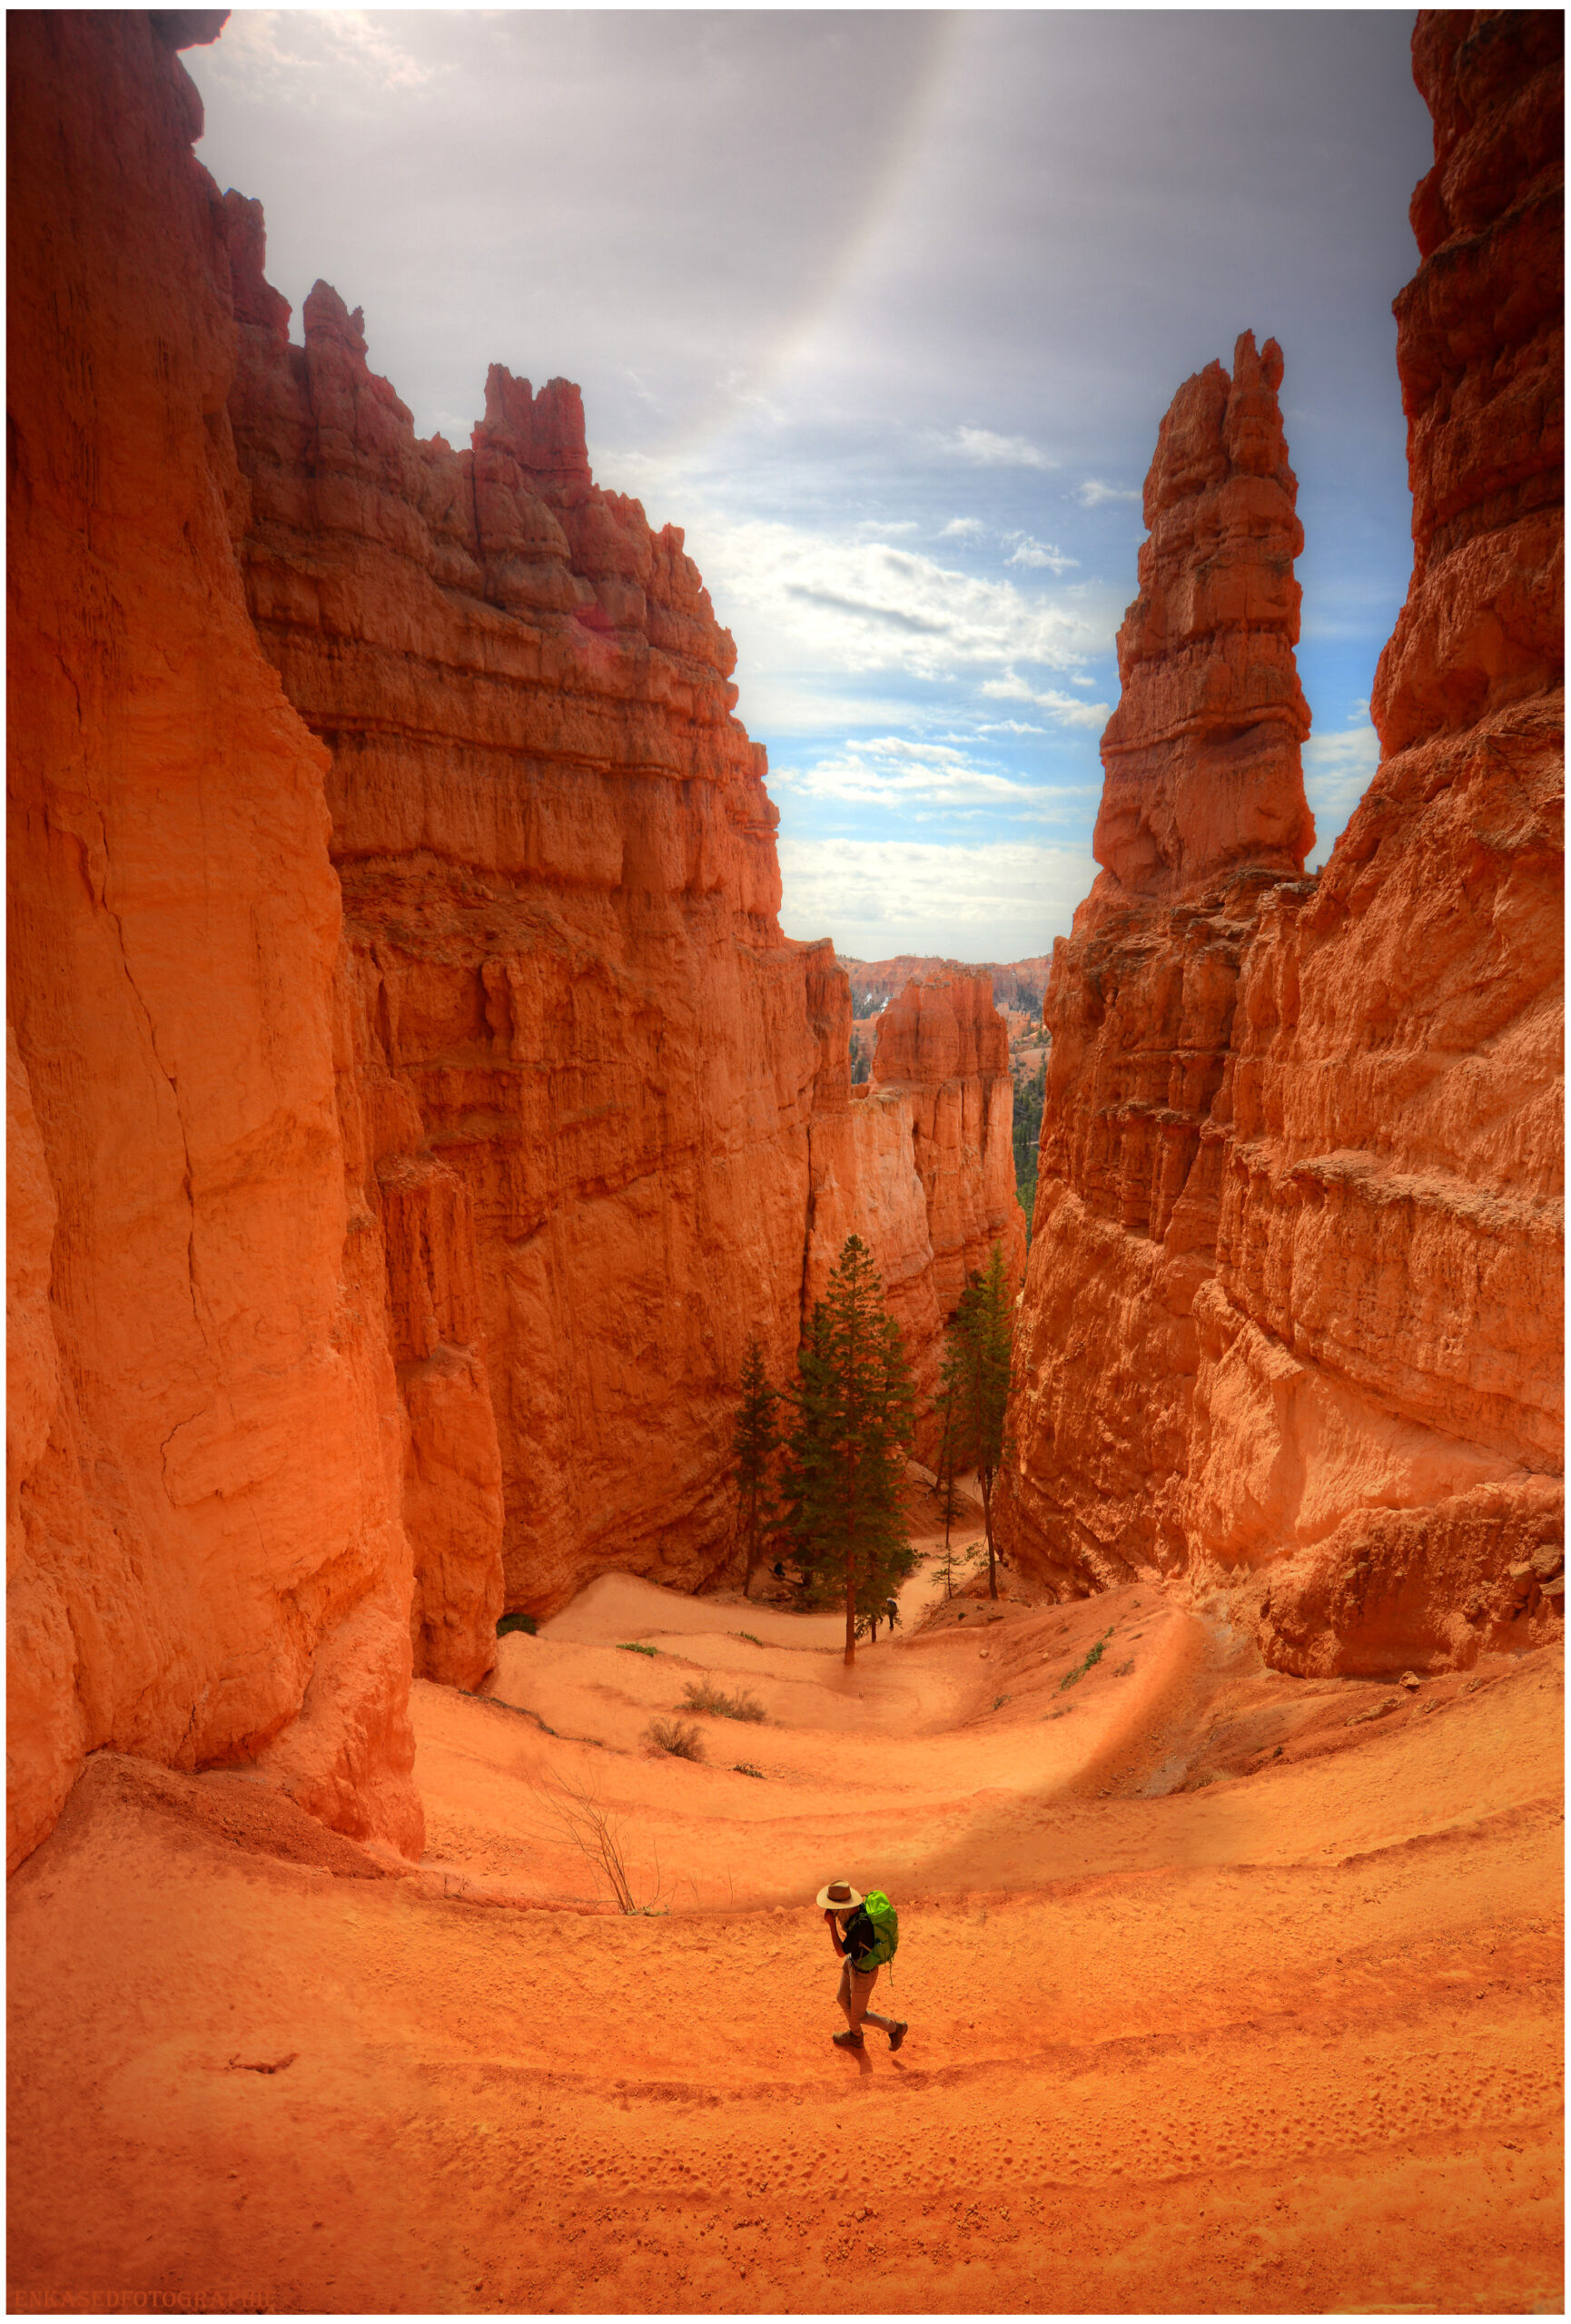
Among the most popular paths in Bryce Canyon National Park is the Navajo Loop Trail. The trailhead begins just across the street from Sunset Campground and starts by descending into the amphitheater and passing through “Wall Street,” a tiny switchbacked slot canyon between cliffs lined with tall Douglas fir trees.

The trail offers spectacular views of Thor’s Hammer, a well-photographed tall, slender pinnacle with a narrower neck that supports a massive, hammerhead-shaped rock. From the path are also magnificent views of the “Silent City,” where rock formations imitate towers, buildings, and temples. The “Temple of Osiris” is located to the east.

The Navajo Loop Trail is 1.5 miles in length and ascends/descends 550 feet, beginning and terminating at Sunset Point. Most people traverse the loop in 1-2 hours. For a lengthier trek, continue onto the roughly 3-mile Queen’s Garden Loop or Peakaboo Loop. Both of these routes can be connected to form a 6.35-mile figure-eight loop.

There are sections of the trail that give no shade and are quite hot during the summer, and areas shaded by rock formations and extremely chilly. So we recommend bringing enough water and wearing proper clothing with lots of layers.

Hiking The Navajo Loop Trail

The Sunset Point parking lot is the best place to start your journey on the Navajo Loop. Guests can drive or take the Park Shuttle to the parking lot.

From the Bryce Canyon Visitor Center, travel 1.2 miles south on UT-63 to get to the Sunset Point Parking area at the entry to Bryce Canyon National Park. Cross over Sunset Point Road on the left.

Get there early or ride the Park Shuttle because parking can become limited during the busy summer months. A little distance from the Bryce Canyon parking lot is where you’ll find the Navajo Loop Trailhead.

You must make a short hike along the canyon wall to get to Sunset Point from the parking area. This viewpoint is among the most frequented in the park; therefore, there will probably be a crowd there.

Hiking The Navajo Loop Trail In Bryce Canyon Utah: The Complete Guide

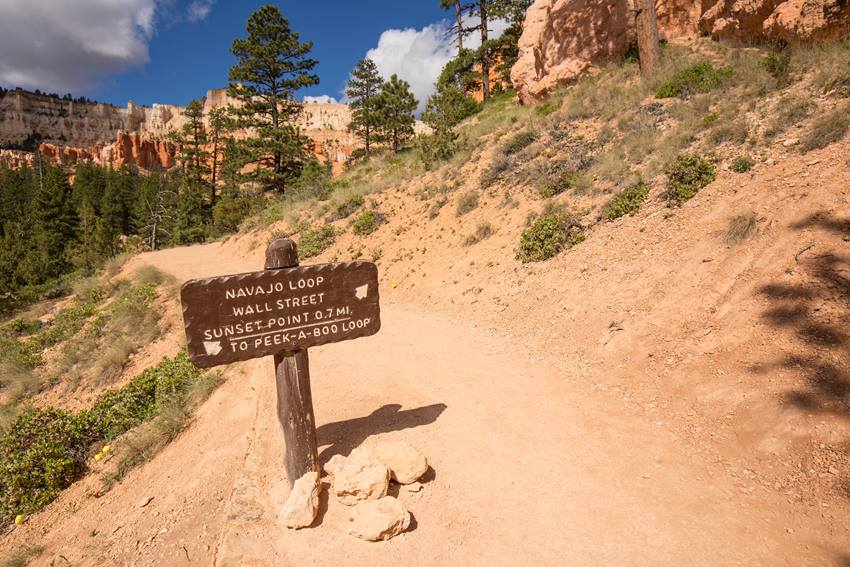
You can go a little down into the canyon from Sunset Point by following the Navajo Loop route, marked by a sign.

Sunset Point is the trail’s beginning and end. Choose which way of the loop you would like to hike when the trail forks at the start of the hike.

When To Hike Navajo Loop Trail

Hiking The Navajo Loop Trail In Bryce Canyon Utah: The Complete Guide

Hiking Navajo Loop Trail in Bryce Canyon National Park offers chances for enjoyment throughout the year, but keep in mind that lower temperatures prevail for a large portion of the year due to its high elevation. Daily high temperatures rarely exceed 80 degrees, not even in the summer.

Spring

In the park’s alpine meadows, wildflowers start to bloom, and meandering streams get a fresh start thanks to the recent snowmelt. Expect daytime highs in the 50s and 60s and a nighttime low of about 30 degrees in temperature.

Summer

Summer is the most popular season when daytime temperatures reach the upper 70s and low 80s. Contrary to typical seasonal fluctuations, Bryce Canyon receives the most rainfall throughout the summer. Expect numerous, brief thunderstorms and equally intense downpours.

Fall

As October arrives, lower elevations burst with fall foliage, and people start to diminish. Planning for milder weather is advisable because snowfall as early as October is not unusual.

Winter

Cross-country skis and snowshoes should be substituted for hiking boots once snowfall starts in early December. Winter is also the most incredible season for winter astronomy programs and organized full moon snowshoe hikes.

Where To Stay If You Hike Navajo Loop Trail in Bryce Canyon

Hiking The Navajo Loop Trail In Bryce Canyon Utah: The Complete Guide

There aren’t many campsites and accommodation types in or close to Bryce Canyon because it’s a small (approximately 55 square miles) and inaccessible park.

However, finding a location to put your hiking sticks at the end of each day shouldn’t be too difficult if you do some before planning or having a sense of adventure.

Here are the best options for you to stay near Bryce Canyon if you hike Navajo Loop Trail!

Sunset Campground

Located 1.5 miles south of Bryce Canyon Visitor Center, west of Sunset Point is a choice for car camping. It has 99 sites divided into three loops; Loop A is mainly for RVs, while Loops B and C are tent-only.

There are no available power, water, or sewer hookups. In the summer, a dump station is close to North Campground; the included cost of a campsite. There is potable water close to the dump station. A shuttle stop is available at the entrance of Sunset Campground, which is near Sunset Point.

North Campground

Another option for car camping is North Campground. It lies across the street from the visitor center and has 100 sites divided into four loops: A, B, C, and D.

Campers in RVs use Loops A and B. Tent campers should use loops C and D.

There are no available power, water, or sewer hookups. In the summer, a dump station is close to North Campground; use includes the cost of a campsite. There is potable water close to the dump station.

The Fairyland Loop/Rim Trail, General Store, and North Campground are all nearby.

Backcountry Camping

Get away from the tourists and explore Bryce Canyon’s backcountry to learn more about its distinctive geology and ecology. Up to 48 hours in advance, backcountry licenses are available at the visitor center for $5.

Two paths, the Under-the-Rim Trail (22.7 miles, eight sites) and the Riggs Spring Loop, provide access to backcountry camping (8.9 miles, four campsites). Only specific grounds are available for camping.

The Lodge at Bryce Canyon

At this historical lodge, established in 1924, rooms fill up quickly. The place, which has 70 modest accommodations, 40 cabins, three suites, and a studio, is close to the Bryce Amphitheater. Also, it has a restaurant open for breakfast, lunch, and dinner.

Towns

Hiking The Navajo Loop Trail In Bryce Canyon Utah: The Complete Guide

Throughout Bryce Canyon National Park, little villages are dispersed and provide various lodging options and dining establishments.

The Bryce Canyon Shuttle serves Bryce, which is the nearest and is located one mile from the park. Hatch, 24 miles from the national park, is conveniently on Highway 89, allowing faster access to Zion and the Grand Canyon.

Tropic, 10 miles from the park, or Cannonville, 15 miles from the national park, are excellent bases for people who want to explore Grand Staircase-Escalante National Monument.

What To Bring When Hiking the Navajo Loop Trail

Hiking The Navajo Loop Trail In Bryce Canyon Utah: The Complete Guide

To have an easy time hiking the Navajo Loop Trail and have a satisfying experience, here are the things you should not forget!

Food and Water: You will be hiking in a high-altitude environment, which can lead to dehydration, so it is best to bring ample water. Apart from water, do not forget packed lunch or snacks to eat while tackling the trail.

Hiking Gear: You can’t put just anything on the Navajo Trail because it’s a strenuous journey. While trekking some of the more challenging sections of the trail, it’s crucial to wear the appropriate footwear. Hiking poles can even be advantageous for some hikers.

Light Jacket: While hiking throughout the day, you’ll want to wear hiking gear because you’ll be hot. Eventually, as the sun sets, it will be freezing! You’ll want to be ready because the weather in Bryce Canyon changes dramatically from day to night.

Blanket: Red soil on the Navajo Loop Trail can ruin your clothes beyond belief. We advise carrying a small blanket with you on your trip if you want to pause, take a breather, and relish a picnic lunch.

Hats and Sunscreens: Even though you’ll be moving through a canyon, once the sun is right overhead, you won’t be able to hide from it. So it’s essential to pack a sturdy hat and sunscreen.

Camera: Not essential, but it is great to have a camera around. You’ll start looking back years later and regret taking all of your photos of Bryce Canyon with a blurry camera! Your photos will last a lifetime, so do not forget to bring a decent camera, preferably a small and lightweight one.

Hiking the Navajo Loop Trail

Are you ready to finally take the route? Here is what you would expect when you embark on your journey at Navajo Loop Trail.

Sunset Point

Hiking The Navajo Loop Trail In Bryce Canyon Utah: The Complete Guide
tripadvisor.com

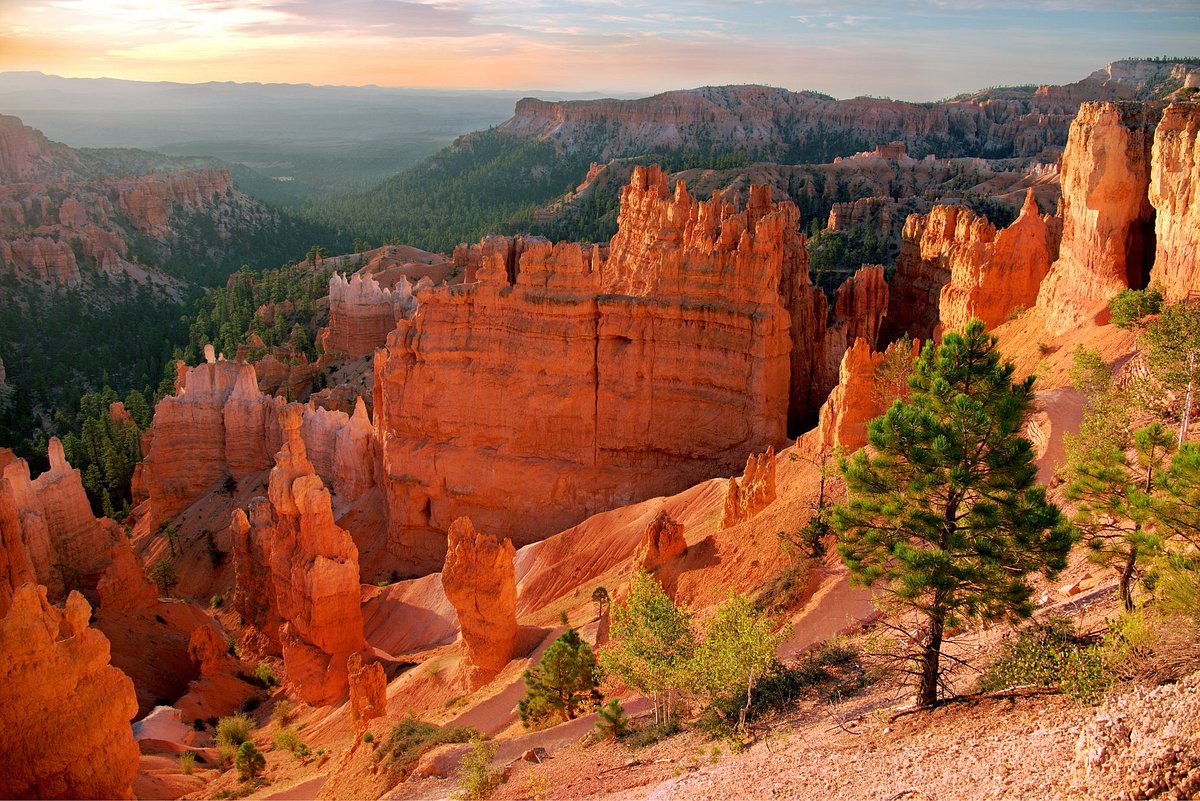
Your experience begins at Sunset Point. From this vantage point, you can appreciate the Silent City and the numerous hoodoos that comprise Bryce Canyon National Park. Hike along the Rim Trail from Sunset Point until Sunrise Point if you want to discover more.

After admiring the scenery from Sunset Point, proceed to the rim and follow the signs to the beginning of the Navajo Loop Trail. Be sure to get some hydration and use the parking area toilet before leaving.

The Fork and Thor’s Hammer

Hiking The Navajo Loop Trail In Bryce Canyon Utah: The Complete Guide
flickr.com

You’ll have the option to turn left toward the Twin Bridges or right into Wall Street soon after beginning the Navajo Loop trail.

If you are beginning your morning hike, it is advisable to proceed toward Twin Bridges. You’ll have better lighting within the slot canyon region if you save Wall Street for later in the day.

You’ll begin a sharp drop into the canyon shortly after passing the fork. The trail will be straightforward before giving way to a lengthy string of tightly spaced switchbacks.

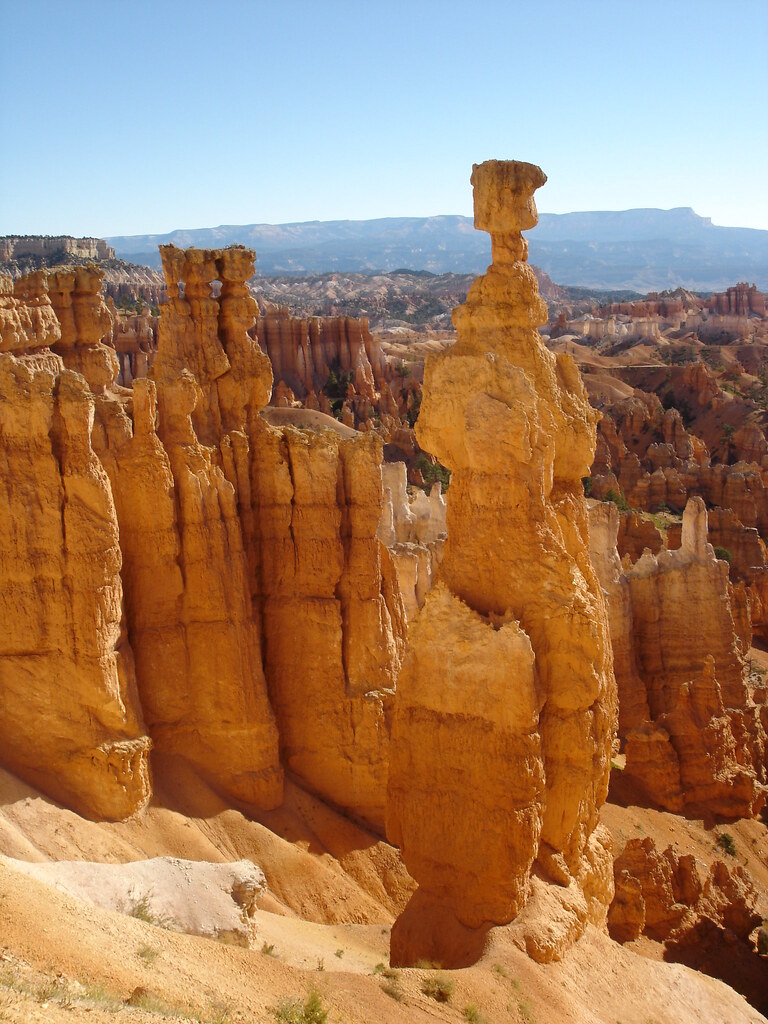
As you begin the switchbacks, keep an eye out for one of Bryce Canyon’s most famous hoodoos. It would be best if you didn’t miss seeing Thor’s Hammer, which towers proudly above the barren terrain. As you make your way downhill into the canyon, it will be to the left.

Canyon Floor

Hiking The Navajo Loop Trail In Bryce Canyon Utah: The Complete Guide
tripadvisor.com

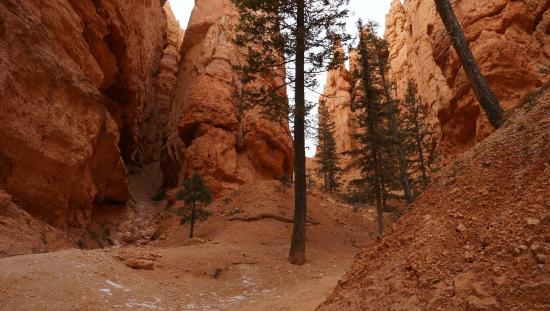
You will eventually descend past Thor’s Hammer and reach the canyon floor. A fantastic trail that crosses high walls and grows irregular trees can be spotted here. Although this section of the path has no official name, it was an exciting part of the trip.

You’ll find some tree cover here, which is nice if you’re trekking in the summer when the sun is already blazing at eight in the morning.

Twin Bridges

Hiking The Navajo Loop Trail In Bryce Canyon Utah: The Complete Guide
flickr.com

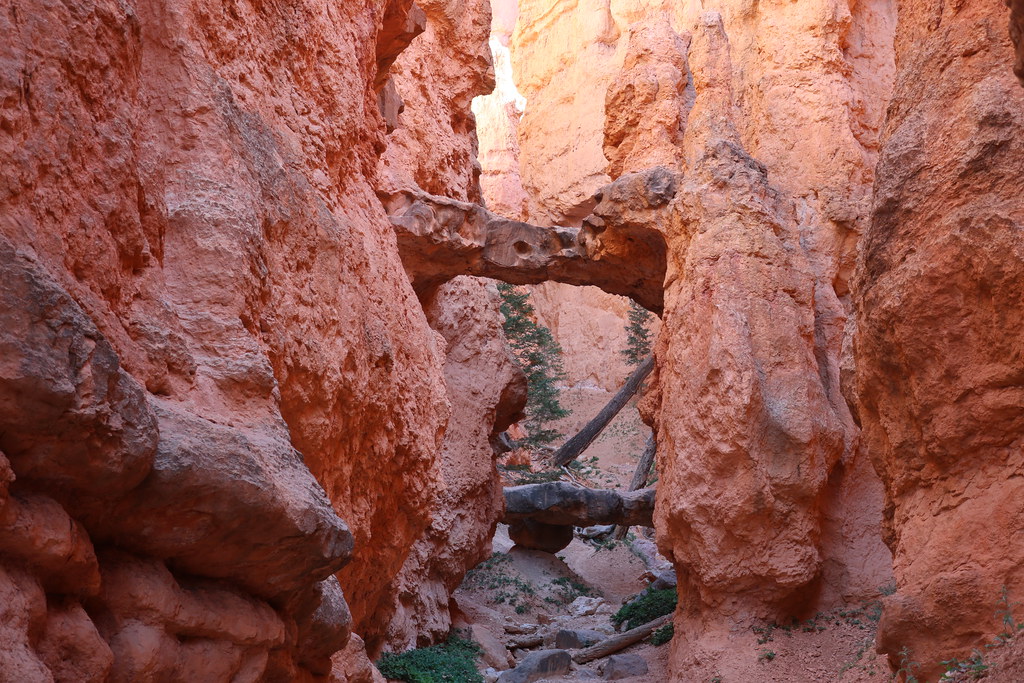
The Twin Bridges is the next significant landmark you’ll encounter along this trail. These arches were slit open into sandstone bridges that hung overhead like a city sidewalk, which is how they received their name.

Due to their fragility, the Twin Bridges come with several signs warning against approaching or attempting to cross them. Please obey the park rules while there since it is for your safety.

From a distance, they are equally spectacular, so feel free to gawk, take some pictures, and keep walking. There is yet more beauty to behold!

Trail Split Junction

Hiking The Navajo Loop Trail In Bryce Canyon Utah: The Complete Guide
intermountainhealthcare.org

You will leave the high canyon walls and enter the more exposed part of the canyon floor if you continue on the route from the Twin Bridges. From this point on, follow the path until you come to a trail divide.

Here, you get to decide how the remainder of your trekking day will pan out. You should keep to the right and follow the arrow that leads to Wall Street if you only have a short period and want to trek the Navajo Loop Trail. You’ll return to Sunset Point by doing this.

If you want to extend your journey, turn left to connect the Peek-A-Boo Loop or keep on to reach Sunrise Point on the Queen’s Garden Trail. Carry on reading to absorb more about these choices!

Wall Street

Hiking The Navajo Loop Trail In Bryce Canyon Utah: The Complete Guide
tripadvisor.com

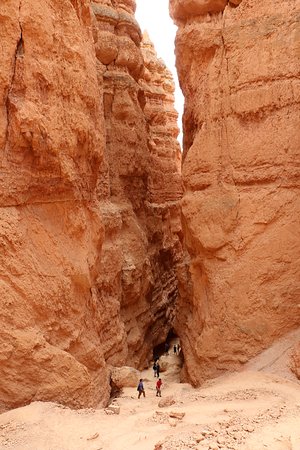
If you want to finish the Navajo Trail, turn right and follow the canyon floor route until you reach the stunning Wall Street entrance. It is simple to understand why Bryce Canyon National Park attracts so many visitors from throughout the nation when you step foot inside the canyon.

You’ll think you’ve entered a different world with its tall stone cliffs and Mars-like scenery.

You begin your journey within Wall Street at the canyon’s floor and travel through several high-walled slot canyons. Before you get to the top of the wall, the trail winds around like this.

From this point, you can anticipate taking a well-traveled and challenging route towards the canyon wall and Sunset Point. You won’t have to hike straight up because there are switchbacks in the path.

Drink plenty of water and take frequent pauses, if necessary. Most critical, halt and turn around! Thanks to this, you’ll also get some breathtaking aerial panoramas of Wall Street.

Best Add-On Hikes When Hiking the Navajo Loop Trail

What if you’ve completed the Navajo Loop Trail but still want more? Consider these other options for adding onto your hike!

Navajo Loop (Counter Clockwise)

1.4 miles | 459 feet elevation gain | Moderate 

You can also hike Navajo Loop counterclockwise, even if neither side is straightforward. Most other hikers complete the loop clockwise, which places Wall Street as the hike’s ascent.

Since your legs and lungs are on fire, it is difficult to appreciate its vastness. It becomes more apparent how enormous these walls are as one descends into the emptiness of this seemingly unfathomable hole.

Second, if you climb the Navajo Loop’s north portion uphill, there are a couple of fantastic rest stops. Thor’s Hammer, Two Bridges, and the expansive views of Bryce Valley and elsewhere are all excellent reasons to pause and breathe in some much-needed oxygen.

To hike this loop, turn right at the junction underneath the rim, go over Wall Street, then keep to the left at the split just below the canyon’s bottom.

Navajo Loop to Queen’s Garden

2.5 miles | 600 feet elevation gain | Moderate 

This well-liked loop connection is ideal for hikes of moderate length. Hikers can experience the true essence of Bryce Canyon National Park by linking the Navajo and Queen’s Garden paths.

Stop underneath the rim to get a bird’s-eye view of Thor’s Hammer, Bryce Canyon’s largest hoodoo at 150 feet. Next, take the right branch on the route to descend through Wall Street’s terrifying switchbacks.

The key to this loop is to turn left at the main intersection at the bottom of the canyon. The track is well-marked, so if you catch yourself climbing steadily immediately, do a U-turn at Two Bridges and pretend you knew where you were going.

You can access the Queen’s Garden connector to get right there. To return to the top at Sunrise Point, you must make a strenuous ascent.

Navajo and Peek-A-Boo Loop

4.5 miles | 1,400 feet elevation gain | Difficult 

The Navajo/Peekaboo Trail’s figure 8 loop is the best option for lengthy hikes. Turn right on the first split below the rim to start this loop, then enjoy the breathtaking descent via Wall Street.

At the crucial intersection at the bottom of the canyon, turn right into the connection route. You will reach the Peekaboo Loop using this Connector. From here, it’s on you whether to go left or right.

Be aware that while horseback rides follow the loop clockwise, going counterclockwise is the less-dusty choice. As an alternative to making the entire Peekaboo Loop, you could take the challenging one-mile uphill offshoot to Bryce Point and catch the Park Shuttle back.

Take the connecting trail back towards the Navajo Trail to complete the loop if you decide.

Other Trails to Hike in Bryce Canyon National Park

Hiking The Navajo Loop Trail In Bryce Canyon Utah: The Complete Guide

If you stay longer in Bryce Canyon National Park and are curious about what other trails you can hike, these are some that you can try!

Queen’s Garden Trail

The Queen’s Garden Loop Trail is the best short hike to see the spectacular hoodoos of Bryce Canyon.

As hikers descend from Sunrise Point, they face hoodoos of all different sizes. On a clear day, the 80-mile-distance top of Navajo Mountain is visible on the horizon.

A closer look at the hoodoo structures reveals a color scheme of white, vermillion, yellow, pink, and purple. Pose for pictures within the custom tunnels that pass directly through the rock fins of Bryce Canyon.

Her Majesty is waiting at the trail’s finish. Have fun identifying her among the weirdly formed white rock pillars and try to figure out where she is lying. Searching for people, animals, and patterns in the Queens Garden Loop Trail hoodoos can let your imagination go wild.

Rim Trail

The Rim Trail offers the best access to Bryce Canyon National Park without descending into the canyon. Visitors can begin their breathtaking 5.5-mile journey along the rim of Bryce Canyon’s amphitheaters, either Fairyland Point or Bryce Point.

Peer over the verge if you dare and look down into the chasms of the Silent City.

As you travel from Bryce Point to the appropriately called Inspiration Point, stroll among stoic pine forests and ancient bristlecone pines. You can watch hikers ascending Wall Street’s steep switchbacks from Sunset Point.

Between Sunrise Point and Fairyland Point, pay attention to the aspen’s trembling rustling. At the same time, the world’s most extensive array of hoodoos is right beneath your feet.

Put on your snowshoes for a spectacular winter stroll above Bryce Canyon’s icy spires and pinnacles. The Rim Trail at Bryce Canyon offers unending views.

Tower Bridge Trail

The Tower Bridge Trail, a section of the Fairyland Loop Trail, is the ideal intermediate-distance hike for hikers to Bryce Canyon National Park.

Take in views of some of the most recognizable hoodoo formations in Bryce Canyon National Park, including the Chinese Wall or Crescent Castles.

At the midway mark of this climb, the Tower Bridge, the show’s true star, is waiting. You can reach the foot of this creation, which resembles London’s most iconic structure, by way of a 200-yard-long spur trail.

Wait a bit to take in the stunning natural architecture before beginning the ascent back to the rim. You might even meet the Steller’s Jay, a graceful park inhabitant.

Active hikers can opt to add a few more miles by continuing on the Fairyland Loop Trail.

Mossy Cave Trail & Bristlecone Loop Trail

Families will love these beautiful, quick hikes. Mormon settlers dug an irrigation ditch from the East Fork of Sevier River in the 1890s along the short (0.8 miles roundtrip) Mossy Cave Trail.

It has a small cascade and Mossy Cave, an underground spring-formed grotto with an overhanging that is wrapped in moss or, during the winter, with icicles.

The one-mile Bristlecone Loop Trail meanders through a spruce and fir forest and passes past cone-bearing pines that are close to 1,800 years old while traversing the highest part of the park, rising to a height of 9,100 feet.

Tips To Have The Best Hiking Experience at Bryce Canyon

If you hike Navajo Loop Trail or any other hikes in Bryce Canyon, these few things will help you get the best out of your time experiencing each!

Start Early: Early arrival has many benefits. You can avoid the crowd and avoid the midday heat during summer.

Don’t Rush: The elevation of Bryce Canyon is relatively high. Even with short climbs, it is typical to feel out of the air in this location. Taking your time and taking multiple breaks to gather your breathing on the way back up is best because the last ascent out of the amphitheater might be difficult.

Connect Hikes: To enjoy further what the canyon offers, consider connecting different hikes if possible. This way, you’ll be able to take in the scenery better than just taking a stroll on a single trail.

Guided Tours: You can opt to join a guided tour around the canyon for convenience. Guides can give you knowledge, share a great spot in the area, and access other things that are difficult to do on your own.

Other Activities To Do After Hiking the Navajo Loop Trail

Hiking The Navajo Loop Trail In Bryce Canyon Utah: The Complete Guide
astropics.com

If you get tired after hiking the Navajo Loop Trail or any other trails, here are some additional activities you can do while at the Bryce Canyon National Park.

Stargazing

The National Park Service has referred to Bryce Canyon as “the last grand sanctuary of natural darkness” because of its better air quality and lack of light pollution.

Since 1969, the area has held regular astronomy-trained ranger-led midnight viewing events. These guides, also known as “Astronomy Rangers,” plan stargazing excursions for guests interested in learning more about the night sky.

Visitors can see the whole spectrum of the Milky Way’s pulsating hues and the shadows Venus and Jupiter’s brilliance cast on the atmosphere.

The Salt Lake Astronomical Society (SLAS) sponsors the park’s annual astronomy festival, which is open to enthusiastic stargazers. Moon lovers should plan their trip to match a full moon, including ranger-led full moon hikes.

Scenic Driving

The numerous picturesque overlooks that line Highway 63’s 18-mile route through the park’s central area offers some of the best perspectives of the entire area.

As you travel south, the eastern portion of the park road, or the left, is where all of the park’s overlooks are available.

These include the Sunrise, Sunset, Inspiration, and Bryce perspectives, among many more. Hang a left only one mile down the park’s border onto the route to Fairyland Canyon, where the hoodoos are at the line of sight, to get a close-up look of the red-rock spires.

Horseback Riding

Swap your hiking poles for reins and grab a ride on a horse or mule to the Bryce Amphitheater from spring through fall. An adventure unlike any other in the park, the wranglers at Canyon Trail Rides provide 2 to 4 trips into the amphitheater on a designated horse trail along the Peek-A-Boo Loop Trail.

Winter Sports

Bryce Canyon’s colors start to stand out in the winter. Bright white snow contrasts dramatically with the cliffsides’ crimson, pink, and orange rock spires.

The Fairyland Road or Paria Point Road remains unplowed for cross-country skiers and snowshoers. At the same time, most of the park’s other routes are still accessible to hikers using hiking boots with additional traction, such as mountaineering crampons.

After significant snowfalls, join one- to two-mile ranger-led snowshoe excursions that depart from the visitor center for a guided tour of Bryce’s frozen attractions.

Cycling and Mountain Biking

Cycling is permitted on all park roads, although not on trails or off-trail areas. On Scenic Byway 12, which passes through the northeastern portion of Bryce Canyon, road cyclists can put their endurance to the test.

Although the journey is challenging due to the steep elevation climbs and several switchbacks, the breathtaking sights are guaranteed to ease your aching legs.

Mountain bikers can experience their delights on open trails close to the park. One of them is Thunder Mountain Trail, 8.1-mile one-way singletrack that winds through ponderosa pines and is generally smooth, hard track to provide breathtaking views of Thunder Mountain.

The Cassidy Trail got its name after the gunslinging criminal Butch Cassidy, who formerly roamed these parts; it is 8.9 miles long and offers rides through red cliffs and pine forests. The Casto Canyon Trail is 5.5 miles long.

Final Thoughts

We threw out some other activities for you to do there! Bryce Canyon National Park is indeed a sight to behold. Hikers and non-hikers alike will find something to meet their outdoor desires.

Either hiking the famous Navajo Loop Trail, combining it with other trail systems in the area, or engaging in a scenic drive, the park will not disappoint.

Hopefully, this Navajo Loop Trail hiking guide gave you a good idea of where to start. Hiking the Navajo Loop Trail is amazing and is one of those hikes that’s totally worth it! It’s absolutely one of our favorite Bryce Canyon hikes and is where we recommend any hiker begins the journey at Bryce Canyon.

Related: Zion To Bryce Canyon: 2, 3, and 4 Day Road Trip Itineraries


Zion To Bryce Canyon: 2, 3, and 4 Day Road Trip Itineraries

Utah has breathtaking scenery and once-in-a-lifetime hikes. And Zion and Bryce Canyon are some of the state’s stunning national parks! These national parks in Southern Utah have unique and distinctive views that will astonish you.

The most accessible approach to exploring Utah’s most incredible hikes and its distinctive beauty is to combine these national parks on a short road trip.

Zion and Bryce Canyon provide something for everyone, from views to hiking routes. Luckily, driving from Zion to Bryce Canyon is straightforward, so you can easily combine the two!

If you planning a road trip itinerary that will take you from Zion to Bryce Canyon National Parks OR vice-versa, we’ll show you how to plan an enjoyable three-day trip to maximize the experience.

What if you don’t have enough time? We’ll also give itinerary alternatives for a two-day and four-day Zion to Bryce Canyon road trip so that every traveler can plan the ideal holiday.

Let’s plan your road trip to Zion and Bryce Canyon National Parks!

Zion vs. Bryce Canyon

While both Zion and Bryce Canyon National Parks are stunning, Zion is more suited for adventurous hikers and canyon enthusiasts, while Bryce Canyon is excellent for families and photographers. Less than an hour apart, these parks are a must-see.

On your southwest Utah road trip plan, it’s ideal for visiting both parks.

Your heart rate will slow as you hike through Zion’s bucket list trails, then rise again as you marvel at the hoodoos in Bryce Canyon’s bowl-shaped amphitheater.

We’ve been to both parks twice and want to visit again, so we highly recommend seeing both!

Elevation: Zion National Park vs. Bryce Canyon

The elevation of each landscape varies greatly between Zion and Bryce Canyon. Springdale in Zion is 3,900 ft high, whereas Bryce City is 7,650 ft.

When driving from Zion to Bryce Canyon, you’ll definitely feel the elevation rise. Altitude sickness isn’t usually a concern until 8,000 ft, but Bryce Canyon isn’t far from that, so bring medicine if you’re prone to it (anything with Acetazolamide works well).

Why Take the Zion to Bryce Canyon Road Trip?

Even though Zion National Park and Bryce Canyon are in the same state, the experience at each is massively different. But there are things in between/along the way that you wouldn’t want to miss, too. The Grand Staircase is a line of multicolored cliffs that connects Zion and Bryce Canyon in Southern Utah’s Colorado Plateau area. It is the lowest rock stratum of Bryce Canyon and is a must-see.

One road trip can easily cover both Zion and Bryce Canyon. And there’s plenty to do along the way that it’s really worth it to turn this small road trip into an adventure.

In about two hours, you can travel from Zion to Bryce Canyon. It’s hard to grow tired of the views because the sights are incredible. You’ll see beautiful mountain vistas in Zion and hoodoos in Bryce Canyon.

How Far is Bryce Canyon from Zion?

Because Bryce Canyon and Zion National Parks are so close, many visitors combine their visits.

The quickest route to Bryce Canyon is by US-89 from Zion National Park. The travel is around 74 miles long and takes about 1 hour 30 minutes.

The travel from Zion National Park’s south gate or Springdale takes longer due to the winding Zion-Mount Carmel Highway (State Route 9). This section of your trip from Bryce Canyon to Zion National Park is stunning and should be on your Zion National Park bucket list, even though it’s a bit further away.

This tour will take you through sandstone tunnels, the Checkerboard Mesa’s cross-cut pattern, and some Desert Bighorn Sheep! They tend to hang around between the Zion-Mount Carmel Tunnel and the East Entrance in the mountains. The 84-mile travel takes at least 1 hour and 45 minutes, and we think it’s definitely worth the extra few miles.

How to Get from Zion to Bryce Canyon?

We suggest flying into McCarran International Airport in Las Vegas for your Bryce Canyon and Zion trip. The travel to Zion National Park takes little under three hours. You can also fly into Salt Lake City, but it’s a five-hour drive to Zion National Park.

After your tour from Zion to Bryce Canyon, you can fly out of McCarran or Salt Lake City. Both are roughly 4 hours from Bryce Canyon.

Next, we’ll go over our favorite aspects of each part, then we’ll talk about the best road trip stops in between these two national parks.

Why Visit Zion National Park?

Zion to Bryce Canyon

Angels Landing, The Narrows, and The Subway are world-famous trails in Zion National Park. Canyons with 2,000 ft sandstone cliffs surround valleys, rivers, and streams with hiking routes and natural beauty.

In 2019, Zion was the fourth most visited US National Park with 4.5 million recreational visitors.

The park comprises three major sections: Main Zion Canyon, Kolob Terrace, and Kolob Canyons.

Angels Landing and the Narrows are among the most renowned hikes in Zion National Park and the most popular in the US National Park system.

In addition to hiking, there are many other things to do in Zion.

Zion National Park: Important Notes

Before you go, here are some highlights about Zion National Park to help you organize your trip:

Best Time to Visit: The perfect time to visit Zion is during the Spring and Fall, specifically April to May and September to October. You can avoid crowds by going shortly before or after the busy season, from April to October.

Where to Stay: You can stay in Zion Lodge, South Campground, or Watchman campground if you prefer to stay inside the park. Springdale has attractive yet pricey hotels outside the park.

How to Get There: Las Vegas Airport is 3 hours away from Zion National Park, and Salt Lake City International Airport is 4-5 hours.

How to Get Around: Most of the year, travelers to Zion Canyon must utilize the complimentary shuttle service. However, you will need a vehicle to navigate the park. We recommend renting a car at the airport if you’re flying in. It’s just not worth it to come to Zion without a car.

Permits: You need permissions for Angels Landing, Backpacking, The Subway, The Narrows, and Rock Climbing.

Zion National Park Tips

Zion to bryce canyon

Here are some helpful tips when getting to Zion National Park:

1. Arrive Early for Parking

Parking at Zion National Park is difficult since places are restricted and fill up rapidly. Arrive early to grab a parking place.

When we visited this park in August, the parking lot was almost complete by 7:00 am. Crowds are typical in Zion from early February to late November.

If parking at Zion National Park is not enough, use the free Springdale shuttle to get to the park. The shuttle may pick you up at nine different locations to get to Zion from town.

2. Obtain Permits and Book Trips Ahead of Time

Daily, hundreds of people visit the US National Parks. The NPS increased its ticketing system for Zion National Park to safeguard the park’s peaceful environment. Permits required for popular Zion trails include:

To secure Angels Landing and the Subway tickets, you must apply months ahead of time.

Reservations for a hike from Chamberlain’s Ranch to the Narrows can be made up to two months in advance on recreation.gov.

Every 5th of the current month, reservations for the following month become available. Check out the permit system here.

3. Learn about the Zion Canyon Shuttle System

Zion to bryce canyon

The Zion Canyon Scenic Drive is restricted (not available for private cars) from March to November. You can only enjoy the gorgeous drive by shuttle or bicycle. You’ll need to know the shuttle schedules and stops to visit most of the highlights in Zion National Park. What’s more, it’s free to use!

It’s totally worth it to take a trip on the Zion shuttle. The views are literally incredible!

4. Catch the First Shuttle

The shuttle parking lot fills up quickly, so arrive early to catch the first shuttle. Thus, you can spend more time in the park and explore more popular activities without the crowds.

5. Evaluate the Weather

If you want to trek the Narrows, one of the most crucial factors is the river’s flow. Flash floods and powerful currents are particularly hazardous. During the summer, thunderstorms are frequent in Utah. Check the weather before visiting Zion.

6. Know the Trail Conditions

Primary rock falls in Zion National Park can alter trail conditions. Check the park’s website or drop by the visitor center for the most up-to-date information.

7. Start Your Day With a Narrows Hike

Even though many people avoid getting wet in the morning, it is one of the least congested times. It’s best to hike the Narrows early in the day to avoid the crowds.

8. Arrive at Canyon Junction Bridge One Hour Before Sunset

Arrive early to see the sunset at Zion National Park’s most famous sunset point. Many photographers will seek to capture the classic shot of Canyon Junction Bridge. We went there an hour before sunset and grabbed the best location on the bridge!

Why Visit Bryce Canyon National Park?

Zion to bryce canyon

Bryce Canyon is one of America’s lesser-known National Parks. It is in the American Southwest and has lovely scenery.

The canyon has the world’s most extensive hoodoo collection. The Bryce Canyon Amphitheater at the park’s entrance has the most hoodoos.

Explore the park by hiking the beautiful trails, driving the picturesque route, and stopping at the numerous views. You can also take a park tour or go horseback riding.

Bryce Canyon National Park: Important Notes

Here are some essential notes about Zion National Park that will help you plan your trip:

Best Time to visit: Spring and fall, or April to May and September to October, are the best times to visit Bryce Canyon National Park.

Where to Stay: North or Sunset Campgrounds and The Lodge at Bryce Canyon are alternatives for lodging inside the park. For a reasonable price, you can stay outside the park.

How to Get There: The closest airports to Bryce Canyon National Park in Utah are Las Vegas which takes 4 hours and 10 minutes by car, and a 4-hour 5 minutes drive to Salt Lake City. We would suggest that you go to Zion National Park first. From there, Bryce Canyon is only a short 1.5-hour drive away.

How to Get Around: You can take the free Bryce Canyon Shuttle, which takes you to all the viewpoints and trailheads, or you can drive your car in the park, whichever you prefer.

Permits: None!

Bryce Canyon National Park Tips

Below are some helpful Bryce Canyon National Park tips to maximize your enjoyment here:

1. Recognize the Altitude

With almost 8,000 feet in elevation, Bryce Canyon National Park is much higher than Zion. You can feel out of breath really quickly. Taking it easy and stopping to see the stunning scenery is always a good option.

2. Learn About the Bryce Canyon Shuttle

Parking at Bryce Canyon is limited and can fill up quickly, so use the free Bryce Canyon Shuttle to avoid the hassle. The shuttle operates from April to October and visits the most incredible sights in the park.

The shuttle operates from 8:00 am to 6:00 pm, so you’ll need to drive to witness sunrise or sunset.

3. Take the First Shuttle

If you’re taking the Bryce Canyon shuttle, get there early. It allows you to enter the park before the crowd.

4. Hoodoo Photo Op

You can photograph the stunning blood orange hoodoos of Bryce Canyon National Park from different angles. Your list should include Sunrise, Sunset, Bryce, and Inspiration Points.

Visit such locations at dawn or golden hour for unique picture opportunities. The golden hour is between sunrise and sunset.

5. Wear Layers

The temperature difference between morning and night might be variable. Dress in layers to cope with temperature variations.

6. Watch for Wildlife

We saw prairie dogs bursting out of their caves and deer lounging in the pine trees along the Bryce Canyon Scenic Drive. You could also see mountain lions, pronghorn deer, and rattlesnakes.

7. Hike Navajo Loop

The Navajo Loop is the most popular walk-in Bryce Canyon National Park, so go around sunrise or sunset. You’ll escape the crowds and enjoy the trip in the best light!

What to Pack for a Zion to Bryce Canyon Trip?

Zion to bryce canyon

The weather can change quickly in both Zion and Bryce Canyon, from cold mornings to storms in the afternoon. Make sure you bring these things on your trip to be ready for anything.

National Park Pass

There is a fee to get into both Zion and Bryce Canyon. Obtaining America the Beautiful National Park Pass is a great idea to visit more than one national park this year. You can go to more than 60 national parks and more than 400 monuments and sites for a year. Here, you can buy a national park.

Hiking Backpack

We usually bring an empty hiking backpack in our carry-on for exploration. It allows us to carry food, clothing, and other items for our adventures.

Hiking Boots

In these parks, hiking is the best thing to do. You’ll need hiking boots or trail runners that are sturdy, comfortable and have good grip. Before your trip, don’t forget to wear your shoes.

Wool Socks

Inappropriate socks ruin good hiking boots. Always go for merino wool. They’re costly, but they will keep your feet dry and prevent blisters for a long time.

Layers

In Spring and Fall, the weather can change from day to night in Zion National Park and Bryce Canyon National Park. Even though the mornings are chilly, the afternoons may be sweltering. Comfortable hiking clothes and fleece layers are essential.

Rain Jacket

During the summer, thunderstorms might occur suddenly. A rain jacket or poncho is always helpful, even just a brief light rain.

Camera

From Zion to Bryce Canyon, you decide how to capture each scene. Any iPhone will do. Also, if you plan on taking a quality camera with you on your hike, we highly recommend a camera clip.

Hat and Sunblock

Many of the trails in Zion and Bryce have no shade, so it’s essential to wear sunscreen. Sunscreen is necessary, but a sun hat will also do a lot to keep you from getting sunburned.

Zion To Bryce Canyon Road Trip Itineraries

Now that we’ve covered the basics of both national parks, let’s get to the road trip itinerary section!

This guide will present you with three road trip itineraries of these two gorgeous parks.

For the three Zion To Bryce Canyon road trip itineraries here (2-day, 3-day, and 4-day), we’ll focus most on the 3-day since it is the best time frame to enjoy these two parks fully.

We’ll give you an overview of the 2-day and 4-day Zion to Bryce Canyon road trip itineraries to best plan your adventures.

2-Day Zion To Bryce Canyon Road Trip Itinerary

Zion to bryce canyon

The 2-day trip will provide you enough time to visit the finest of both Zion and Bryce Canyon and some versatility in how you divide your time. However,  the number of time-consuming treks you can squeeze in will be restricted.

One day in Zion and one day in Bryce Canyon are options. You could also spend a day and a half in Zion and just a few hours at Bryce Canyon.

Spend most of your hiking trip in southern Utah at Zion National Park. If you’re there for photography, though, you should plan on spending the whole day in Bryce Canyon, including sunrise.

Here is how to spend two days in Zion and Bryce Canyon:

Day 1: Zion

For day 1 in Zion, you can either do the following:

As you can see, there’s a lot to do in Zion. We recommend hiking The Narrows if you’ve never been, just because it’s the most famous, but we also really love the Emerald Pools and the Kolob Canyons. So stretch your trip to three days if at all possible!

You should drive to Bryce Canyon later in the day and spend the night in its hotel or campground, no matter which option you choose, so you’re ready to go for the following day.

Day 2: Bryce Canyon

For the day 2 in Bryce Canyon, spend the day doing the following:

You can definitely fit in all of these activities in one day.

Best 3-Day Zion to Bryce Canyon Road Trip Itinerary

We’ll get more details in this 3-day road trip from Zion to Bryce Canyon now, and it is the ideal time frame to explore these two incredible national parks.

In three days, you can quickly travel while seeing many of the highlights of each park. There may be a few concessions, and you won’t be able to view every part of Zion, but you’ll get the best parts of each.

Day 1 (Zion): The Narrows And Watchman

If you’re coming from Las Vegas, get there early, or get an early start if you stay in Springdale. Make sure to get any necessary gear the night before to head out before stores open.

Park at the main visitor center if you are just getting to Zion. You can also walk or take the village shuttle bus from a Springdale hotel or campground to the visitor center.

No matter what time of year you go, don’t forget to rent a walking pole. Without it, you won’t get very far.

The Narrows

Zion to bryce canyon

Hiking the Narrows with as few people as possible is ideal for starting your Bryce Canyon and Zion tour. The Narrows is generally peaceful at sunrise.

The trail begins with a mile of Riverside Walk before entering the river. The Narrows is unique in that you can trek it for as long as you desire. Most people hike the first 1-3 miles of the path, which is 10 miles roundtrip.

Hiking through a river takes much longer than walking on a conventional route, so keep that in mind while planning your schedule. Consider the following while planning your trip across the Narrows:

  • Because your feet will be in the water for the whole trip, we recommend bringing a change of shoes for your later excursions.
  • Since the Narrows region is prone to sudden floods, check the weather forecast before trekking there.
  • Also, because the river is prone to cyanobacteria, you should avoid submerging your head, swimming, or drinking the water.
  • Keep in mind that you should only hike as far as you feel comfortable and that you must return the same distance you walked in.

Watchman

Zion to bryce canyon

Return to the visitor center on the shuttle and drop off your stuff at Zion Outfitter. You’ll be more than ready to change into something comfier by now!

It should be late afternoon, giving you plenty of time to trek The Watchman.

Watchman begins in the tourist center, where you just left off your belongings. Before going up to Watchman Overlook, it’s a good idea to get some dinner in Springdale.

The sun should be setting by the time you get to Watchman Overlook. Stay up here to see the sunset before returning to your Springdale hotel or campsite. Seeing the sunset here is totally worth it and is a must-do!!

Day 2 (Zion): Angels Landing, Emerald Pools, and Canyon Overlook

Apply for an Angels Landing permit in advance or receive a walk-in permit the following day. We suggest that you choose the first time slot so that you can hike to Angels Landing in time for sunrise.

Get up early, pack your tent or check out your hotel, and get on one of the earliest shuttles into the canyon. You don’t want to be on this path with dozens of other hikers since there’s not a ton of room.

Take the shuttle to The Grotto, stop #6. Starting on the other side of the road, follow the route towards Scout Lookout and Angels Landing.

Angels Landing

Zion to bryce canyon

If you obtain a permit, you will be given a specified start day and time for your hike. You can rearrange your trip to accommodate the commencement time on your permit. Angels Landing in Zion National Park’s most famous hike is not for the faint-hearted.

This 5.5-mile roundtrip expedition starts with a rugged ascent via switchbacks before continuing along a ridge with lengthy, steep dropoffs. It’s an adrenaline-pumping adventure with breathtaking vistas that will leave you breathless!

Remember to be cautious and aware of your surroundings when climbing.

You never know how other people will respond when they are terrified, so be alert to what is happening around you.

Emerald Pools Trail

Zion to bryce canyon

The Emerald Pools hike is a 3-mile out-and-back that passes through the only waterfalls in Zion National Park. Although the waterfalls are modest in size, they are stunning!

Beginning opposite the Zion Lodge, the route follows a straightforward approach to the Lower Emerald Pools, where you can stroll under a waterfall. You can end your hike or continue to Middle and Upper Emerald Pools.

You should be prepared for a significantly more steep route if you want to hike to the Middle and Upper Emerald Pools. The Middle Emerald Pools are located on top of the rock and waterfall you just passed under.

Due to its location at the foot of towering cliffs, Upper Emerald Pool is one of the most scenic spots along this hike. It is a beautiful spot that few people hike to!

Zion Canyon Overlook

Zion to bryce canyon

The Canyon Overlook trailhead starts only a few meters from the tunnel’s mouth. This hike will be considerably gentler on the nerves and more suited to children/families.

This hike has many entertaining features, including sloping wooden footbridges and a crescent-shaped cave. So it’s fun but not too tricky, making it a great afternoon hike.

Find a secluded location on either side of the information board and take in some of the most outstanding views in Zion, this time across Pine Creek Canyon, as you reach the summit.

Return to your vehicle, continue down UT-9 beyond the east entrance and turn onto US-89 North. The journey between Zion and Bryce Canyon should take around two hours.

Take a slight detour to Many Pools and Checkerboard Mesa on the way out of Zion if you have the time.

Day 3 (Bryce Canyon): Incredible Sunrise Over the Amphitheater, Navajo Loop and Queens Garden Trail, and Bryce Point Perspective

Today is another early start, but you won’t have to battle any crowds, at least not right away. Here is how you’ll start day 3 in Bryce Canyon National Park.

Incredible Sunrise Over the Amphitheater

Zion to bryce canyon
pinterest.com

Check Bryce Canyon sunrise timing and get up there at least 30 minutes before sunrise.

Drive to Sunrise Point, set up your camera and tripod in the best possible position, and then relax with a coffee and breakfast while waiting for the sun to rise above the Eastern horizon.

The sight of the Bryce Canyon amphitheater burning a fiery red hue in the morning light is breathtaking.

As the early sunshine poured over the countryside, we were astounded by how vivid and intense the red and orange colors shimmered.

Navajo Loop and Queens Garden Trail

Zion to bryce canyon

Next, it’s time to hike. This hike is one of the most remarkable ways to see the hoodoos and spires of Bryce Canyon National Park. This fantastic walk passes by notable park landmarks, including Queen Victoria and Thor’s Hammer.

Begin by hiking the Navajo Loop Trail to Sunset Point, which offers spectacular canyon views. You can go right here and enter Wall Street, a tiny canyon. This route follows the Navajo Loop Trail’s eastern side. After crossing Thor’s Hammer and the Two Bridges, you’ll reach the Queens Garden trail intersection, home to some of the park’s most beautiful formations.

The Queens Garden Trail offers views of towering hoodoos and rocky formations.

During their creation, hoodoos go through numerous phases. First, water erodes stony plateaus into fins. When they become thin, a hole forms in the middle, producing a window. A hoodoo appears in place of the top of the windows after further erosion.

Frost wedging causes most erosion in Bryce. Rain pours into rock fissures, freezing and expanding when the temperature decreases, widening the fractures.

Turn left at Sunrise Point to return to the parking lot via the Rim Trail.

Bryce Point Perspective

Zion to bryce canyon

Suppose you still have enough time after the Navajo Loop and Queens Garden Trail. If so, you can finish your trip to Bryce Canyon by driving (or better yet, riding the park shuttle) to Inspiration Point and Bryce Point for various views of the magnificent theater.

It should be mid-afternoon, giving you plenty of time to get to your next location before dark. If you’re behind schedule, just skip this step and head home.

Bryce Canyon is much smaller than it seems, though, so it’s pretty easy to see the top sights here all in one day.

4-Day Zion To Bryce Canyon Road Trip Itinerary

When traveling to Bryce Canyon from Zion National Park, the 4-day trip provides you more flexibility. You can take your time and appreciate every detail of both parks without feeling hurried.

You could divide your time between Zion and Bryce Canyon and spend two days in each, or spend three days hiking in Zion and reserve the final day for Bryce Canyon.

We would do the latter and hike in Zion for three days before going to Bryce Canyon for sunset on the third evening.

Because there aren’t many “things to do” within Bryce Canyon, you won’t need to spend two full days there.

Here are some ideas on how to spend your four days in Zion and Bryce Canyon:

Day 1: Zion

You can spend the night in Springdale.

Day 2: Zion

  • Spend the day hiking through The Narrows or sunrise hike with Watchman
  • Then go to Observation Point (wilderness) via the East Rim Trail

Day 3: Zion

Day 4: Bryce Canyon

What About A Bryce Canyon To Zion Road Trip?

While we personally enjoy doing the Zion to Bryce Canyon road trip in that order, you can also do a Bryce Canyon to Zion road trip just as easily.

One plus of the Bryce Canyon to Zion road trip is that you won’t experience any altitude sickness because you’re starting at a higher altitude and slowly moving to a lower altitude (Zion).

Simply reverse any of these itineraries when planning your Bryce Canyon to Zion road trip. But keep in mind that you won’t want to spend more than a day at Bryce Canyon, so there will be a bit more driving during the early part of your trip.

Where to Stay Near Zion and Bryce?

Both Zion and Bryce Canyon have lodging options ranging from camping to resorts. Here are our favorite spots near both parks!

Where to Stay Near Zion National Park?

From camping beneath the stars for free to stay in a fancy resort, Zion offers something for everyone.

If you want to stay in Springdale outside the park, you must reserve four to six months in advance.

Make reservations for campsites and the Zion Lodge 6 months in advance. Every year at the beginning of the month, the lodge accepts bookings for the entire month.

Inside Zion National Park

There are three campgrounds in Zion that need to be reserved ahead of time. Camping in the park is very popular, and campsites tend to fill up fast. There are only three places where camping is allowed:

If you don’t want to camp, you can stay at the Zion Lodge. It is the only place to stay in the whole park.

Outside Zion National Park

You can camp for free on BLM land on Dalton Wash Road, about 30 minutes outside the park.

Hotels in Springdale are costly, so if you want to spend the night in this charming small town, be prepared to spend a few bucks. Some of the best choices are:

Where to Stay Near Bryce Canyon National Park?

Staying inside the park’s limits takes considerable preparation. Book lodgings 3–6 months in advance.

Make reservations for the famous Lodge at Bryce Canyon a year in advance.

Inside Bryce Canyon National Park

There are two campgrounds inside the park of Bryce Canyon. Both campgrounds are great places to camp because they are close to the park’s main things to see and do. Visit the National Park Service website to find out more about each campground and how to make reservations. Here are the two campgrounds:

The only hotel in the park is the Lodge at Bryce Canyon for lodging.

Outside Bryce Canyon National Park

Even though the towns near Bryce Canyon aren’t as big as Springdale near Zion National Park, they offer places to stay outside the park.

You can camp anywhere along Forest Road 1173 (on BLM land) for free just outside the park.

For camping outside, you have Ruby’s Inn RV Park and Camping.

You could spend the night in one of the following beautiful hotels close to Bryce Canyon National Park:

General Tips for Both Parks

When preparing for a trip from Zion to Bryce Canyon National Park, you should know the following:

1. Get an America the Beautiful Pass

For only $80, you can buy an America the Beautiful Pass. It is the best way to save money on all National Parks and even more National Park Service Sites. Here are a few reasons why you should buy the pass:

  • Give access to more than 2,000 public lands is free for an entire year
  • Pay for itself quickly, and you can’t beat the price!
  • Have six different types of America the Beautiful passes, so there is one for everyone
  • Share your pass with family and friends
  • Support giving money to the United States’ Public Lands

2. Get Your Day Going Early

Zion and Bryce Canyon are both well-known national parks that get a lot of visitors every year. Start your day soon after sunrise to find the best places to park and avoid crowds. Even if you’re not a morning person, it’s worth it to get up early and beat the crowds for this trip.

3. Have NPS Apps on Your Phone

Download the National Park Service App and the Recreation.gov App if you haven’t already.

The National Park Service app is a helpful app that gives information on all National Park Service locations in the United States. You can identify nearby places, and you can use it to keep track of the National Parks you’ve visited and those you want to see. This app makes it straightforward to begin arranging a vacation to any US National Park.

Most people are familiar with the Recreation.gov app for reserving campsites, particularly in the United States National Parks, but it offers much more. You can buy permits, excursions, shuttle tickets, and passes and obtain more information on various places and activities through the app or website.

4. Rent a Car Rather Than an SUV To Save Money

We usually hire a larger car with all-wheel drive on national park outings. But it isn’t necessary at Zion and Bryce Canyon since all roads are paved and readily accessible. Renting a smaller car will save you money.

5. Stop at the Visitor Centers

A simple trip to one of the US National Park visitor centers can be highly beneficial. A qualified park ranger can provide you with further information on the park. You may also buy merchandise, see park exhibits or films, use the toilet, and refill your water bottle.

6. Book in Advance for Your Stay

When bookings are offered on a rolling 6-month basis, campsites fill up quickly. If you wish to stay in a park lodge, reserve 13 months in advance when reservations open.

7. Adhere to the Principles of Leave No Trace

It is critical to remember the Leave No Trace principles while exploring and enjoying the outdoors. Respect and cherish nature so that future generations might experience its splendor.

Hopefully, this Zion to Bryce Canyon road trip guide gives you lots of information to plan an amazing trip!

11 Dazzling Hot Springs In Utah To Visit: Complete Guide

Utah is home to many natural wonders, ranging from towering sandstone cliffs to massive rock formations with unusual shapes. You may not realize that Utah is also home to some of the best hot springs in the world, many of which are just as beautiful as the megaliths.

On-site extras like waterslides, yoga on a paddleboard, and camping transform a day trip into a fun-filled weekend of several activities. These hot springs in Utah have a lot to offer!

On your epic Utah vacation, don’t miss out on these 11 blissful hot springs, which range from the mineral-rich waters of Red Hill to the cascading waters of Mystic.

11. Mystic Hot Springs

The best hot springs in Utah on your Utah vacation | Utah hot springs and Utah activities
instagram.com/jonandhon

Mystic Hot Springs is located near Monroe and boasts the “edge of the wilderness.” Mainly because you’re literally in the wild while you soak in these infamous Utah hot springs.

The hot spring’s minerals accumulated through time, and the rock structure that beautifies the cascading flow of water is fantastic. The lovely hot springs have a temperature range of 99 to 110 ℉.

There are two vast pools on site. The first pool’s vibe is more relaxed; it’s also deeper than the second one, with water up to your shoulders. Meanwhile, the second pool is a bit more “fun” and family-friendly since it’s more shallow.

Artificial structures also shelter five separate baths in structures that look like bathtubs. One person can fit in the tubs scattered across the property. Two baths are positioned on a hill facing the mountains and the fish ponds down – those views are incredible.

Mystic Hot Springs is home to six enormous fish ponds with a diversified ecosystem. At 4 p.m., you can feed the fish, so we recommend staying a bit on the late side. This is one of our favorite activities at this Utah hot spring!

The best hot springs in Utah on your Utah vacation | Utah hot springs and Utah activities

The 175-acre resort boasts a range of housing options, so this is one of the best hot springs in Utah to visit for a prolonged bacation. You can find the right area according to your tastes and budget, from antique cabins for hire that date back to the 1800s to rooms, buses, and campsites.

Stay at the Grow Cabin, a traditional pioneer-type log cabin. Only one cottage can be considered “contemporary” in Mystic Hot Springs. Pets are not permitted in this unit, which sleeps up to four people.

They include eight distinct, colorfully renovated antique school buses. Each comes with electricity and furniture. One of them is the “Gypsy Wagon,” which comes in various sizes, and is our favorite!

Both tent campsites and RVs are available. The latter can handle up to 40-footers, with power, water, and sewer connections from April to October.

If you’re never seen any of the hot springs in Utah, we recommend starting here. This is one of the most popular hot springs for a reason!

10. Meadow Hot Springs

The best hot springs in Utah on your Utah vacation | Utah hot springs and Utah activities

These clear and deep hot springs with geothermal water will keep you warm even on the coldest days.

Meadow Hot Springs is a private property situated just south of Fillmore with three bathing spots. The springs are accessible through a half-mile stroll. With temperatures hovering over 100 degrees Fahrenheit, it is open all year and is dog-friendly.

It is about 2.5-3 hours from Salt Lake City and is located just south of Fillmore in the community of Meadow. Meadow Hot Springs is one of Utah’s most famous hot springs, so it’s easy to get to, but expect that it may be a bit crowded during the weekends.

Although Meadow Hot Springs is on privately owned land, visitors and campers are welcome as long as they clean up after and leave no trace. The owner supplies garbage cans and a tip jar, which he utilizes to keep the site clean for guests’ enjoyment.

The property has three pools with varying temperatures, but the nearest pool to the road is the hottest and deepest, measuring roughly 102°F and 27 feet deep. At best, the other two pools are lukewarm.

Meadow Hot Springs’ deepest pool is a fantastic freediving destination, unlike other hot springs in Utah. Locals have even attached a rope from the top to the bottom of the pit to aid divers’ navigation. If you plan to do the same, it goes without saying, but be cautious and know your limits.

9. Gandy Warm Springs

The best hot springs in Utah on your Utah vacation | Utah hot springs and Utah activities

Gandy Warm Springs is a desert oasis in western Utah. Its crystal clear waters provide an excellent way to warm yourself on a chilly day. You can explore a tranquil underwater tunnel that makes you feel more like you’re in a tropical paradise than in the desert.

Nearby attractions include Great Basin National Park, Devils Gate Slot Canyon, and Crystal Ball Cave, all within a few minutes’ drive. In the summer, the water is refreshingly chilly, but in the winter, it is toasty, so this is one of the best year-round hot springs in Utah to visit. According to the Utah Geological Survey, the water here can get as hot as 81°F.

Gandy Warm Springs has three natural pool spots to explore: the lower, middle, and upper pools.

The middle pool has a little waterfall and a small tunnel, making it the most popular. It is a unique pool with a waterfall and a cave at the end. Make sure to carry a headlamp so you can see into the cave – claustrophobic people should avoid the cave.

From the middle pool, you must walk to the upper pool. The upper pool is shallow and designed for lounging rather than swimming, so it’s a great spot for adults who want more of a lazy day. It’s situated on the ledges above the middle pool.

The Lower Pool is approximately 1/2 mile east of the Middle Pool and Cave. The lower pool area is more of a place in the river than an actual pool. It has more of a stream in spots and is deeper than the other two pools.

There are restrooms at the Bates Family Ranch, which is less than 10 minutes from the Warm Springs if you go on a tour of the Crystal Ball Cave.

About 10 minutes from Warm Springs, Bates Family Ranch provides cabins and camping.

8. Saratoga Hot Springs

The best hot springs in Utah on your Utah vacation | Utah hot springs and Utah activities

Saratoga Hot Spring is a beautiful natural bathing spring found in Utah Lake’s northwest edge marshes. It is also referred to as Inlet Hot Spring.

To get to the spring, park in Inlet Park and walk south on the cement walkway. After 150 yards, you’ll come to a grove of trees, and the soaking pool will be on your left, surrounded by reeds, mud, and spectacular views of the Wasatch Mountains.

The water is at a pleasant temperature, hovering about 100°F. The city has supplied a seat and towel rack, which are beneficial since the pool’s area is nearly always muddy. Even though there is plenty of space, weekends might be packed – this is one of the more popular Utah hot springs.

When you’re done bathing, follow the short walk out to the shore of Utah Lake, where you can go bird watching and take panoramic shots of the mountains. From this vantage point, the sunset is breathtaking. But keep track of the return route since it might be difficult to find amid the reeds, particularly after dark.

Filled with mineral elements that offer therapeutic advantages for your skin and assist in relaxing your muscles, these Utah hot springs provide the ideal location to sit back, unwind, and take in the immensity of the blue sky above you.

7. Red Hill Hot Springs

The best hot springs in Utah on your Utah vacation | Utah hot springs and Utah activities

Surrounded by the beautiful red granite of southern Utah, Red Hill Hot Springs is a well-known spot for travelers. This Utah hot spring, which sits on a hill above Monroe, is popular with visitors because of its convenient location and sense of seclusion.

Even though the property is privately held, the owners have given it to the public for usage. Red Hill Hot Springs is sometimes overlooked in favor of the more touristic Mystic Hot Springs, which is just four miles away and attracts more significant numbers each year. On the other hand, the Springs provide a once-in-a-lifetime chance to soak in mineral water while surrounded by gorgeous red rock and away from the crowd.

Anyone is welcome to visit these non-commercialized pools at any time of year. This stunning location is just a short drive away if you’re ever in southern Utah. We think these are some of the best Utah hot springs because they offer the beautiful look/scenery without the crowds.

The temperatures in each of the four pools are different. The pool nearest to the source is the hottest, with a high temperature that makes swimming difficult (it’s that hot), followed by three other pools that gradually become colder. As the water runs down the hill to each pool, it loses heat as it gets farther away from the spring’s source.

Each pool is tiny, with just a few individuals able to use it. You and your mates will become quick friends! With roughly 3 feet of water, the pool nearest to the spring is the deepest. Depending on when you arrive, the other three pools contain between 1 and 2 feet of water.

Murky mineral water combines with the red granite in the pools. None of the pools are fortified with barriers to keep the all-natural appearance. Guests can either enter the waters or relax on the red sand or rocks around the edge.

This is definitely one of the more natural hot springs in Utah but is so beautiful and has tons of beneficial minerals! I can’t recommend it enough.

6. Ogden Hot Springs

The best hot springs in Utah on your Utah vacation | Utah hot springs and Utah activities

You can find this spring just off of Ogden Canyon Road. These artificial pools are supplied with water by a hose from a concrete collecting system, since the springs are just across the river. The water temperature in these Utah hot springs is roughly 100°F.

Ogden Hot Springs is known for its riverfront position. It consists of two enormous ponds cut into the rock, located close to the beautiful Ogden River. You must cross the river to get to the hot spring, so be sure you have the necessary supplies. The most fantastic time to visit these Utah hot springs is in the middle to late summer, when the river is at its lowest. When the river is high, fording it might be risky.

Because the springs are popular with families and children, skinny dippers should be cautious. Expect a crowd throughout the spring and summer months. Parking is provided just off the canyon road, although it’s limited and only holds a few vehicles.

If you’re planning a trip to the springs during the winter, proceed with care. Some experienced a solid ice route, with a 15-foot plunge to the river below in several spots.

5. Horseshoe Springs

The best hot springs in Utah on your Utah vacation | Utah hot springs and Utah activities

Found in an oasis-like setting, Horseshoe Springs is located in western Utah’s Skull Valley, once known as Spring Valley.

Horseshoe Springs got its name from the “horseshoe shape” formed by two natural springs merging and running north into the Great Salt Lake. While visiting the springs, it is difficult to see the “U” form; nevertheless, the “U” is visible from any height.

Horseshoe Springs is a warm spring, with an average year-round temperature of 70 ℉. Winter is certainly not the ideal time to soak, but a dip in 70-degree water would be a terrific way to chill down in the summer.

In addition, the water in the springs is crystal transparent, allowing visitors to observe the fish swimming in the depths.

This is definitely a nature lover’s haven. ATV routes, hiking, and exploring the abandoned village of Iosepa are among the numerous additional activities accessible in the region.

Take a few minutes to stop at Horseshoe Springs the next time you drive along I-80. Go for a walk down the boardwalk, relax in the hot tub, try your hand at fishing, or read the instructive plaques about the area’s history.

4. Baker Hot Springs

The best hot springs in Utah on your Utah vacation | Utah hot springs and Utah activities

Three soaking baths are available at Baker Hot Springs. Each of the three tubs is big enough to hold a large group. The tubs are filled from two different sources: the hot water is carried in one ditch, while the cold water is taken in the other.

Baker is well-known in the surrounding town of Delta, Utah; therefore, skinny dipping is not recommended. But it’s great if you want the exact right water temperature since the temperature is entirely within your control.

There is a vast parking space at the spring that can accommodate numerous vehicles. A gravel trail leads to the springs’ source, north of the parking lot. If you visit this location, keep an eye on your children since there are various hot pools where they might easily get lost.

When visiting Baker Springs, use care. The hot water supply is incredibly hot, and you must chill it before soaking.

3. Crystal Hot Springs

The best hot springs in Utah on your Utah vacation | Utah hot springs and Utah activities

Crystal Hot Springs is in Honeyville, Utah, 12 miles north of Brigham City. It is unique in that there are both hot and cold springs. The hot spring temperature varies between 120 and 134℉, and it has the greatest mineral concentration in the United States, making it one of the best hot springs in Utah for therapeutic purposes.

More than 8,000 gallons of hot water reach the surface every five minutes, carrying roughly 900,000 pounds of mineral throughout 24 hours. The source of the cold spring is barely fifty feet away from the hot spring. The spring discharges approximately 9,000 gallons every five minutes, or 2.6 million gallons per day, with temperatures ranging from 65 to 75°F.

Three jetted hot tubs, a soaker pool, a lap pool, an Olympic-sized pool, and two 360-foot water slides make up Crystal Hot Springs’ pool area. Except for the slide pool, all pools are filled with a mixture of water from the two springs.

This Utah campsite has fire rings, drinking water, flush toilets, showers, and laundry facilities. Changing rooms and meeting areas are located in a big stone lodge at the entryway. There is a sand volleyball court at the far end. A gorgeous grass-covered and tree-lined campsite surrounds the pools and offers complete RV hookups and camping for tents. There are more than a hundred sites to pick from here.

There’s also a wonderful carp pond on the campground’s west side that’s a lot of fun to fish. Try chumming the water with breadcrumbs, then baiting your line with bread and tossing it into the mix. It is unlike any other fish bite you’ve ever experienced.

This is definitely one of the best hot springs in Utah if you want a full-on vacation and lots of attractions!

2. Homestead Crater

The best hot springs in Utah on your Utah vacation | Utah hot springs and Utah activities

One of Utah’s best-kept secrets is hidden in Heber Valley. The Homestead Crater in Midway is a geothermal hot spring formed about 10,000 years ago when melting snow plunged deep into the soil and was heated by the earth’s core. Warm water surged to the surface, picking up minerals and forming the Homestead Crater, a beehive-shaped limestone deposit.

Tourists from all over the world visit the Crater to see this natural phenomenon; it’s a once-in-a-lifetime event. The mineral-rich water is kept at a constant temperature of 90-96 °F all year and you can rest in it while enjoying the fresh mountain air and sunshine through the aperture at the top of the dome.

But don’t worry; you won’t have to launch 55 feet from the dome’s aperture. For easier access, take the tunnel through the slope of the Crater.

You don’t need to be a scuba diving expert to explore the Homestead Crater since all skill levels are welcome. But the Homestead is the greatest destination for scuba divers and diving enthusiasts worldwide, with a depth of 65 feet and a 400-foot-wide base.

If scuba diving isn’t on your list of activities, you can swim, soak, snorkel, or visit the hot spring. Homestead Resort provides life jackets and snorkels so that the whole family can enjoy the warm mineral water.

Also, the Homestead Crater offers paddleboard yoga courses for a more vigorous yet calming experience. The Crater, dubbed the oldest yoga studio globally, is a sought-after yoga venue.

They offer yoga classes every day of the week, including Restorative Paddleboard Yoga and sunrise/sunset hikes/snowshoes followed by paddleboard yoga. No prior yoga experience is required, and if you fall off your paddleboard, the warm geothermal water will catch you.

This is definitely one of the best Utah hot springs to visit in you want some insane views and deep, warm water.

1. Fifth Water Hot Springs

The best hot springs in Utah on your Utah vacation | Utah hot springs and Utah activities

Fifth Water Hot Springs is a popular hiking destination little over an hour’s drive from Salt Lake City, partially because of its beauty and accessibility. The hot springs are pretty famous, attracting large numbers of people on weekends throughout the summer.

There are many soaking pools to choose from. The water is transparent, and you can adjust the temperature by situating yourself in the pools and changing the water flow into the pools.

Warning: some people like to swim naked in the pools. Although it is against the law, it is usual to see individuals in their underwear here.

The best hot springs in Utah on your Utah vacation | Utah hot springs and Utah activities

The primary soaking pool is located close to the lower waterfall. The second waterfall is a photogenic multi-tiered cascade worth seeking out (counting up from the bottom). You will find a third waterfall farther up the stream.

The water becomes bluer as you come closer to Fifth Water Hot Springs. It will be such a distinct hue of blue that you have never seen before, making this one of the best hot springs in Utah for photos.

The snow usually is nicely compacted in the winter, and you can easily hike to the hot springs without snowshoes. You’ll need a four-wheel-drive car to get to the trailhead, though.

There’s no lack of places to stay in Salt Lake City. Some of the excellent hotels here are SLC Hostel, Little America Hotel, and Grand America Hotel. We definitely recommend spending a few days here for the full effect!

Things To Know Before Bathing in Hot Spring

Soaking in one of Utah’s hot springs is a highly calming and pleasurable experience. Seriously: these Utah hot springs are therapeutic in more ways than one! The mineral water provides several health advantages.

However, some people with pre-existing health conditions must take care to enjoy risk-free thermal bathing. Here are a few reminders when you plan to bathe in a hot spring:

  • Pregnant women should avoid using hot springs without first consulting a doctor.
  • Before soaking in hot water, those with circulatory system difficulties, cardiovascular problems, low or high blood pressure, and diabetes should consult a doctor.
  • Maintain a safe distance from the water’s edge.
  • Overheating should be avoided at all costs – take breaks if needed.
  • Stay hydrated by drinking lots of water.
  • Avoid alcoholic and caffeinated drinks as much as possible before swimming.

These are Utah’s best bubbling and steaming springs! If you’ve ever visited one of these tranquil havens, let us know about your experience.

If you’re heading on a road trip, check out our post all about the top hot springs in Nevada.